
Introduction to Silky Chocolate Raspberry Mousse Cake
Ah, the Silky Chocolate Raspberry Mousse Cake! Just saying the name makes my heart flutter with excitement. This dessert is not just a cake; it’s a celebration of flavors that dance together like a perfectly choreographed ballet. I remember the first time I made this cake. It was a rainy afternoon, and the clouds outside mirrored the rich, dark chocolate I was about to melt. The aroma filled my kitchen, wrapping me in a warm embrace, and I knew I was in for something special.
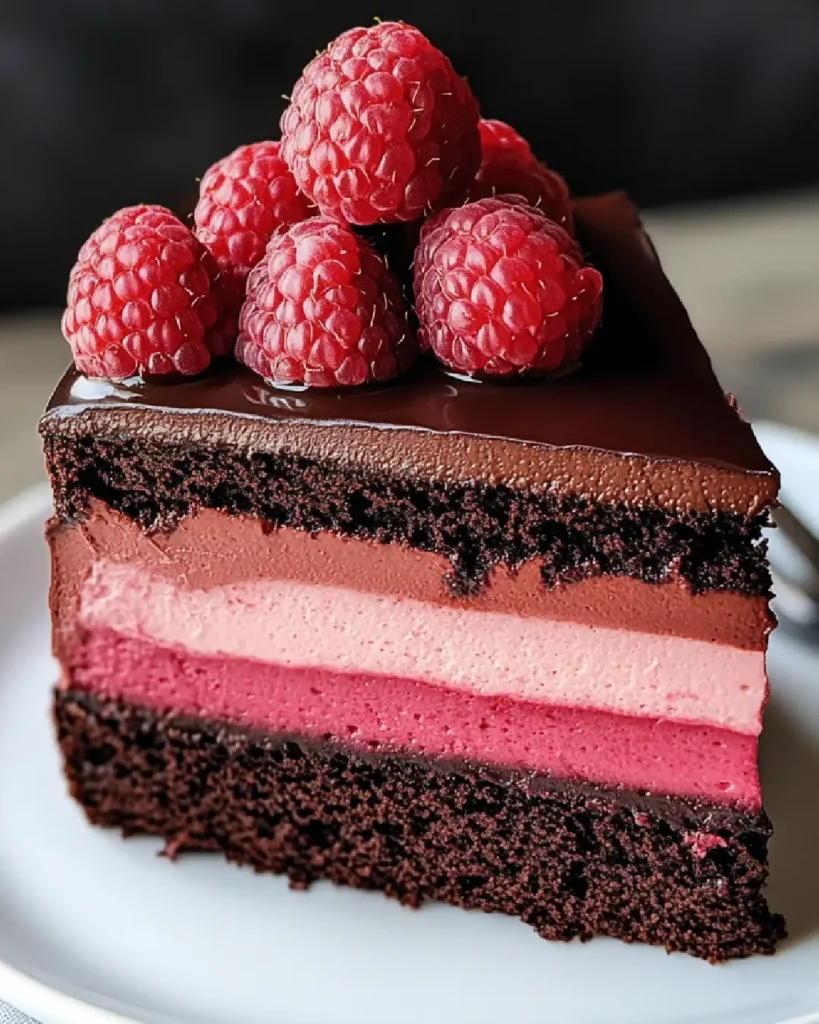
This cake is a delightful combination of velvety chocolate mousse and tart raspberries, creating a balance that is simply irresistible. The first bite is like a hug from an old friend—comforting yet exhilarating. I often find myself daydreaming about this cake, especially when I need a little pick-me-up. It’s perfect for special occasions, but honestly, I believe every day is a good day for a slice of this heavenly treat!
What I love most about this recipe is how it brings people together. I’ve shared it with friends during cozy gatherings, and it never fails to impress. The way the rich chocolate and the bright raspberry flavors complement each other is pure magic. Plus, it’s surprisingly easy to make! So, whether you’re celebrating a birthday, an anniversary, or just a Tuesday, this Silky Chocolate Raspberry Mousse Cake is sure to steal the show.
So, grab your apron, and let’s embark on this delicious journey together. I promise you, once you try this cake, it will become a cherished recipe in your kitchen, just like it has in mine!
Ingredients for Silky Chocolate Raspberry Mousse Cake
Before we dive into the delightful process of making the Silky Chocolate Raspberry Mousse Cake, let’s gather our ingredients. Having everything ready is like setting the stage for a beautiful performance. Each ingredient plays a vital role in creating the symphony of flavors that will dance on your taste buds. Here’s what you’ll need:
Main Ingredients
- 1 cup all-purpose flour
- 1/2 cup unsweetened cocoa powder (I recommend using a high-quality brand for a richer flavor)
- 1 cup granulated sugar
- 1/2 cup unsalted butter, melted
- 3 large eggs
- 1 teaspoon vanilla extract
- 1/2 teaspoon baking powder
- 1/4 teaspoon salt
- 1 cup heavy cream (for the mousse)
- 8 ounces dark chocolate (at least 70% cocoa, chopped)
- 1 cup fresh raspberries (plus extra for garnish)
- 2 tablespoons powdered sugar (for sweetening the raspberries)
When I shop for ingredients, I always look for the freshest raspberries. They should be plump and vibrant, bursting with flavor. The chocolate is equally important; a good quality dark chocolate will elevate your mousse to new heights. Trust me, it makes a world of difference!
Optional Add-ons
- 1/4 cup raspberry liqueur (for an adult twist)
- Chocolate shavings or curls (for decoration)
- Mint leaves (for a fresh garnish)
These optional add-ons can add a little flair to your cake. The raspberry liqueur gives a lovely depth to the flavor, while chocolate shavings make for a stunning presentation. And who doesn’t love a pop of green from fresh mint? It’s like the cherry on top of an already fabulous dessert!
Now that we have our ingredients ready, we’re one step closer to creating this masterpiece. Let’s move on to the next exciting part—preparing the cake!
How to Prepare Silky Chocolate Raspberry Mousse Cake
Now that we have our ingredients ready, it’s time to roll up our sleeves and dive into the delightful process of making the Silky Chocolate Raspberry Mousse Cake. Each step is like a note in a beautiful melody, and together they create a symphony of flavors. Let’s get started!
Step 1: Prepare the Cake Base
First things first, we need to create a solid foundation for our cake. Preheat your oven to 350°F (175°C). Grease and flour an 8-inch round cake pan. This will ensure our cake comes out easily without any sticky surprises!
In a mixing bowl, combine the flour, cocoa powder, sugar, baking powder, and salt. Whisk them together until they’re well blended. Then, add the melted butter, eggs, and vanilla extract. Mix until everything is just combined. Don’t overmix; we want our cake to be light and fluffy!
Tips for Step 1
- Make sure your butter is not too hot; it should be warm, not sizzling. This helps keep the eggs from cooking.
- Use a rubber spatula to scrape down the sides of the bowl to ensure all ingredients are mixed well.
Step 2: Make the Chocolate Mousse
Next up is the star of the show—the chocolate mousse! In a heatproof bowl, melt the dark chocolate over a pot of simmering water, stirring gently until smooth. Remove it from the heat and let it cool slightly.
In another bowl, whip the heavy cream until soft peaks form. Gently fold the melted chocolate into the whipped cream. This is where the magic happens! The mousse should be silky and luscious, ready to embrace the cake.
Tips for Step 2
- Be patient while melting the chocolate. If it gets too hot, it can seize up, and we don’t want that!
- Folding is key! Use a gentle hand to keep the mousse airy and light.
Step 3: Prepare the Raspberry Layer
Now, let’s bring in the raspberries! In a small bowl, toss the fresh raspberries with powdered sugar. This will help release their juices and create a sweet-tart layer that pairs beautifully with the chocolate.
Let the raspberries sit for about 10 minutes. This step is like letting the flavors mingle at a party—everyone gets to know each other better!
Tips for Step 3
- Feel free to mash some of the raspberries for a more jam-like consistency if you prefer.
- Use fresh raspberries for the best flavor; frozen ones can be too watery.
Step 4: Assemble the Cake
It’s time to put everything together! Place the cooled cake base on a serving plate. Spread half of the chocolate mousse over the top, followed by the raspberry layer. Then, gently spread the remaining mousse on top. It’s like building a delicious tower of joy!
Tips for Step 4
- Use an offset spatula for smooth spreading; it makes the process easier and neater.
- Don’t worry about perfection; a little rustic charm adds character to your cake!
Step 5: Chill and Serve
Finally, cover the cake with plastic wrap and refrigerate for at least 4 hours, or overnight if you can wait that long. This chilling time allows the flavors to meld and the mousse to set perfectly.
When you’re ready to serve, garnish with extra raspberries and chocolate shavings for that wow factor. Slice into this beauty, and watch as everyone’s eyes light up!
Tips for Step 5
- For easier slicing, dip your knife in hot water and wipe it dry before cutting.
- Serve with a dollop of whipped cream for an extra touch of indulgence!
Equipment Needed for Silky Chocolate Raspberry Mousse Cake
Before we dive into the deliciousness of the Silky Chocolate Raspberry Mousse Cake, let’s make sure we have the right tools at our disposal. Having the right equipment can make the process smoother and more enjoyable. Here’s what you’ll need:
- 8-inch round cake pan: This is essential for baking the cake base. If you don’t have one, a square pan will work too; just adjust the baking time slightly.
- Mixing bowls: A couple of medium-sized bowls will do the trick for mixing the cake batter and the mousse.
- Whisk: A good whisk is perfect for blending ingredients together. If you prefer, an electric mixer can save you some elbow grease!
- Rubber spatula: This handy tool is great for scraping down the sides of the bowl and folding ingredients together gently.
- Heatproof bowl: You’ll need this for melting the chocolate. A glass bowl works wonderfully, but make sure it fits snugly over your pot of simmering water.
- Offset spatula: This is optional but super helpful for spreading the mousse evenly on the cake. If you don’t have one, a regular spatula will work just fine.
- Plastic wrap: To cover the cake while it chills in the fridge, keeping it fresh and delicious.
With these tools in hand, you’re all set to create your masterpiece! Remember, cooking is all about improvisation, so don’t hesitate to use what you have. Let’s get ready to whip up some magic in the kitchen!
Variations of Silky Chocolate Raspberry Mousse Cake
While the classic Silky Chocolate Raspberry Mousse Cake is a showstopper on its own, I love to experiment with variations that add a unique twist to this beloved dessert. After all, variety is the spice of life, right? Here are a few delightful ideas to inspire your culinary creativity:
- White Chocolate Raspberry Mousse Cake: Swap out the dark chocolate for white chocolate. The creamy sweetness pairs beautifully with the tart raspberries, creating a light and elegant dessert.
- Nutty Chocolate Base: Add crushed nuts, like hazelnuts or almonds, to the cake base for a delightful crunch. It adds texture and a nutty flavor that complements the chocolate perfectly.
- Vegan Version: Use plant-based ingredients like almond milk, coconut cream, and aquafaba (the liquid from canned chickpeas) to create a vegan-friendly mousse. It’s just as delicious and perfect for those with dietary restrictions!
- Layered Trifle: Instead of a cake, create a trifle by layering chocolate mousse, raspberry sauce, and cake pieces in a glass dish. It’s a stunning presentation and perfect for sharing at gatherings.
These variations not only keep things exciting but also allow you to cater to different tastes and dietary preferences. I encourage you to try them out and make this recipe your own. Who knows? You might just discover a new favorite version of this delightful cake!
Cooking Notes for Silky Chocolate Raspberry Mousse Cake
As I’ve journeyed through the delightful process of making the Silky Chocolate Raspberry Mousse Cake, I’ve gathered a few cooking notes that can help you achieve the best results. These little nuggets of wisdom can make a big difference in your baking adventure!
- Room Temperature Ingredients: For the best texture, make sure your eggs and butter are at room temperature. This helps them blend more easily, creating a smoother batter and mousse.
- Quality Matters: Don’t skimp on the chocolate! A high-quality dark chocolate will elevate your mousse, making it rich and decadent. It’s worth the splurge!
- Chill Time: Patience is key! Allowing the cake to chill for at least 4 hours (or overnight) is crucial for the mousse to set properly. Trust me, the wait is worth it!
- Serving Temperature: For the best flavor, serve the cake slightly chilled, not too cold. This way, the chocolate and raspberry flavors shine through beautifully.
- Storage: If you have leftovers (which is rare!), store the cake in the fridge, covered with plastic wrap. It should stay fresh for up to three days, but I doubt it will last that long!
These cooking notes are like little guiding stars in your baking journey. They’ll help you navigate the process and ensure your Silky Chocolate Raspberry Mousse Cake turns out as delightful as you imagined. Happy baking!
Serving Suggestions for Silky Chocolate Raspberry Mousse Cake
When it comes to serving the Silky Chocolate Raspberry Mousse Cake, presentation is key! I love to make each slice a feast for the eyes as well as the taste buds. Here are some delightful serving suggestions that will elevate your cake experience:
- Garnish with Fresh Raspberries: A handful of fresh raspberries on top not only adds a pop of color but also enhances the tartness that pairs so beautifully with the rich chocolate.
- Drizzle with Chocolate Sauce: A warm chocolate sauce drizzled over each slice creates a decadent touch. It’s like giving your cake a luxurious bath!
- Serve with Whipped Cream: A dollop of freshly whipped cream adds a light and airy contrast to the dense mousse. You can even sweeten it with a touch of vanilla for extra flavor.
- Pair with Coffee or Tea: This cake is perfect with a cup of coffee or a soothing herbal tea. The warmth of the drink complements the coolness of the mousse, creating a delightful balance.
- Chocolate Shavings: For an elegant touch, sprinkle some chocolate shavings on top. It’s like adding a sprinkle of magic to your dessert!
These serving suggestions not only enhance the visual appeal but also add layers of flavor that make each bite even more enjoyable. I always find that a little extra effort in presentation makes the dessert feel even more special. So, whether it’s a casual family dinner or a fancy gathering, these ideas will surely impress your guests!
Tips for Making Silky Chocolate Raspberry Mousse Cake
As I’ve whipped up the Silky Chocolate Raspberry Mousse Cake time and time again, I’ve gathered a treasure trove of tips that can help you create this delightful dessert with ease. These little gems will ensure your cake turns out perfectly every time, so let’s dive in!
- Prep Ahead: If you’re short on time, consider preparing the cake base and mousse a day in advance. This way, you can simply assemble and chill the cake when you’re ready to serve.
- Use Quality Ingredients: Invest in good chocolate and fresh raspberries. The quality of your ingredients shines through in the final product, making every bite a heavenly experience.
- Don’t Rush the Chilling: Allow the cake to chill for the full recommended time. This helps the mousse set properly, ensuring a smooth and creamy texture that melts in your mouth.
- Experiment with Flavors: Feel free to add a splash of vanilla or almond extract to the mousse for an extra layer of flavor. A hint of liqueur can also elevate the taste, making it even more indulgent.
- Be Gentle: When folding the chocolate into the whipped cream, use a light hand. This keeps the mousse airy and fluffy, which is key to that silky texture we all love.
With these tips in your back pocket, you’re well on your way to mastering the art of the Silky Chocolate Raspberry Mousse Cake. Remember, cooking is all about having fun and experimenting, so don’t hesitate to make this recipe your own. Happy baking!
Breakdown of Time for Silky Chocolate Raspberry Mousse Cake
As a passionate home cook, I know that timing is everything in the kitchen. When it comes to the Silky Chocolate Raspberry Mousse Cake, understanding the time commitment can help you plan your baking adventure. Here’s a quick breakdown of the time you’ll need:
- Prep Time: 30 minutes – This includes gathering your ingredients, preparing the cake base, and making the mousse and raspberry layer. It’s a fun and creative time where you can let your culinary spirit shine!
- Cooking Time: 25 minutes – This is the time it takes to bake the cake base to perfection. Keep an eye on it, and your kitchen will be filled with the most delightful aroma!
- Chilling Time: 4 hours (or overnight) – This is the most crucial part! Allowing the cake to chill helps the mousse set beautifully, creating that silky texture we all crave. Patience is key here!
- Total Time: Approximately 4 hours and 55 minutes (or overnight) – While the active time is relatively short, the chilling time is essential for the best results. Trust me, the wait is worth every delicious bite!
With this time breakdown, you can easily plan your baking day. Whether you’re making it for a special occasion or just because, knowing how long each step takes will help you enjoy the process even more. Happy baking, and get ready for a delightful treat!
Nutritional Information for Silky Chocolate Raspberry Mousse Cake
As a passionate home cook, I believe it’s important to know what goes into our delicious creations. The Silky Chocolate Raspberry Mousse Cake is a delightful treat, and while it’s indulgent, it’s also packed with some nutritional goodness. Here’s a general breakdown of the nutritional information per slice (assuming the cake is cut into 12 slices):
- Calories: Approximately 320
- Protein: 4g
- Carbohydrates: 40g
- Fat: 18g
- Saturated Fat: 10g
- Cholesterol: 70mg
- Sodium: 150mg
- Fiber: 2g
- Sugar: 25g
Keep in mind that these values can vary based on the specific ingredients you use and the portion sizes. While this cake is a treat, it’s also a wonderful way to enjoy the rich flavors of chocolate and the tartness of raspberries. I always say, balance is key! Enjoying a slice of this cake can be part of a well-rounded diet, especially when shared with loved ones. So, savor each bite and celebrate the joy of baking!
Frequently Asked Questions about Silky Chocolate Raspberry Mousse Cake
As I’ve shared my love for the Silky Chocolate Raspberry Mousse Cake, I’ve often encountered a few common questions from fellow home cooks. It’s always a joy to help others navigate their baking adventures! Here are some frequently asked questions that might just answer your own queries:
Can I make this cake ahead of time?
Absolutely! In fact, I often recommend making the Silky Chocolate Raspberry Mousse Cake a day in advance. The flavors meld beautifully overnight, and the mousse sets perfectly. Just be sure to cover it well with plastic wrap to keep it fresh in the fridge.
What can I substitute for heavy cream in the mousse?
If you’re looking for a lighter option, you can use coconut cream or a non-dairy whipped topping. Just keep in mind that the texture and flavor will vary slightly. I’ve tried coconut cream before, and it adds a lovely tropical twist!
How do I store leftovers?
If you happen to have any leftovers (which is rare in my house!), store the cake in the fridge, covered with plastic wrap. It should stay fresh for up to three days. Just remember to slice it with a warm knife for the best results!
Can I use frozen raspberries instead of fresh?
While fresh raspberries are ideal for this recipe, you can use frozen ones in a pinch. Just be aware that they may release more moisture, so it’s best to thaw and drain them before using. They can still add that lovely tartness to the cake!
Is it possible to make this cake gluten-free?
Yes! You can substitute the all-purpose flour with a gluten-free flour blend. I’ve had success with almond flour or a store-bought gluten-free mix. Just keep an eye on the baking time, as it may vary slightly.
These questions reflect the curiosity and creativity that come with baking. I love that so many people are eager to try their hand at this delightful cake! If you have any other questions or need further clarification, don’t hesitate to reach out. Happy baking, and may your kitchen be filled with the sweet aroma of chocolate and raspberries!
Conclusion on Silky Chocolate Raspberry Mousse Cake
As I reflect on my journey with the Silky Chocolate Raspberry Mousse Cake, I can’t help but smile. This dessert is more than just a recipe; it’s a delightful experience that brings joy to both the baker and those lucky enough to enjoy a slice. The combination of rich chocolate and tart raspberries creates a flavor profile that is simply irresistible, making it perfect for any occasion.
What I love most about this cake is its versatility. Whether you’re celebrating a special milestone or simply indulging in a sweet treat after a long day, this cake fits the bill. Plus, it’s surprisingly easy to make, allowing even novice bakers to create something truly impressive.
So, if you’re looking to impress your friends and family or just want to treat yourself, I wholeheartedly encourage you to give this Silky Chocolate Raspberry Mousse Cake a try. I promise it will become a cherished recipe in your kitchen, just as it has in mine. Happy baking, and may your culinary adventures be filled with sweetness and joy!


