
Introduction To Red Velvet Oreo Cheesecake
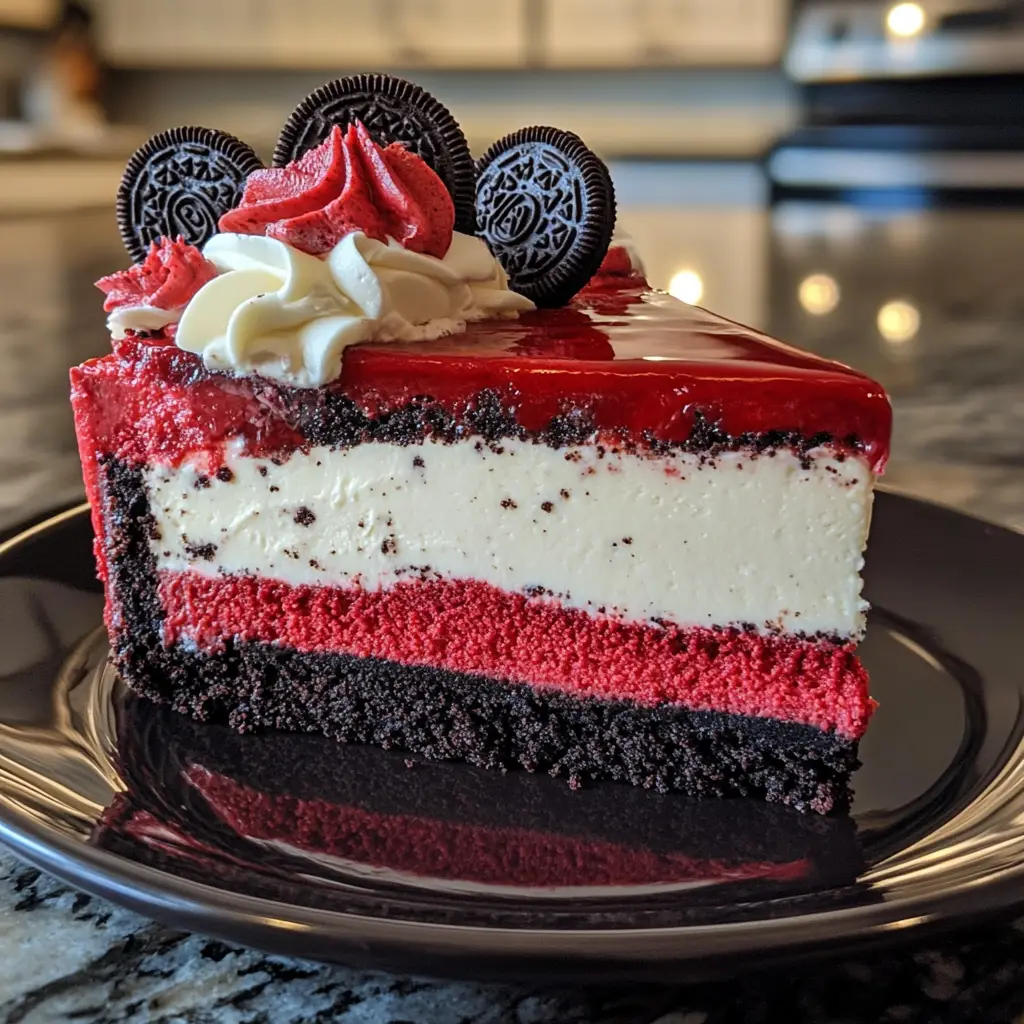
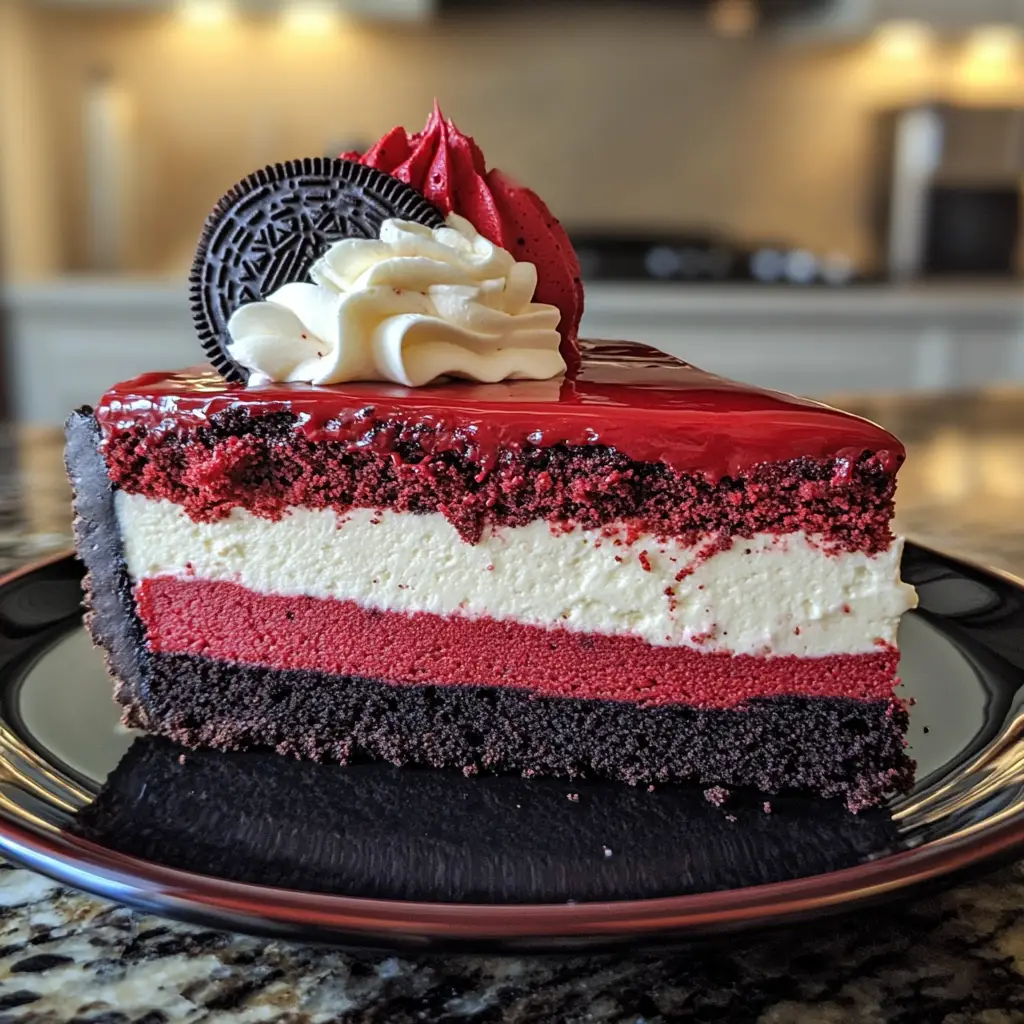
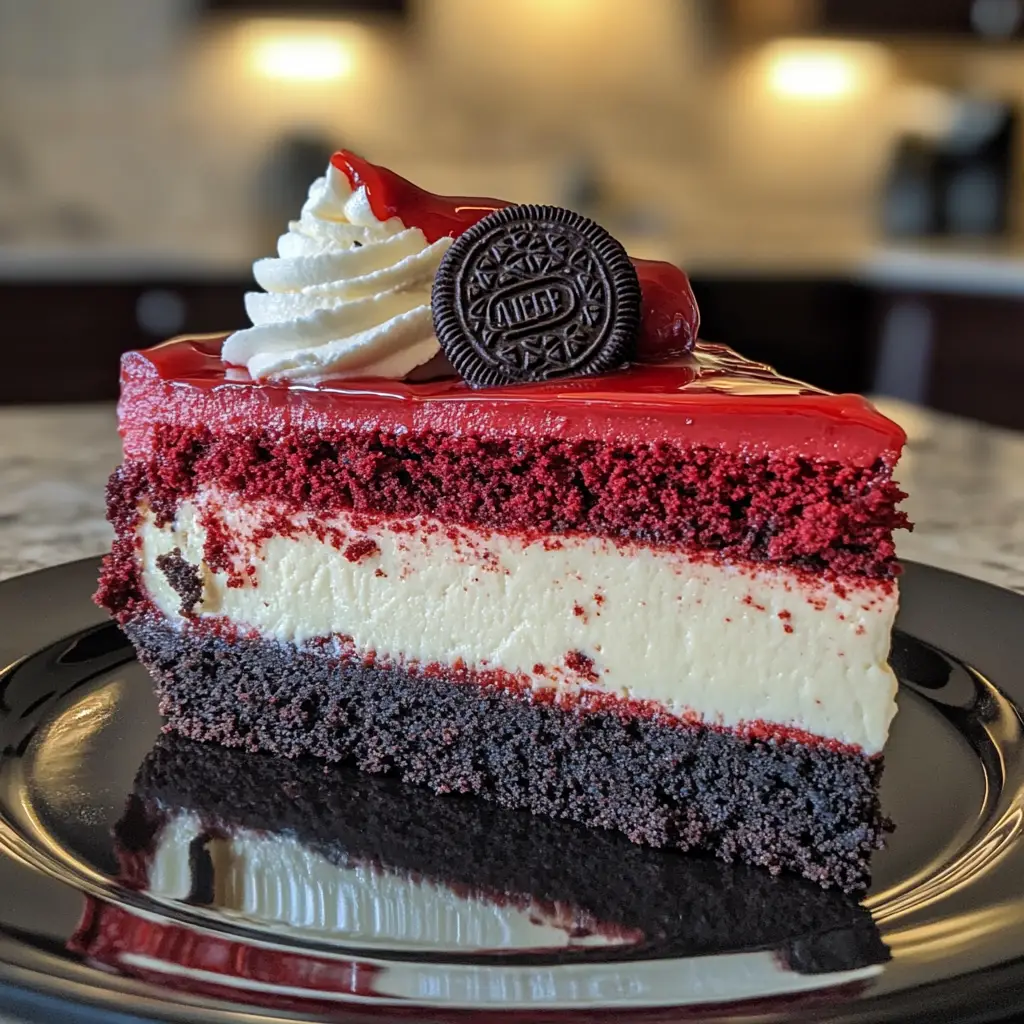
Get ready to indulge in one of the most decadent, eye-catching desserts you’ll ever bake—Red Velvet Oreo Cheesecake. This recipe takes the timeless elegance of red velvet cake and fuses it with the rich, creamy indulgence of Oreo cheesecake to create a dessert that’s bold, beautiful, and bursting with flavor. With a dark Oreo cookie crust, a velvety red cream cheese filling, and even more crushed Oreos folded in, every slice is a celebration of texture and taste.
This showstopping cheesecake is perfect for holidays like Valentine’s Day or Christmas, but it’s also an irresistible treat for birthdays, parties, or any occasion that calls for something extraordinary. Whether you’re a red velvet lover or a die-hard Oreo fan, this dessert checks all the boxes. It’s got color. It’s got crunch. It’s got a dreamy, creamy filling that melts in your mouth. And yes—it’s as rich as it looks.
Why Is This Recipe So Popular?
Red Velvet Oreo Cheesecake has skyrocketed in popularity because it combines not one, but two beloved desserts. It’s like ordering the best of both worlds in a single bite. Here’s why this recipe continues to win hearts (and taste buds):
- Visual Appeal: The deep red hue of the cheesecake against the black-and-white Oreo crust is jaw-droppingly beautiful.
- Texture Heaven: You get a crispy crust, velvety filling, and crunchy Oreo bits throughout.
- Crowd Favorite: Red velvet and Oreos are already iconic flavors on their own—together, they’re unstoppable.
- Make-Ahead Friendly: This cheesecake tastes even better the next day, making it great for prep.
- Restaurant-Quality at Home: It looks and tastes like something from a gourmet bakery but is simple enough for a home cook.
Why You’ll Love This Recipe:
- ✅ Luscious & Creamy – Melt-in-your-mouth texture with a rich flavor
- ✅ Showstopping Color – The red velvet filling makes it a visual masterpiece
- ✅ Oreo Lovers’ Dream – From crust to topping, it’s full of cookie goodness
- ✅ Perfect Make-Ahead Dessert – Chill overnight for the best results
- ✅ Versatile & Festive – Great for holidays, parties, and special dinners
- ✅ Easy to Customize – Swap fillings, play with toppings, or adjust sweetness
Ingredients:
These ingredients come together to form a powerhouse of flavor:
- 🍪 24 Oreo cookies, finely crushed (for crust)
- 🧈 5 tbsp unsalted butter, melted (for crust)
- 🧀 24 oz cream cheese, softened (three 8 oz blocks)
- 🍬 1 cup granulated sugar
- 🥚 3 large eggs, room temperature
- 🍫 1/4 cup unsweetened cocoa powder (Dutch-process preferred)
- 🔴 2 tsp red food coloring (gel works best for vibrant color)
- 🍰 1 tsp vanilla extract
- 🥛 1/2 cup sour cream
- 🍪 8 Oreo cookies, roughly chopped (for folding into the batter)
- 🍫 Additional crushed Oreos or mini Oreos for topping (optional)
- 🍫 Chocolate ganache or whipped cream for garnish (optional)
Preparation:
Step 1: Prepare the Crust
Preheat your oven to 325°F (160°C). Line the bottom of a 9-inch springform pan with parchment paper. In a bowl, combine 24 crushed Oreos and the melted butter. Mix until all crumbs are evenly moistened. Press the mixture firmly into the bottom of the pan using a flat-bottomed glass. Bake for 8–10 minutes. Remove from the oven and let cool while you make the filling.
Step 2: Make the Cheesecake Filling
In a large mixing bowl, beat the softened cream cheese until smooth and creamy (about 2 minutes). Add sugar and beat until well combined. Beat in the eggs one at a time, scraping the sides of the bowl between each addition. Add cocoa powder, red food coloring, vanilla extract, and sour cream. Mix until fully incorporated and the color is even. Fold in 8 roughly chopped Oreos.
Step 3: Assemble the Cheesecake
Pour the cheesecake batter over the cooled crust. Use a spatula to smooth the top. Tap the pan on the counter a few times to release air bubbles. If desired, sprinkle extra chopped Oreos on top or gently press them into the surface.
Step 4: Bake the Cheesecake
Place the springform pan in a larger roasting pan and pour hot water into the outer pan (about 1 inch deep) to create a water bath. Bake for 50–60 minutes or until the center is slightly jiggly but edges are set. Turn off the oven and let the cheesecake sit inside with the door cracked open for 1 hour.
Step 5: Chill and Serve
Remove the cheesecake from the oven and water bath. Cool completely at room temperature, then cover and refrigerate for at least 6 hours (preferably overnight). Before serving, top with whipped cream, ganache, and extra Oreos for garnish.
Variation:
This cheesecake is wonderfully versatile. Here are some ways to change it up:
- Chocolate Drizzle: Add a layer of chocolate ganache over the top for an ultra-rich finish.
- Mini Cheesecakes: Use a muffin pan and cupcake liners to make mini versions. Bake 20–25 minutes.
- No-Bake Version: Use the same crust, but swap the filling for no-bake cheesecake with red velvet flavoring and gelatin.
- Marbled Effect: Swirl a bit of white cheesecake batter into the red velvet for a marbled look.
- Gluten-Free: Use gluten-free Oreos or similar sandwich cookies for the crust and filling.
COOKING Note:
This cheesecake is rich and creamy, but a few tips help ensure success:
- Always use room temperature cream cheese and eggs to avoid lumps.
- Don’t overmix after adding the eggs—it can lead to cracks.
- A water bath helps bake the cheesecake gently and evenly. Wrap the outside of the pan with foil to prevent leaks.
- Let the cheesecake cool gradually to avoid cracking. The hour in the oven with the door cracked is key.
- Chill the cheesecake for at least 6 hours, but overnight is best for texture and flavor.
Serving Suggestions:
This cheesecake is decadent on its own but even better with the right presentation:
- 🍫 Drizzle with chocolate sauce or ganache
- 🍦 Serve with a scoop of vanilla or cookies-and-cream ice cream
- 🍓 Add fresh strawberries, raspberries, or a berry compote
- 🍰 Top with whipped cream and mini Oreos for extra flair
- ☕ Pair with coffee, espresso, or a dessert liqueur like Baileys
Serve it on:
- Elegant cake stands for holidays
- Small dessert plates for individual servings
- Plated with a chocolate swirl and mint sprig for restaurant-style impact
Tips:
- For cleaner slices, dip your knife in hot water and wipe between cuts
- Use gel food coloring for deep, vibrant red without watering down the batter
- Let it sit at room temperature for 15 minutes before serving for the creamiest texture
- Store leftovers covered in the fridge for up to 5 days
- Freeze slices wrapped in plastic and foil for up to 2 months—thaw overnight in the fridge
Prep Time:
25 minutes
Baking Time:
55 minutes
Chill Time:
6–8 hours
Total Time:
About 8 hours
Nutritional Information (Per Slice, 1 of 12):
- Calories: 450
- Carbohydrates: 38g
- Sugars: 26g
- Protein: 6g
- Fat: 32g
- Saturated Fat: 18g
- Cholesterol: 120mg
- Sodium: 310mg
FAQs:
Can I make this cheesecake ahead of time?
Absolutely! In fact, it tastes best when made a day in advance and chilled overnight.
What’s the best food coloring to use?
Gel food coloring gives a stronger, more vibrant color without thinning out your batter like liquid coloring.
Can I skip the cocoa powder?
You can, but red velvet traditionally has a hint of cocoa flavor. Skipping it will result in a less authentic taste.
What if I don’t have a springform pan?
You can use a deep 9-inch cake pan, but it’s harder to remove the cheesecake cleanly. Line with parchment and be careful when lifting it out.
Can I freeze Red Velvet Oreo Cheesecake?
Yes! Wrap individual slices tightly and freeze for up to 2 months. Thaw in the fridge overnight before serving.
Conclusion:
Red Velvet Oreo Cheesecake is a dessert lover’s dream come true. It’s rich, creamy, strikingly beautiful, and full of chocolatey cookie goodness. Whether you’re celebrating a holiday, hosting a dinner party, or just want to treat yourself to something truly special, this cheesecake never disappoints. It looks like it came from a fancy bakery, but with a few simple ingredients and techniques, you can easily make it at home. One slice is never enough—and don’t be surprised when people beg you for the recipe. So go ahead, preheat the oven, grab those Oreos, and get ready to bake a masterpiece.


