
Imagine the most iconic and beloved dessert flavors of the modern era, the deep, subtly chocolatey, and vibrantly crimson allure of red velvet cake and the irresistible, creamy, and crunchy phenomenon that is the Oreo cookie, fused into one show-stopping, monumental dessert. The Red Velvet Oreo Cheesecake is not just a cake; it is an experience, a masterpiece of texture and flavor that commands attention from the moment it is presented. This decadent creation features a rich, dense, and velvety-smooth classic cheesecake batter, meticulously tinted a deep red and infused with the essence of cocoa, perfectly capturing the soul of red velvet. This brilliant filling is cradled by a base not of traditional graham crackers, but by a decadent, buttery crust made from crushed Oreo cookies, their iconic black cocoa flavor and creamy filling adding a profound depth.
Why Is This Red Velvet Oreo Cheesecake So Popular?
The cultural resonance of this cheesecake is a powerful testament to its genius combination of two dessert titans, creating a viral-worthy phenomenon that appeals to a massive audience.
The Ultimate Flavor Fusion: It masterfully combines two of the most universally adored desserts into one super-dessert. It taps into the powerful nostalgia of both red velvet cake and Oreo cookies, creating a powerful “why choose?” appeal that is incredibly enticing.
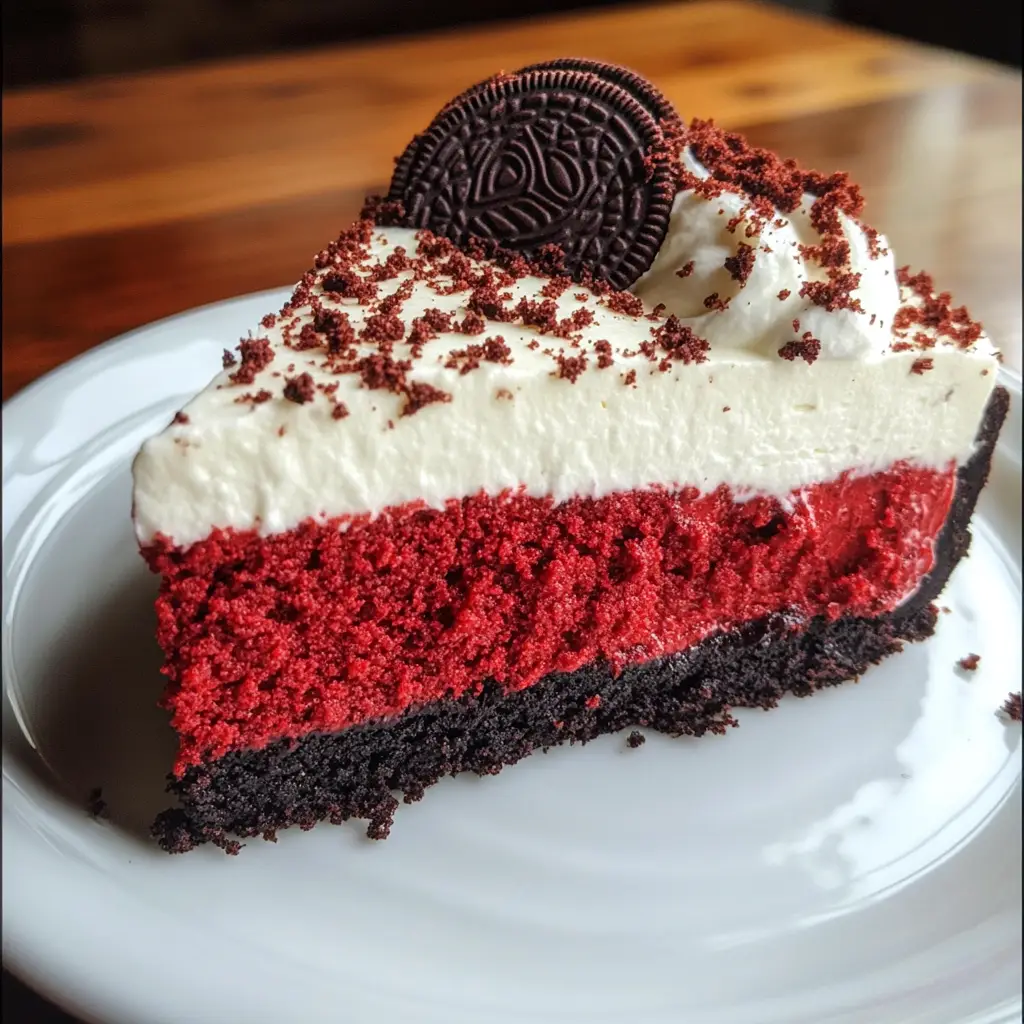
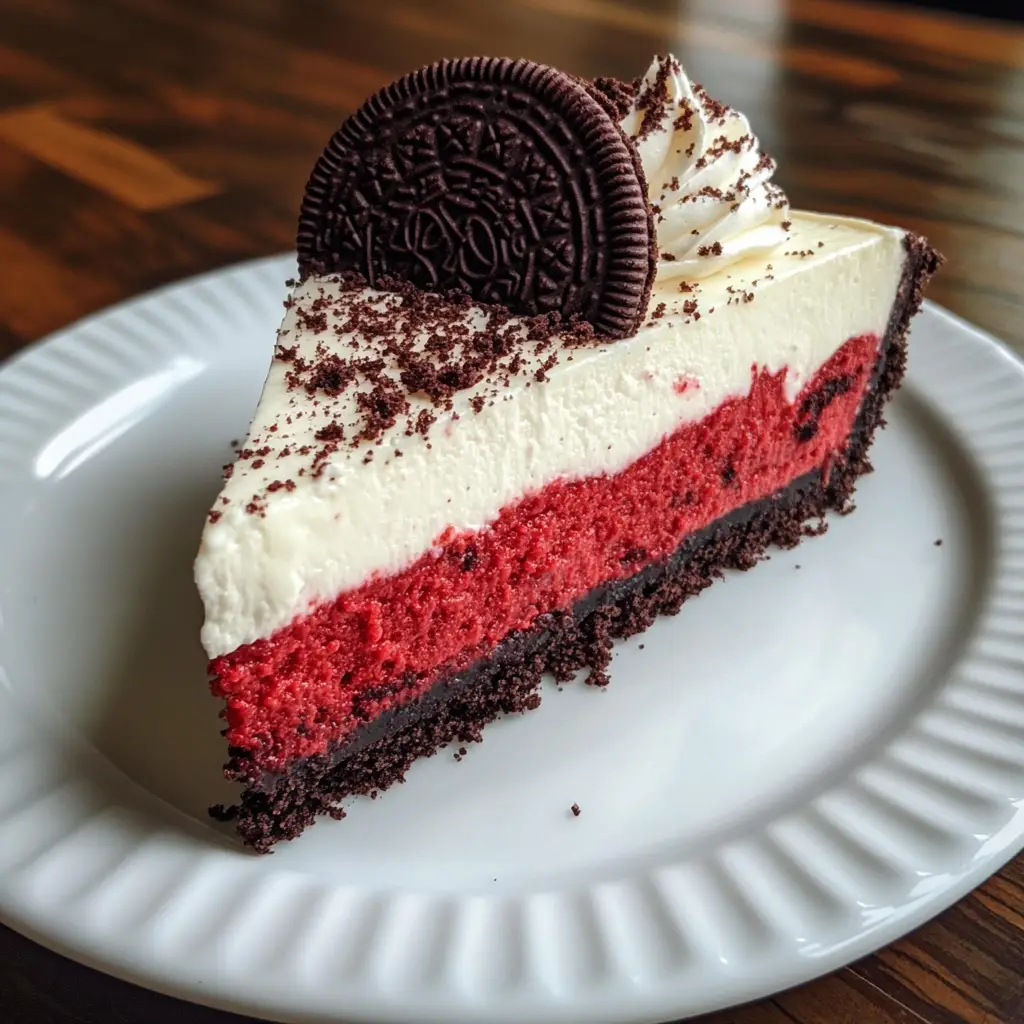
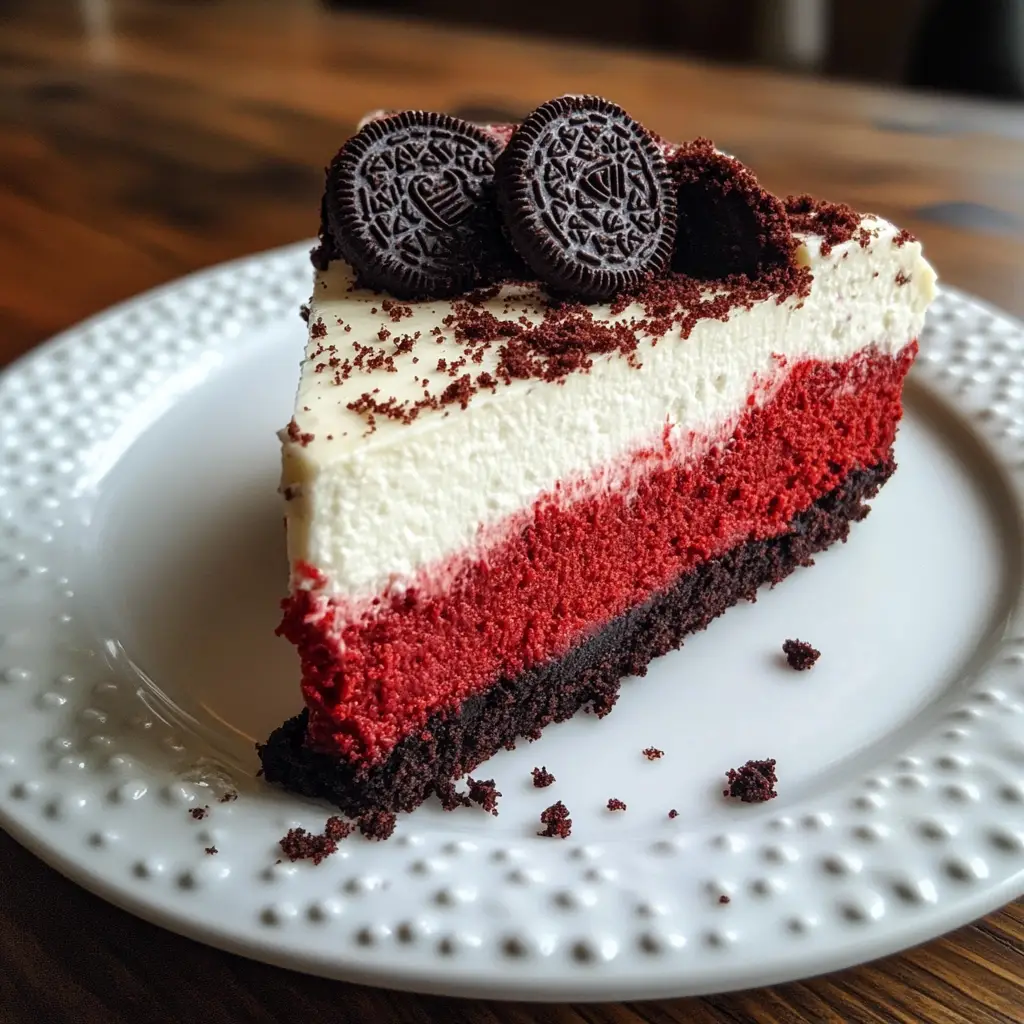
Visual Spectacle and “Wow” Factor: The dramatic contrast between the stark white frosting, the jet-black Oreo crust, and the intense, vibrant red interior is visually stunning and incredibly photogenic. This makes it a superstar on social media platforms like Instagram and Pinterest, fueling its desire and popularity.
Textural Nirvana: This dessert is a masterclass in texture. The dense, creamy, and smooth body of the cheesecake contrasts perfectly with the firm, crunchy, and chocolatey Oreo crust. The fluffy cream cheese frosting and additional crunchy garnishes add further layers, making every single bite a complex and satisfying sensory experience.
Celebration Centerpiece: Its impressive size, dramatic appearance, and rich flavor profile make it the perfect dessert for birthdays, holidays, Valentine’s Day, and any gathering where a spectacular finale is required. It feels special, indulgent, and celebratory.
Culinary Creativity: It represents a modern, innovative approach to baking. It’s not a traditional recipe but a creative mash-up that appeals to those who love to experiment with flavors and create something that feels new, exciting, and uniquely their own.
Why You’ll Love This Red Velvet Oreo Cheesecake:
You will adore this recipe because it provides a detailed, meticulous roadmap to creating a flawless, professional-quality dessert at home. The process, while involved, is deeply rewarding and designed for success.
Deep, Complex Flavor Profile: This is not a one-note dessert. The tanginess from the cream cheese, the subtle chocolate notes from the cocoa and Oreo, the vanilla undertones, and the sweetness of the frosting all work in harmonious balance, creating a flavor that is rich but not cloying.
A Baking Achievement: Successfully baking a beautiful, crack-free cheesecake is a rite of passage for any serious home baker. This recipe, with its water bath technique and careful instructions, guides you to that achievement, resulting in a tremendous sense of accomplishment.
Make-Ahead Perfection: Cheesecakes are famously better when made a day (or even two) in advance. This allows the flavors to fully meld and the texture to set perfectly, making it an ideal, stress-free dessert for entertaining.
Customizable and Adaptable: While the recipe is perfect as is, it serves as a fantastic canvas. You can adjust the level of red color, add chocolate chips to the batter, or even drizzle the top with a white or dark chocolate ganache for extra decadence.
Here’s what you’ll need:
For the Oreo Crust:
24 whole Oreo cookies (including the cream filling)
5 tbsp (70g) Unsalted Butter, melted
1 tbsp Granulated Sugar (optional, for extra sweetness)
For the Red Velvet Cheesecake Filling:
24 oz (678g) full-fat Cream Cheese, completely softened to room temperature
1 ¼ cups (250g) Granulated Sugar
1 cup (240g) Sour Cream, room temperature
3 tbsp (15g) Unsweetened Natural Cocoa Powder (not Dutch-process)
3 Large Eggs, room temperature
2 Large Egg Yolks, room temperature
¼ cup (60ml) Heavy Cream, room temperature
2 tsp Pure Vanilla Extract
1 tsp Distilled White Vinegar
1 oz (2 tbsp) Liquid Red Food Coloring (or 1-2 tsp gel food coloring for a deeper color)
1 tbsp All-Purpose Flour (helps stabilize the structure)
½ tsp Salt
For the Cream Cheese Frosting:
8 oz (226g) full-fat Cream Cheese, softened to room temperature
½ cup (115g) Unsalted Butter, softened to room temperature
2 ½ cups (300g) Confectioners’ Sugar, sifted
1 tsp Pure Vanilla Extract
Pinch of Salt
For Garnish:
Oreo Cookie Crumbs
Red Velvet Cake Crumbs (from a box mix or homemade cake, baked and crumbled)
Whole or Halved Oreo Cookies
How to Make Red Velvet Oreo Cheesecake:
Now that you have your ingredients ready, let’s dive into the steps for making this delightful Red Velvet Oreo Cheesecake. Precision and patience are key to a perfect, crack-free result.
Step 1: Prepare the Pan and Preheat Oven
Preheat your oven to 325°F (160°C). Take a 9-inch springform pan. To prevent any water from the water bath leaking in, tightly wrap the outside bottom and sides of the pan with a double layer of heavy-duty aluminum foil. This is a crucial step.
Step 2: Make the Oreo Crust
Place the whole Oreo cookies (cream filling included) in a food processor. Pulse until you have fine, even crumbs. You should have about 2 ½ cups of crumbs. Transfer to a bowl and mix with the melted butter (and 1 tbsp sugar, if using) until the mixture resembles wet sand. Press the crumbs firmly and evenly into the bottom and about 1 inch up the sides of the prepared springform pan. Use a flat-bottomed measuring cup to pack it down tightly. Bake for 10 minutes. Remove and set aside to cool slightly. Reduce oven temperature to 300°F (150°C).
Step 3: Start the Cheesecake Filling
In the bowl of a stand mixer fitted with the paddle attachment, beat the room-temperature cream cheese on medium-low speed until it is completely smooth, creamy, and free of any lumps. This can take 3-4 minutes. Scrape down the bowl and beater thoroughly.
Step 4: Add Sugar and Cocoa
Gradually add the sugar and cocoa powder to the cream cheese, beating on low speed until just combined. Scrape down the bowl again. Ensure no pockets of dry cocoa remain.
Step 5: Incorporate Wet Ingredients
Add the sour cream, heavy cream, vanilla extract, vinegar, and red food coloring. Beat on low speed until the mixture is uniform and vibrantly red. Again, scrape down the bowl to ensure even coloring.
Step 6: Add Eggs and Final Ingredients
Switch to a whisk attachment if desired. Whisk the flour and salt with the eggs and egg yolks in a separate bowl just until combined. With the mixer on low speed, gradually pour the egg mixture into the cheesecake batter. Mix until just combined—do not overmix! Overmixing incorporates too much air and can cause cracking.
Step 7: Prepare the Water Bath and Bake
Bring a kettle of water to a boil. Place the springform pan with the crust inside a large roasting pan. Carefully pour the cheesecake batter over the crust. Place the roasting pan in the oven on the center rack. Carefully pour the hot water into the roasting pan around the springform pan until it reaches about halfway up the sides of the springform pan. Bake for 1 hour 30 minutes to 1 hour 45 minutes. The edges will be set, but the center will still have a slight jiggle.
Step 8: Cool Slowly
Turn off the oven, crack the oven door open with a wooden spoon, and let the cheesecake cool in the oven for 1 hour. This gradual cooling is the best defense against cracking. After 1 hour, remove the cheesecake from the water bath, remove the foil, and place it on a wire rack to cool completely to room temperature. Then, cover it loosely and refrigerate for at least 8 hours, preferably 24.
Step 9: Make Frosting and Decorate
Before serving, make the frosting. Beat the softened butter and cream cheese together until smooth. Gradually add the sifted confectioners’ sugar, vanilla, and salt, and beat until light and fluffy. Unclasp the springform pan. Frost the top of the chilled cheesecake with a generous layer of cream cheese frosting. Garnish the edges with Oreo crumbs and red velvet cake crumbs. Pipe remaining frosting around the border if desired and add whole Oreos.
Tips for Success:
Room Temperature is Mandatory: All refrigerated ingredients (cream cheese, eggs, sour cream, heavy cream) MUST be at room temperature. This is the single most important factor for a smooth, lump-free batter that bakes evenly.
Do Not Overmix: Once the eggs are added, mix only until the yolk streaks disappear. Overmixing incorporates air, which expands in the oven and causes the cheesecake to rise and fall, leading to cracks.
The Water Bath is Non-Negotiable: The water bath (or bain-marie) provides gentle, moist heat. This is essential for cooking the cheesecake evenly without curdling the eggs and for preventing the surface from drying out and cracking.
Patience is a Virtue: The slow cooling and long chilling time are not suggestions; they are requirements. They allow the structure to set properly, resulting in the perfect creamy, dense texture.
Use Gel Food Coloring: For a deep, vibrant red color without adding excess liquid, highly concentrated gel food coloring is superior to liquid.
Don’t Peek: Resist the urge to open the oven door during the first hour of baking. A sudden drop in temperature can cause the cheesecake to fall and crack.
Equipment Needed:
9-inch Springform Pan
Heavy-Duty Aluminum Foil
Food Processor
Stand Mixer or Electric Hand Mixer
Large Roasting Pan (for water bath)
Instant-Read Thermometer (target internal temp is 150°F/65°C)
Spatula
Wire Rack
Piping Bag and Tip (optional, for decoration)
Variations of Red Velvet Oreo Cheesecake:
- White Chocolate Ganache Drizzle: Replace the frosting with a drizzle of white chocolate ganache over the top for a different kind of elegance.
- Cheesecake Bars: Press the crust into a 9×13 inch pan, add the filling, and bake. Cut into bars for a portable option.
- Mini Cheesecakes: Use a muffin tin with liners. Bake for a shorter time for adorable individual servings.
- Different Crust: Use a traditional red velvet cake crumb crust instead of Oreo for an all-red velvet experience.
- Layered Cheesecake: Create a layer of Oreo pieces in the middle of the cheesecake batter before baking.
Serving Suggestions for Red Velvet Oreo Cheesecake:
- Serve Chilled: This cheesecake is always served cold from the refrigerator. It slices cleanly when cold.
- Use a Hot Knife: For picture-perfect slices, dip a sharp knife in hot water, wipe it dry, and make a cut. Repeat for each slice.
- With a Dessert Wine: Pair with a glass of late-harvest Riesling or a sparkling Moscato d’Asti.
- With Coffee: The rich, tangy flavors pair beautifully with a strong cup of black coffee or espresso.
Prep Time:
45 minutes (plus 8+ hours chilling)
Cooking Time:
1 hour 45 minutes (plus 1 hour cooling in oven)
Total Time:
10+ hours (mostly inactive chilling time)
Nutritional Information:
(Estimated per slice, assumes 12 slices. This is a very rich, indulgent dessert.)
- Calories: ~780
- Protein: ~9g
- Sodium: ~480mg
- Sugar: ~65g
- Fat: ~52g (Saturated Fat: ~30g)
- Carbohydrates: ~75g
- Fiber: ~1g
FAQs about Red Velvet Oreo Cheesecake:
Q: Why did my cheesecake crack?
A: The main causes are overmixing the batter (incorporating too much air), a rapid temperature change (opening the oven door or not cooling slowly), or overbaking.
Q: Can I make this without a water bath?
A: It is highly discouraged. The water bath is essential for even, gentle cooking and preventing cracks. If you absolutely cannot, place a pan of water on the rack below the cheesecake, but results may vary.
Q: Can I use Dutch-process cocoa?
A: It’s not recommended. Natural cocoa powder is more acidic, which interacts with the baking soda in the Oreo crust and the vinegar in the batter, contributing to the classic “red velvet” flavor profile.
Q: How long does it keep?
A: Covered tightly in the refrigerator, it will keep for up to 5 days. It can also be frozen (without frosting) for up to 3 months. Thaw overnight in the refrigerator before frosting and serving.
Q: My cheesecake is jiggly after the bake time. Is it done?
A: Yes. The center should have a slight jiggle, like Jell-O, when you gently shake the pan. It will firm up dramatically during the cooling and chilling process.
Q: Can I use low-fat cream cheese?
A: For the best texture and flavor, full-fat cream cheese is essential. Low-fat varieties have more water and stabilizers, which can result in a softer, less creamy texture.
Final Thoughts:
The Red Velvet Oreo Cheesecake is the undisputed champion of fusion desserts. It is a ambitious, breathtaking, and profoundly delicious creation that represents the peak of home baking achievement. While it requires patience, attention to detail, and respect for the process—particularly the sacred rules of room temperature ingredients and the water bath—the reward is a dessert that is nothing short of spectacular. This recipe provides a meticulous, foolproof guide to navigating each critical step, ensuring your final result is a smooth, crack-free, vibrantly red, and impossibly creamy cheesecake that perfectly marries the timeless flavors of red velvet and Oreo. It is the ultimate show-stopping centerpiece for any celebration, a guaranteed conversation starter, and a dessert that will forge its own legacy of nostalgia for everyone lucky enough to enjoy a slice.


