
Introduction to Peanut Butter Brownie Trifle
As a passionate home cook, I often find myself daydreaming about desserts that can make any gathering feel special. One of my all-time favorites is the Peanut Butter Brownie Trifle. This delightful treat is not just a dessert; it’s a celebration in a bowl! The combination of rich, fudgy brownies layered with creamy peanut butter goodness creates a symphony of flavors that dance on your taste buds.
Let me take you back to the first time I made this trifle. It was a sunny afternoon, and I had friends coming over for a casual get-together. I wanted to impress them with something sweet, yet simple. As I rummaged through my pantry, I stumbled upon a jar of peanut butter and a box of brownie mix. That’s when the idea struck me! Why not combine these two beloved ingredients into a show-stopping dessert?
With each layer of brownie, peanut butter cream, and whipped topping, I felt like a culinary artist painting a masterpiece. The best part? It was incredibly easy to assemble! My friends were in awe as I presented the trifle, and the smiles on their faces as they took their first bites were priceless. It was a moment I’ll never forget, and since then, this Peanut Butter Brownie Trifle has become my go-to dessert for any occasion.
In this article, I’ll share my tried-and-true recipe, along with tips and tricks to help you create your own Peanut Butter Brownie Trifle. Whether you’re hosting a party or simply treating yourself, this dessert is sure to bring joy and satisfaction. So, let’s dive into the delicious world of trifle-making!
Ingredients for Peanut Butter Brownie Trifle
Creating a Peanut Butter Brownie Trifle is like gathering all your favorite flavors into one delightful dish. The ingredients are simple yet essential for achieving that perfect balance of sweetness and richness. Here’s what you’ll need to whip up this delicious dessert!
Main Ingredients
- 1 box of brownie mix (plus ingredients required on the box, usually eggs, oil, and water)
- 1 cup creamy peanut butter (I prefer using natural peanut butter for a richer flavor)
- 1 cup powdered sugar (this adds sweetness and helps create a smooth cream)
- 1 cup heavy whipping cream (for that luscious whipped topping)
- 1 teaspoon vanilla extract (a splash of vanilla elevates the flavor)
- 1 cup whipped topping (store-bought or homemade, for an extra layer of creaminess)
When selecting your ingredients, I always recommend going for high-quality products. A good brownie mix can make a world of difference, and using natural peanut butter without added sugars or oils will enhance the overall taste of your trifle.
Optional Add-ons
- Chopped peanuts (for a crunchy texture and added flavor)
- Chocolate chips (to sprinkle between layers for extra chocolatey goodness)
- Caramel sauce (drizzled on top for a sweet finish)
- Fresh berries (like raspberries or strawberries, for a fruity twist)
These optional add-ons can take your Peanut Butter Brownie Trifle to the next level. I love adding chopped peanuts for that delightful crunch, and a drizzle of caramel sauce makes it feel extra indulgent. Feel free to get creative and mix in your favorite flavors!
How to Prepare Peanut Butter Brownie Trifle
Now that we have our ingredients ready, it’s time to dive into the fun part—preparing the Peanut Butter Brownie Trifle! I love this stage because it’s where the magic happens. Follow these simple steps, and you’ll be on your way to creating a dessert that will wow your friends and family.
Step 1: Bake the Brownies
First things first, let’s get those brownies baking! Preheat your oven according to the instructions on the brownie mix box. Then, prepare your baking pan by greasing it lightly or lining it with parchment paper. This will make it easier to remove the brownies later.
Mix the brownie batter according to the package instructions, and pour it into the prepared pan. Bake until a toothpick inserted in the center comes out with a few moist crumbs. This usually takes about 20-25 minutes, but keep an eye on it!
Tips for Baking Perfect Brownies
- Don’t overmix: Stir the batter just until combined. Overmixing can lead to tough brownies.
- Check for doneness: Remember, brownies continue to cook a bit after you take them out of the oven, so it’s okay if they’re slightly underbaked.
- Let them cool: Allow the brownies to cool completely in the pan before cutting them into squares. This helps them hold their shape when layering.
Step 2: Prepare the Peanut Butter Cream
While the brownies are cooling, let’s whip up that creamy peanut butter layer! In a mixing bowl, combine the creamy peanut butter, powdered sugar, and vanilla extract. Using a hand mixer or a whisk, blend until smooth and creamy.
Next, in a separate bowl, whip the heavy cream until stiff peaks form. Gently fold the whipped cream into the peanut butter mixture. This step is crucial because it gives the cream a light and airy texture that balances the dense brownies.
Tips for Achieving the Right Consistency
- Room temperature ingredients: Make sure your peanut butter is at room temperature for easier mixing.
- Don’t overmix: When folding in the whipped cream, be gentle! You want to keep that fluffy texture.
- Taste as you go: Feel free to adjust the sweetness by adding more powdered sugar if you like it sweeter!
Step 3: Assemble the Trifle
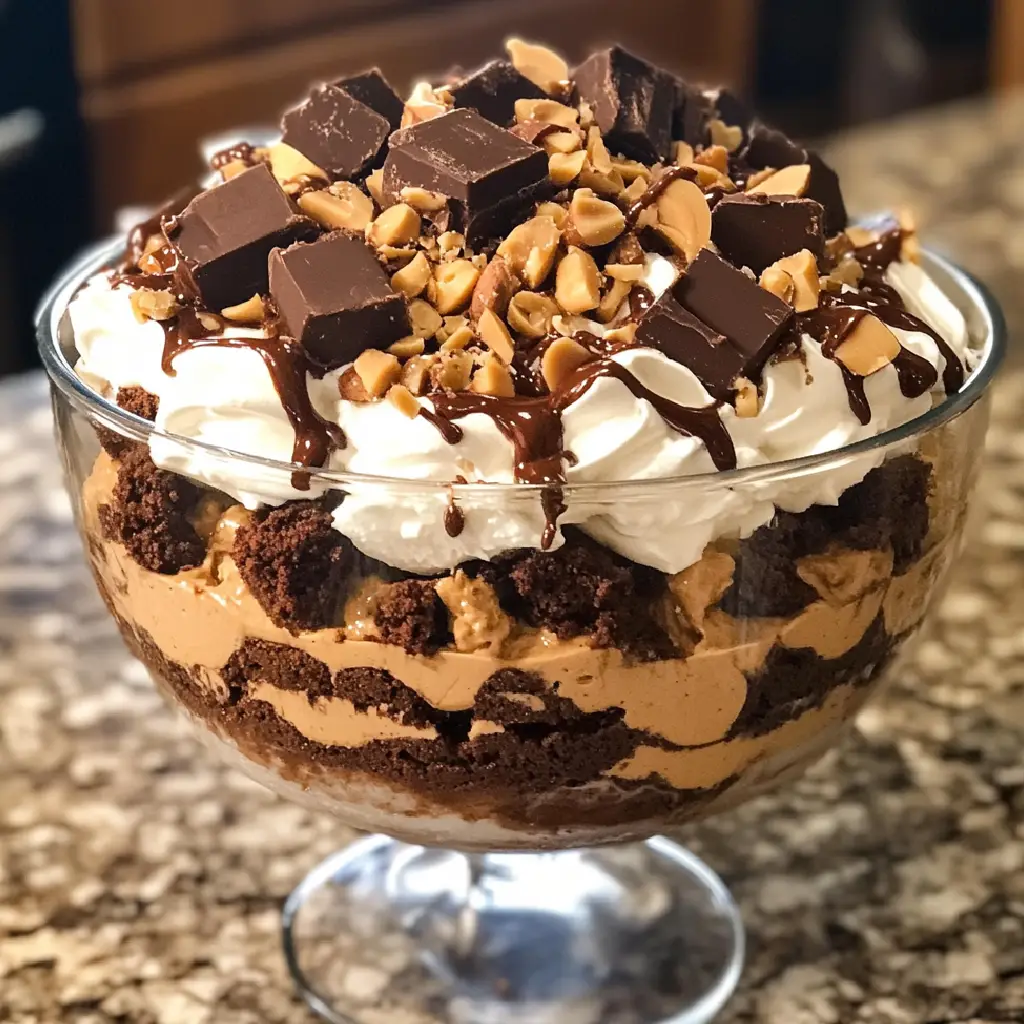
Now comes the fun part—assembling the trifle! Grab a large glass bowl or individual serving cups for a personal touch. Start by placing a layer of brownie squares at the bottom. Then, add a generous layer of the peanut butter cream on top. Repeat this process until you reach the top of your bowl or cups, finishing with a layer of whipped topping.
For an extra touch, sprinkle some chopped peanuts or chocolate chips on the top layer. This not only adds flavor but also makes your trifle look stunning!
Layering Tips for Visual Appeal
- Use clear containers: This allows everyone to see the beautiful layers of brownie and cream.
- Vary the sizes: Use different sizes of brownie pieces for a more interesting texture.
- Garnish: A drizzle of chocolate or caramel sauce on top can elevate the presentation!
Equipment Needed for Peanut Butter Brownie Trifle
Creating a Peanut Butter Brownie Trifle is a delightful experience, and having the right equipment makes it even easier! Here’s a quick list of the tools you’ll need to bring this dessert to life. Don’t worry if you don’t have everything on hand; I’ll suggest some alternatives too!
- Mixing Bowls: You’ll need a couple of mixing bowls—one for the brownie batter and another for the peanut butter cream. If you don’t have mixing bowls, any large container will do!
- Hand Mixer or Whisk: A hand mixer is perfect for whipping the cream and mixing the peanut butter. If you prefer a workout, a whisk works just as well, though it may take a bit more elbow grease!
- Baking Pan: A square or rectangular baking pan is ideal for the brownies. If you don’t have one, a round cake pan can work too; just adjust your brownie cutting accordingly.
- Spatula: A spatula is handy for spreading the brownie batter and folding in the whipped cream. If you don’t have one, a large spoon can do the trick!
- Trifle Bowl or Serving Cups: For the grand presentation, a clear trifle bowl is perfect to showcase those beautiful layers. If you don’t have one, individual serving cups or even mason jars can create a charming effect.
With these simple tools, you’ll be well on your way to crafting a stunning Peanut Butter Brownie Trifle. Remember, it’s all about having fun in the kitchen, so don’t stress if you need to improvise a little!
Variations of Peanut Butter Brownie Trifle
One of the things I love most about the Peanut Butter Brownie Trifle is its versatility. You can easily switch things up to suit your taste or the occasion. Here are a few delightful variations that I’ve tried and absolutely adored!
- Nutty Chocolate Delight: Swap out the peanut butter for almond butter or hazelnut spread. This gives the trifle a unique twist while still keeping that nutty flavor.
- Minty Fresh: Add a few drops of peppermint extract to the peanut butter cream for a refreshing minty flavor. Top it off with crushed mint chocolate candies for a festive touch!
- Fruit Fusion: Layer in some fresh fruits like bananas or strawberries between the brownie and cream layers. The fruity freshness balances the richness beautifully.
- Cookie Crumble: Instead of brownies, use crushed chocolate chip cookies as the base. This creates a fun cookie trifle that’s just as delicious!
These variations not only keep things exciting but also allow you to cater to different preferences. I encourage you to experiment and find your favorite combination. After all, cooking is all about creativity and joy!
Cooking Notes for Peanut Butter Brownie Trifle
As I’ve learned through my culinary adventures, a few cooking notes can make all the difference when preparing your Peanut Butter Brownie Trifle. Here are some insights that I’ve gathered over time, which I hope will help you create the best version of this delightful dessert!
- Brownie Texture: For a fudgier brownie, bake them for the minimum time suggested on the box. If you prefer a cake-like texture, leave them in a bit longer.
- Chill Time: After assembling the trifle, let it chill in the refrigerator for at least an hour. This allows the flavors to meld beautifully and makes serving easier.
- Make Ahead: You can prepare the brownie and peanut butter cream a day in advance. Just assemble the trifle on the day you plan to serve it for the freshest taste.
- Storage: If you have leftovers (which is rare!), cover the trifle with plastic wrap and store it in the fridge. It’s best enjoyed within a couple of days.
These cooking notes are little gems that I’ve picked up along the way. They help ensure that your Peanut Butter Brownie Trifle turns out just as delicious as you envision it. Happy cooking!
Serving Suggestions for Peanut Butter Brownie Trifle
When it comes to serving my Peanut Butter Brownie Trifle, I love to make it a memorable experience! Presentation is key, and there are a few fun ways to serve this delightful dessert that will surely impress your guests.
- Individual Cups: For a personal touch, serve the trifle in individual cups or mason jars. This not only looks adorable but also makes it easy for guests to grab their own serving.
- Garnish with Fresh Ingredients: Top each serving with a dollop of whipped cream, a sprinkle of chopped peanuts, or a drizzle of chocolate or caramel sauce. These little details elevate the dessert and make it even more enticing!
- Pair with Coffee or Milk: I love to serve my trifle alongside a warm cup of coffee or a glass of cold milk. The rich flavors of the trifle pair beautifully with these beverages, creating a delightful balance.
- Festive Touch: For special occasions, consider adding seasonal decorations like edible flowers or themed sprinkles on top. It adds a festive flair that’s perfect for celebrations!
These serving suggestions not only enhance the visual appeal of your Peanut Butter Brownie Trifle but also create a delightful experience for everyone. Remember, it’s all about sharing joy and deliciousness, so have fun with it!
Tips for Making the Best Peanut Butter Brownie Trifle
As I’ve whipped up my fair share of Peanut Butter Brownie Trifles, I’ve gathered a treasure trove of tips that can help you elevate your dessert game. These little nuggets of wisdom can make a big difference in the final result, ensuring that your trifle is not just good, but absolutely unforgettable!
- Quality Ingredients Matter: Always opt for high-quality peanut butter and brownie mix. The better the ingredients, the more delicious your trifle will be!
- Layer with Love: Take your time when layering. A little patience goes a long way in creating those beautiful, distinct layers that make trifles so visually appealing.
- Chill Before Serving: Allow your assembled trifle to chill in the fridge for at least an hour. This helps the flavors meld together and makes it easier to serve.
- Experiment with Flavors: Don’t be afraid to get creative! Try adding different flavors to the peanut butter cream, like chocolate or even a hint of cinnamon, to give your trifle a unique twist.
- Use Seasonal Ingredients: Incorporate seasonal fruits or toppings to keep your trifle fresh and exciting. Berries in the summer or caramelized apples in the fall can add a delightful touch!
With these tips in your back pocket, you’ll be well on your way to creating a Peanut Butter Brownie Trifle that will leave everyone asking for seconds. Remember, cooking is all about having fun and sharing joy, so enjoy the process!
Breakdown of Time for Peanut Butter Brownie Trifle
When it comes to making my Peanut Butter Brownie Trifle, I always like to keep track of the time. It helps me plan my day and ensures that everything comes together smoothly. Here’s a quick breakdown of the time you’ll need to whip up this delightful dessert!
- Prep Time: Approximately 20 minutes. This includes gathering your ingredients, mixing the brownie batter, and preparing the peanut butter cream.
- Cooking Time: About 25 minutes. This is the time it takes to bake the brownies to perfection. Remember to let them cool afterward!
- Assembly Time: Roughly 15 minutes. Layering the brownies and peanut butter cream is the fun part, and it doesn’t take long at all!
- Total Time: Around 1 hour. This includes prep, cooking, and assembly. If you let the trifle chill in the fridge, you might want to add an extra hour for the flavors to meld beautifully.
With this time breakdown, you can easily plan your cooking session. I find that knowing how long each step takes helps me enjoy the process even more. Happy trifle-making!
Nutritional Information for Peanut Butter Brownie Trifle
As a passionate home cook, I believe that enjoying dessert doesn’t have to come with guilt. While the Peanut Butter Brownie Trifle is undeniably indulgent, it’s also important to be mindful of its nutritional content. Here’s a general breakdown of the nutritional information per serving, based on a standard recipe that serves about 8 people:
- Calories: Approximately 350-400 calories
- Protein: 6-8 grams
- Fat: 20-25 grams
- Carbohydrates: 40-45 grams
- Sugar: 25-30 grams
- Fiber: 1-2 grams
Keep in mind that these values can vary based on the specific ingredients you choose, such as the type of brownie mix or peanut butter. If you’re looking to lighten things up, consider using a low-sugar brownie mix or reducing the amount of whipped cream. Remember, moderation is key, and enjoying a small serving of this delightful trifle can be a wonderful treat!
Frequently Asked Questions about Peanut Butter Brownie Trifle
As I’ve shared my love for the Peanut Butter Brownie Trifle, I often get questions from fellow dessert enthusiasts. It’s always exciting to see others eager to dive into this delicious treat! Here are some of the most frequently asked questions I receive, along with my answers to help you on your trifle-making journey.
Can I use homemade brownies instead of a box mix?
Absolutely! Using homemade brownies can add a personal touch to your trifle. Just make sure they are baked to your desired texture—fudgy or cake-like—and allow them to cool completely before cutting them into squares. Homemade brownies can elevate your trifle to a whole new level!
How long can I store the Peanut Butter Brownie Trifle?
If you have any leftovers (which is rare!), you can store the trifle in the refrigerator for up to 2-3 days. Just cover it with plastic wrap to keep it fresh. However, I recommend enjoying it within the first couple of days for the best taste and texture!
Can I make this trifle gluten-free?
Yes! You can easily make a gluten-free Peanut Butter Brownie Trifle by using a gluten-free brownie mix. There are many delicious options available now, so you can still enjoy this dessert without gluten. Just be sure to check the labels on your other ingredients, like whipped cream and peanut butter, to ensure they are gluten-free as well.
What can I substitute for peanut butter?
If you or someone you know has a peanut allergy, you can substitute peanut butter with almond butter, sunflower seed butter, or cashew butter. Each of these alternatives brings its own unique flavor, so feel free to experiment and find the one you love best!
Can I prepare the trifle a day in advance?
Yes, you can prepare the brownie and peanut butter cream a day ahead of time. Just assemble the trifle on the day you plan to serve it. This way, the flavors will meld beautifully, and you’ll have more time to enjoy your gathering!
These FAQs are just a glimpse into the wonderful world of Peanut Butter Brownie Trifle. If you have more questions or need further tips, feel free to reach out! I love sharing my passion for cooking and helping others create delicious memories in the kitchen.
Conclusion on Peanut Butter Brownie Trifle
As I wrap up my journey through the delightful world of Peanut Butter Brownie Trifle, I can’t help but feel a sense of joy. This dessert is more than just a sweet treat; it’s a celebration of flavors and memories. The rich, fudgy brownies paired with the creamy peanut butter layer create a harmonious blend that’s hard to resist.
What I love most about this trifle is its versatility. Whether you’re hosting a party, celebrating a special occasion, or simply indulging in a sweet craving, this dessert fits the bill perfectly. Plus, it’s easy to prepare, making it a go-to recipe for both novice and experienced cooks alike.
So, gather your ingredients, unleash your creativity, and dive into the fun of making your own Peanut Butter Brownie Trifle. I promise it will bring smiles and satisfaction to everyone who gets a taste. Happy cooking, and may your kitchen be filled with laughter and deliciousness!


