
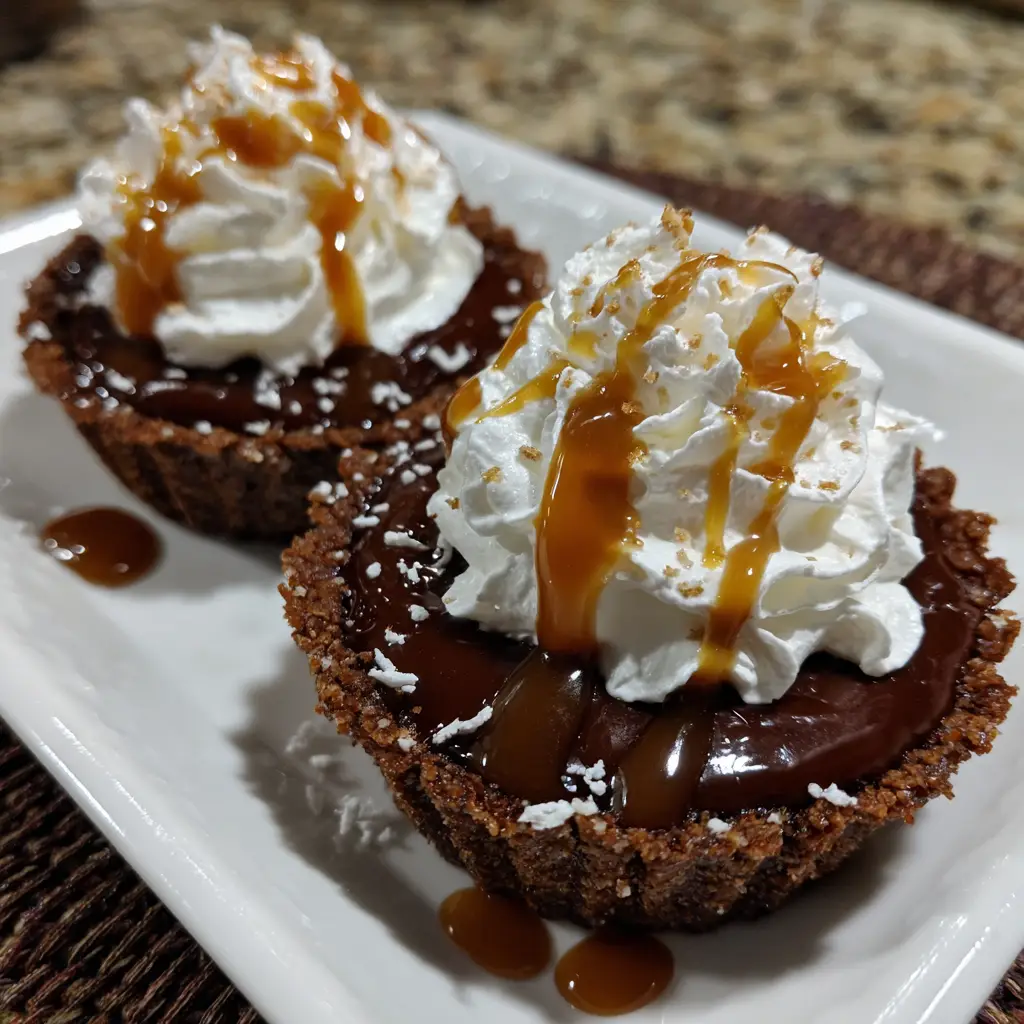
No-Bake Chocolate Caramel Pie Cups are a decadent, individually-portioned dessert that masterfully combines the timeless, crowd-pleasing flavors of chocolate and caramel in a stunning, fuss-free format. Imagine a buttery, crunchy graham cracker crust nestled in a clear cup, layered with a luxuriously smooth and rich chocolate pudding or mousse, then crowned with a generous drizzle of sweet, salty, and gooey caramel sauce, all finished with a cloud of whipped cream and a sprinkle of sea salt or chocolate shavings. These pie cups are a celebration of contrast: the crisp crust against the velvety chocolate, the deep cocoa notes against the buttery caramel, and the cool, creamy textures against the ambient temperature of the room. They are the ultimate solution for when you crave an impressive, homemade dessert but want to avoid turning on the oven.
Why Is This No-Bake Chocolate Caramel Pie Cups Recipe So Popular?
The recipe’s widespread popularity is rooted in its perfect alignment with modern desires for convenience, customization, and visual appeal. First, its completely no-bake nature makes it accessible year-round, especially during hot summer months when oven use is undesirable, and it’s foolproof for cooks of all skill levels. Second, it features a legendary flavor duo—chocolate and caramel—that is universally adored and evokes a sense of nostalgic indulgence. Third, the individual serving style is a major draw; it eliminates the mess of slicing a pie, ensures perfect portion control, and makes serving at gatherings effortless and elegant. Furthermore, its popularity is sustained by its make-ahead convenience and versatility. All components can be prepared hours or days in advance and assembled just before serving, and the recipe easily accommodates dietary swaps (like gluten-free crusts or vegan fillings). It’s popular because it delivers a dessert that looks and tastes like a gourmet treat while requiring minimal active time and no specialized baking skills.
Why You’ll Love This No-Bake Chocolate Caramel Pie Cups:
- No Oven Required: A cool, simple dessert perfect for any season and any kitchen.
- Easy Assembly: Layer store-bought or homemade components for a stunning result with little effort.
- Perfect for Parties: Individual servings are easy to transport, serve, and eat without utensils if desired.
- Endlessly Customizable: Experiment with different crusts, fillings (like peanut butter or vanilla), and toppings.
- Crowd-Pleasing Flavor: The combination of rich chocolate and sweet-salty caramel is a guaranteed hit.
Here’s what you’ll need:
For the Graham Cracker Crust:
- 1 ½ cups (150g) finely crushed graham cracker crumbs (about 12 full sheets)
- 6 tablespoons (85g) unsalted butter, melted
- 2 tablespoons granulated sugar
- Pinch of salt
For the Chocolate Filling:
- 1 ¾ cups (420ml) heavy cream, cold, divided
- 8 ounces (225g) semi-sweet or bittersweet chocolate, finely chopped
- ¼ cup (50g) granulated sugar
- 2 tablespoons unsweetened cocoa powder, sifted
- 1 teaspoon pure vanilla extract
- ⅛ teaspoon salt
For the Caramel Layer & Topping:
- 1 cup (about 11 oz) store-bought thick caramel sauce or dulce de leche, OR homemade caramel
- ½ teaspoon flaky sea salt (like Maldon), plus more for garnish
For the Whipped Cream & Garnish:
- 1 cup (240ml) heavy cream, very cold
- 2 tablespoons powdered sugar
- 1 teaspoon pure vanilla extract
- Chocolate shavings or curls
- Additional caramel sauce for drizzling
Special Equipment:
- 8-10 clear dessert cups or glasses (6-8 oz size)
- Piping bag with star tip (optional, for whipped cream)
- Electric mixer
How to Make No-Bake Chocolate Caramel Pie Cups:
Now that you have your ingredients ready, let’s dive into the steps for making this delightful No-Bake Chocolate Caramel Pie Cups. It’s as easy as pie, and I promise you’ll feel like a culinary superstar!
Step 1: Prepare the Graham Cracker Crust
In a medium bowl, combine the graham cracker crumbs, melted butter, sugar, and salt. Mix until the texture resembles wet sand and holds together when pinched. Spoon about 2-3 tablespoons of the mixture into the bottom of each dessert cup. Use the bottom of a small glass or a tamper to press the crumbs firmly and evenly into a compact layer. Place the cups on a tray and refrigerate for at least 15 minutes to set.
Step 2: Create the Chocolate Ganache Filling
Place the finely chopped chocolate in a heatproof bowl. In a small saucepan, heat ¾ cup of the heavy cream over medium heat until it just begins to simmer around the edges (do not boil). Pour the hot cream over the chopped chocolate. Let it sit undisturbed for 2-3 minutes, then whisk gently from the center outward until the chocolate is completely melted and the mixture is smooth and glossy. This is your chocolate ganache base. Set aside to cool slightly.
Step 3: Whip the Cream and Complete the Mousse
In a separate large bowl, using an electric mixer, whip the remaining 1 cup of cold heavy cream, granulated sugar, sifted cocoa powder, vanilla, and salt until soft peaks form. Gently fold about one-third of the whipped cream into the slightly cooled ganache to lighten it. Then, fold the lightened ganache mixture back into the remaining whipped cream until no white streaks remain. Be gentle to maintain the airy texture. This is your chocolate mousse filling.
Step 4: Layer the Caramel
Remove the cups from the refrigerator. Spoon or pipe about 1-2 tablespoons of caramel sauce over the set crust in each cup. Use the back of a spoon to spread it into an even layer. For a salted caramel effect, sprinkle a tiny pinch of flaky sea salt over the caramel layer.
Step 5: Add the Chocolate Mousse Layer
Spoon or pipe the chocolate mousse filling over the caramel layer, dividing it evenly among the cups. Smooth the tops with a spoon or offset spatula. Gently tap the tray on the counter to remove any air bubbles. Refrigerate the cups for at least 4 hours, or until the mousse is firmly set. For best results, cover loosely with plastic wrap and chill overnight.
Step 6: Prepare the Whipped Cream Topping
Just before serving, make the whipped cream. In a chilled bowl with chilled beaters, whip the 1 cup of heavy cream, powdered sugar, and vanilla until medium-stiff peaks form.
Step 7: Garnish and Serve
Pipe or dollop the fresh whipped cream onto each chilled pie cup. Drizzle with additional caramel sauce and sprinkle with chocolate shavings and a final delicate pinch of flaky sea salt. Serve immediately, or keep refrigerated for up to 2 hours before serving.
Tips for Success:
- Press the Crust Firmly: A well-compacted crust layer will hold together when you spoon into it and provide the necessary textural contrast.
- Use High-Quality Chocolate: The flavor of the mousse depends on it. A good baking chocolate (not chips) will melt smoothly and taste superior.
- Cool Ganache Before Folding: If the ganache is too hot, it will deflate the whipped cream. Let it cool until it’s just slightly warm to the touch.
- Don’t Over-whip the Cream: For both the mousse and topping, stop whipping when you have soft to medium-stiff peaks. Over-whipped cream becomes grainy.
- Layer in Order: The caramel goes under the mousse. If placed on top, it will sink. The crust provides a barrier.
- Chill Thoroughly: Patience is key. A full, long chill ensures clean layers and a perfect, set mousse texture.
Equipment Needed:
- 8-10 Clear Dessert Cups/Glasses
- Mixing Bowls
- Electric Hand Mixer or Stand Mixer
- Whisk
- Small Saucepan
- Piping Bag (optional)
- Fine Mesh Sieve (for sifting cocoa)
Variations of No-Bake Chocolate Caramel Pie Cups:
- Salted Peanut Butter Caramel: Add ¼ cup of creamy peanut butter to the chocolate mousse, and use a peanut butter caramel sauce.
- Cookies & Cream: Use an Oreo cookie crust and fold crushed Oreos into the chocolate mousse.
- Mocha Caramel: Add 1-2 teaspoons of instant espresso powder to the hot cream when making the ganache.
- Turtle Pie Cups: Top with chopped, toasted pecans along with the caramel and chocolate.
- Vegan/DF Version: Use vegan butter, coconut cream for whipping, dairy-free chocolate, and a vegan caramel sauce.
- Chocolate Cookie Crust: Substitute graham crackers with chocolate wafer cookies for a double-chocolate experience.
Serving Suggestions for No-Bake Chocolate Caramel Pie Cups:
- On a Dessert Buffet: Arrange on a tiered stand for a beautiful presentation.
- As a Restaurant-Style Plated Dessert: Serve each cup on a small plate with an artful drizzle of caramel and chocolate sauce.
- For a Dinner Party: Prepare ahead and garnish just before serving for a stress-free, impressive finale.
- As a Gift: Package in clear cellophane bags tied with a ribbon for a thoughtful homemade gift.
- With Coffee: Pair with a strong cup of coffee or espresso to balance the sweetness.
Prep Time:
30 minutes
Cooking Time:
10 minutes (for heating cream)
Total Time:
40 minutes (plus 4+ hours chilling)
Nutritional Information:
(Estimated per pie cup, based on 8 servings)
- Calories: ~580
- Protein: 5g
- Sodium: ~280mg
- Sugar: 45g
- Fat: 42g (Saturated Fat: 26g)
- Carbohydrates: 50g
- Fiber: 3g
FAQs about No-Bake Chocolate Caramel Pie Cups:
Q: Can I use store-bought pudding for the filling?
A: Yes, for a shortcut, you can use two 3.4 oz boxes of instant chocolate pudding mix prepared with cold milk according to package directions. Let it set before layering. The texture will be different (softer) but still delicious.
Q: How far in advance can I make these?
A: The assembled cups (without the final whipped cream topping) can be made and refrigerated for up to 2 days. Add the whipped cream and final garnishes within 2 hours of serving.
Q: Can I freeze them?
A: It’s not recommended. The whipped cream and mousse can become icy and separate upon thawing, and the texture will suffer.
Q: My mousse is runny. What happened?
A: Likely causes: the ganache was too warm when folded into the cream, the cream was under-whipped, or the cups didn’t chill long enough. Ensure each component is at the right stage and chill thoroughly.
Q: Can I make one big pie instead of individual cups?
A: Absolutely! Use a 9-inch pie plate. Press the crust into the bottom and up the sides, then layer the caramel and mousse. Chill as directed. Slice to serve.
Q: Is there a substitute for heavy cream?
A: For the mousse and topping, heavy cream (36% fat) is necessary for proper whipping and stability. Lower-fat alternatives will not whip successfully.
Final Thoughts:
No-Bake Chocolate Caramel Pie Cups are the epitome of a smart, stylish dessert. They prove that you don’t need complex techniques or hours of baking to create something truly spectacular and memorable. This recipe is a celebration of layers, both in texture and in flavor, and invites you to play with presentation and personal touches. The process is straightforward, satisfying, and yields a dessert that is guaranteed to impress and delight anyone who tries it. Whether you’re hosting a celebration or simply treating yourself, these elegant little cups deliver a perfect balance of richness, sweetness, and sophistication in every spoonful. So, gather your clear cups, whip that cream, and get ready to layer up a dessert that’s as fun to make as it is to eat.
Print
No-Bake Chocolate Caramel Pie Cups: Decadent, Easy & Ready in 20 Minutes
- Total Time: 40 minutes
Description
Layers of chocolate crust, creamy caramel filling, and whipped topping in individual cups. A rich, no-bake dessert perfect for parties and quick sweet cravings.
Ingredients
For the Graham Cracker Crust:
-
1 ½ cups (150g) finely crushed graham cracker crumbs (about 12 full sheets)
-
6 tablespoons (85g) unsalted butter, melted
-
2 tablespoons granulated sugar
-
Pinch of salt
For the Chocolate Filling:
-
1 ¾ cups (420ml) heavy cream, cold, divided
-
8 ounces (225g) semi-sweet or bittersweet chocolate, finely chopped
-
¼ cup (50g) granulated sugar
-
2 tablespoons unsweetened cocoa powder, sifted
-
1 teaspoon pure vanilla extract
-
⅛ teaspoon salt
For the Caramel Layer & Topping:
-
1 cup (about 11 oz) store-bought thick caramel sauce or dulce de leche, OR homemade caramel
-
½ teaspoon flaky sea salt (like Maldon), plus more for garnish
For the Whipped Cream & Garnish:
-
1 cup (240ml) heavy cream, very cold
-
2 tablespoons powdered sugar
-
1 teaspoon pure vanilla extract
-
Chocolate shavings or curls
-
Additional caramel sauce for drizzling
Special Equipment:
-
8–10 clear dessert cups or glasses (6–8 oz size)
-
Piping bag with star tip (optional, for whipped cream)
-
Electric mixer
Instructions
Step 1: Prepare the Graham Cracker Crust
In a medium bowl, combine the graham cracker crumbs, melted butter, sugar, and salt. Mix until the texture resembles wet sand and holds together when pinched. Spoon about 2-3 tablespoons of the mixture into the bottom of each dessert cup. Use the bottom of a small glass or a tamper to press the crumbs firmly and evenly into a compact layer. Place the cups on a tray and refrigerate for at least 15 minutes to set.
Step 2: Create the Chocolate Ganache Filling
Place the finely chopped chocolate in a heatproof bowl. In a small saucepan, heat ¾ cup of the heavy cream over medium heat until it just begins to simmer around the edges (do not boil). Pour the hot cream over the chopped chocolate. Let it sit undisturbed for 2-3 minutes, then whisk gently from the center outward until the chocolate is completely melted and the mixture is smooth and glossy. This is your chocolate ganache base. Set aside to cool slightly.
Step 3: Whip the Cream and Complete the Mousse
In a separate large bowl, using an electric mixer, whip the remaining 1 cup of cold heavy cream, granulated sugar, sifted cocoa powder, vanilla, and salt until soft peaks form. Gently fold about one-third of the whipped cream into the slightly cooled ganache to lighten it. Then, fold the lightened ganache mixture back into the remaining whipped cream until no white streaks remain. Be gentle to maintain the airy texture. This is your chocolate mousse filling.
Step 4: Layer the Caramel
Remove the cups from the refrigerator. Spoon or pipe about 1-2 tablespoons of caramel sauce over the set crust in each cup. Use the back of a spoon to spread it into an even layer. For a salted caramel effect, sprinkle a tiny pinch of flaky sea salt over the caramel layer.
Step 5: Add the Chocolate Mousse Layer
Spoon or pipe the chocolate mousse filling over the caramel layer, dividing it evenly among the cups. Smooth the tops with a spoon or offset spatula. Gently tap the tray on the counter to remove any air bubbles. Refrigerate the cups for at least 4 hours, or until the mousse is firmly set. For best results, cover loosely with plastic wrap and chill overnight.
Step 6: Prepare the Whipped Cream Topping
Just before serving, make the whipped cream. In a chilled bowl with chilled beaters, whip the 1 cup of heavy cream, powdered sugar, and vanilla until medium-stiff peaks form.
Step 7: Garnish and Serve
Pipe or dollop the fresh whipped cream onto each chilled pie cup. Drizzle with additional caramel sauce and sprinkle with chocolate shavings and a final delicate pinch of flaky sea salt. Serve immediately, or keep refrigerated for up to 2 hours before serving
Notes
-
8-10 Clear Dessert Cups/Glasses
-
Mixing Bowls
-
Electric Hand Mixer or Stand Mixer
-
Whisk
-
Small Saucepan
-
Piping Bag (optional)
-
Fine Mesh Sieve (for sifting cocoa)
- Prep Time: 30 minutes
- Category: dessert
- Cuisine: American
Nutrition
- Calories: 580
- Sugar: 45g
- Sodium: 280mg
- Fat: 42g
- Saturated Fat: 26g
- Carbohydrates: 50g
- Fiber: 3g
- Protein: 5g


