
Introduction to Maple Bacon Biscuit Roll-Ups Recipe
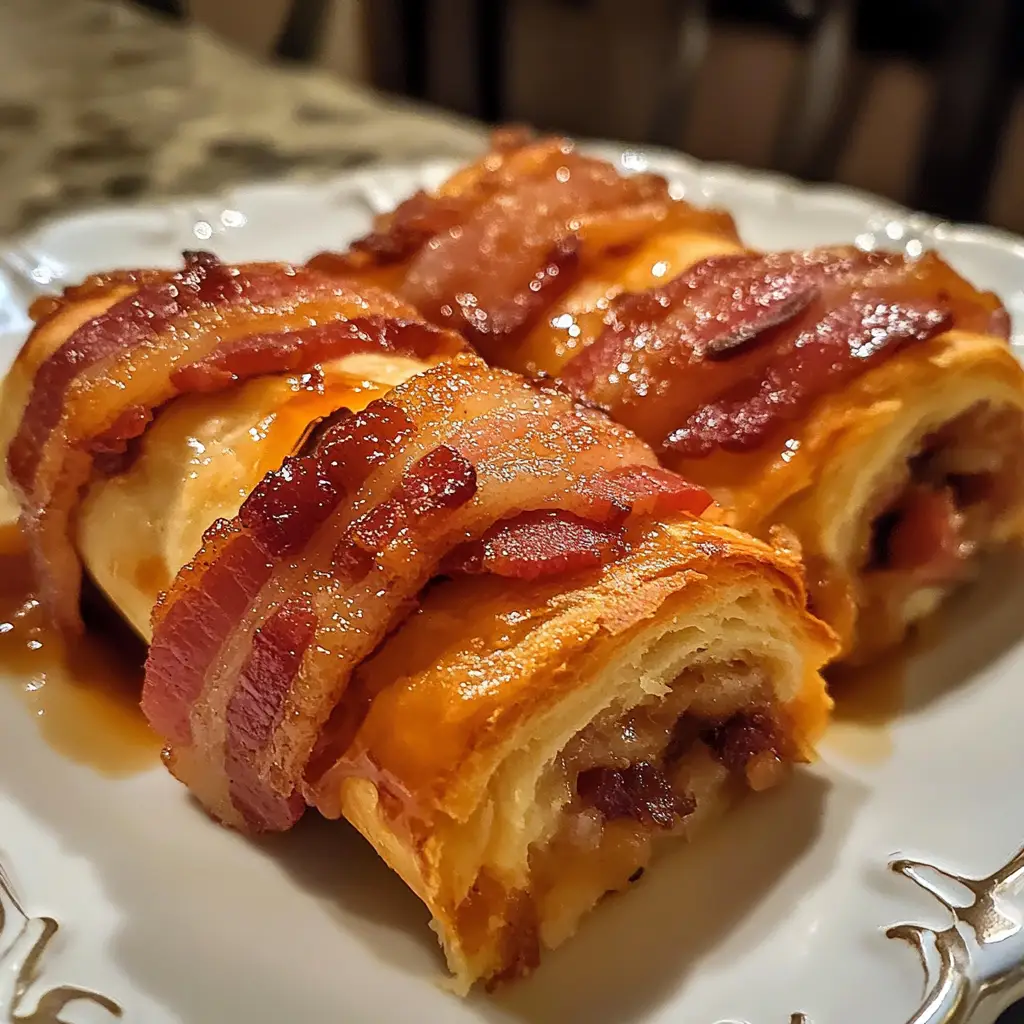
As a passionate home cook, I find joy in creating dishes that bring a smile to my family’s faces. One of my all-time favorites is the Maple Bacon Biscuit Roll-Ups. This delightful treat combines the flaky goodness of biscuits with the savory crunch of bacon, all drizzled with a sweet maple glaze. It’s like a warm hug on a plate!
Let me take you back to a cozy Sunday morning. The sun peeked through the kitchen window, casting a golden glow on the countertop. I had just finished a batch of these roll-ups, and the aroma wafted through the air, drawing my family into the kitchen like bees to honey. The excitement was palpable as we gathered around the table, ready to dig in. Each bite was a perfect blend of sweet and salty, and I could see the joy in their eyes. Moments like these remind me why I love cooking so much.
What I adore about this recipe is its simplicity. You don’t need to be a culinary expert to whip these up. With just a few ingredients, you can create a dish that feels special and indulgent. Whether it’s for a weekend brunch, a holiday gathering, or just a treat for yourself, these Maple Bacon Biscuit Roll-Ups are sure to impress.
So, grab your apron and let’s dive into this delicious adventure together! I promise you’ll want to make these roll-ups again and again.
Ingredients for Maple Bacon Biscuit Roll-Ups Recipe
Before we embark on our culinary journey, let’s gather all the ingredients we need for these scrumptious Maple Bacon Biscuit Roll-Ups. I always believe that quality ingredients make a world of difference in the final dish. So, let’s make sure we have everything ready!
Main Ingredients
- 1 can of refrigerated biscuit dough (about 16 oz) – I prefer the flaky layers variety for that perfect texture.
- 8 slices of bacon – Choose thick-cut bacon for a heartier bite. The flavor is simply unbeatable!
- 1/4 cup of maple syrup – Pure maple syrup is a must! It adds that rich sweetness that complements the bacon beautifully.
- 1/2 cup of shredded cheddar cheese (optional) – This adds a delightful cheesy twist, but feel free to skip it if you want to keep it classic.
Optional Add-ons
- Chopped green onions – A sprinkle of these adds a fresh, zesty flavor.
- Crushed red pepper flakes – If you like a little heat, these are a fantastic addition!
- Garlic powder – A dash of this can elevate the flavor profile even more.
- Egg wash (1 egg beaten with 1 tablespoon of water) – For a golden, glossy finish on your roll-ups.
When I shop for ingredients, I always look for the freshest options. For the bacon, I often visit my local butcher. The aroma of freshly smoked bacon is irresistible! And when it comes to maple syrup, I love supporting local producers. It’s amazing how much better the flavor is compared to the store-bought versions.
Now that we have our ingredients lined up, we’re ready to roll! Let’s move on to the next step and prepare our Maple Bacon Biscuit Roll-Ups.
How to Prepare Maple Bacon Biscuit Roll-Ups Recipe
Now that we have our ingredients ready, it’s time to roll up our sleeves and get cooking! I love the process of making these Maple Bacon Biscuit Roll-Ups. Each step is simple, yet it builds up to something truly delicious. Let’s dive into the preparation!
Step 1: Preheat the Oven
The first thing we need to do is preheat our oven to 375°F (190°C). This ensures that our roll-ups bake evenly and come out perfectly golden brown.
Tips for Preheating
- Make sure to set the oven rack to the middle position. This allows for even heat distribution.
- While the oven is heating, you can start preparing the other ingredients. It’s a great way to save time!
Step 2: Prepare the Biscuit Dough
Next, let’s get our biscuit dough ready. Open the can of refrigerated biscuit dough and separate the biscuits. I like to flatten each biscuit slightly with my hands. This makes it easier to roll them up later.
Tips for Making Dough
- Be gentle when flattening the biscuits. You want them to stay fluffy and not become too thin.
- If you’re feeling adventurous, you can even use homemade biscuit dough! Just make sure it’s chilled for the best results.
Step 3: Cook the Bacon
Now comes the fun part—cooking the bacon! I usually fry the bacon in a skillet over medium heat until it’s crispy. The smell of sizzling bacon is simply irresistible!
Tips for Cooking Bacon
- Don’t overcrowd the pan. Cook the bacon in batches if necessary to ensure it gets crispy.
- Once cooked, place the bacon on a paper towel to absorb excess grease. This keeps our roll-ups from becoming too greasy.
Step 4: Assemble the Roll-Ups
With our bacon cooked and biscuit dough ready, it’s time to assemble! Take a flattened biscuit and place a slice of bacon in the center. If you’re using cheese or any optional add-ons, sprinkle them on top of the bacon.
Tips for Assembly
- Roll the biscuit around the bacon tightly, making sure to seal the edges. This helps keep all the deliciousness inside!
- Place the roll-ups seam side down on a baking sheet lined with parchment paper. This prevents sticking and makes cleanup a breeze.
Step 5: Bake the Roll-Ups
Finally, it’s time to bake our roll-ups! Pop them in the preheated oven and let them bake for about 15-20 minutes, or until they’re golden brown and puffed up.
Tips for Baking
- Keep an eye on them towards the end of the baking time. Ovens can vary, and you want to catch them at just the right moment!
- If you’re using an egg wash, brush it on the roll-ups before baking for that beautiful golden finish.
And there you have it! The preparation of Maple Bacon Biscuit Roll-Ups is a delightful journey that fills your kitchen with mouthwatering aromas. I can’t wait for you to taste the final product!
Equipment Needed for Maple Bacon Biscuit Roll-Ups Recipe
Before we dive into the kitchen, let’s make sure we have all the necessary tools at our fingertips. Having the right equipment can make the cooking process smoother and more enjoyable. Here’s what you’ll need for our Maple Bacon Biscuit Roll-Ups:
- Baking Sheet: A standard baking sheet is essential for placing our roll-ups. If you don’t have one, a large oven-safe dish will work just fine.
- Parchment Paper: This is optional, but lining your baking sheet with parchment paper makes cleanup a breeze and prevents sticking.
- Skillet: A non-stick skillet is perfect for cooking the bacon. If you don’t have one, any frying pan will do; just be sure to keep an eye on the heat to avoid sticking.
- Rolling Pin (optional): If you prefer to roll out your biscuit dough, a rolling pin can be handy. However, you can also flatten the biscuits with your hands, which is what I usually do!
- Spatula: A spatula is great for flipping the bacon and transferring the roll-ups to the baking sheet.
- Mixing Bowl (optional): If you’re using an egg wash, a small bowl for mixing the egg and water is helpful.
With these tools in hand, you’re all set to create your Maple Bacon Biscuit Roll-Ups! Remember, cooking is all about improvisation, so feel free to use what you have. Let’s keep the fun rolling!
Variations of Maple Bacon Biscuit Roll-Ups Recipe
As a home cook, I love experimenting with recipes to keep things fresh and exciting. The Maple Bacon Biscuit Roll-Ups are no exception! Here are a few fun variations that I’ve tried and absolutely adored:
- Sweet and Spicy: Add a sprinkle of cayenne pepper or a drizzle of sriracha to the maple syrup before glazing. This gives a delightful kick that pairs beautifully with the bacon’s richness.
- Herbed Delight: Mix in some fresh herbs like rosemary or thyme into the biscuit dough. The aromatic flavors elevate the roll-ups and add a gourmet touch.
- Veggie Twist: For a vegetarian option, swap the bacon for sautéed mushrooms or spinach. You can still drizzle with maple syrup for that sweet-savory combo!
- Cheesy Goodness: Instead of cheddar, try using crumbled feta or pepper jack cheese for a different flavor profile. The creaminess adds a lovely texture to each bite.
These variations not only keep the recipe interesting but also allow you to cater to different tastes and dietary preferences. I encourage you to get creative and make these roll-ups your own! After all, cooking is all about having fun and sharing delicious moments with loved ones.
Cooking Notes for Maple Bacon Biscuit Roll-Ups Recipe
As I’ve made these Maple Bacon Biscuit Roll-Ups time and time again, I’ve picked up a few handy cooking notes that can help you achieve the best results. Here are some tips to keep in mind:
- Don’t Rush the Bacon: Cooking the bacon to the perfect crispness is key. If it’s undercooked, it can make the roll-ups soggy. Take your time and let it get nice and crispy!
- Chill the Dough: If you’re using homemade biscuit dough, chilling it for about 30 minutes before rolling can help it hold its shape better during baking.
- Experiment with Glaze: Feel free to mix up the maple syrup with a bit of brown sugar or even a splash of bourbon for a unique glaze that adds depth to the flavor.
- Storage Tips: If you have leftovers (which is rare!), store them in an airtight container in the fridge. They can be reheated in the oven for a few minutes to regain their crispiness.
- Serving Warm: These roll-ups are best enjoyed fresh out of the oven. The combination of warm biscuit, crispy bacon, and sweet maple syrup is simply irresistible!
With these cooking notes in your back pocket, you’re all set to create the most delicious Maple Bacon Biscuit Roll-Ups. Enjoy the process, and don’t forget to savor every bite!
Serving Suggestions for Maple Bacon Biscuit Roll-Ups Recipe
When it comes to serving my Maple Bacon Biscuit Roll-Ups, I love to get a little creative! These delightful treats are perfect for any occasion, and how you present them can elevate the experience even more. Here are some of my favorite serving suggestions:
- Brunch Platter: Arrange the roll-ups on a large platter alongside fresh fruit, like sliced strawberries or juicy blueberries. The vibrant colors make for a beautiful presentation!
- Maple Drizzle: Serve with extra maple syrup on the side for those who want an extra touch of sweetness. A small bowl of syrup can be a fun dipping option!
- Garnish with Herbs: A sprinkle of chopped fresh parsley or chives on top adds a pop of color and a hint of freshness that complements the flavors beautifully.
- Pair with Coffee: These roll-ups are fantastic with a hot cup of coffee or a refreshing glass of orange juice. The combination is perfect for a cozy morning!
- Make it a Meal: For a heartier option, serve the roll-ups with scrambled eggs or a side of crispy hash browns. It turns your treat into a satisfying breakfast or brunch!
These serving suggestions not only enhance the visual appeal but also create a delightful dining experience. I love sharing these roll-ups with family and friends, and I can’t wait for you to enjoy them too!
Tips for Making Maple Bacon Biscuit Roll-Ups Recipe
As I’ve whipped up these Maple Bacon Biscuit Roll-Ups countless times, I’ve gathered a treasure trove of tips that can help you achieve the best results. Here are some of my favorite nuggets of wisdom to keep in mind:
- Use Fresh Ingredients: Fresh bacon and high-quality maple syrup make a world of difference. The flavors will shine through, making your roll-ups even more delicious!
- Don’t Overfill: When assembling the roll-ups, resist the urge to overstuff them. A slice of bacon and a sprinkle of cheese are perfect. Too much filling can make them hard to roll and bake evenly.
- Seal the Edges: Make sure to pinch the edges of the biscuit dough tightly after rolling. This helps keep all the tasty goodness inside while baking.
- Experiment with Spices: Don’t hesitate to add your favorite spices to the biscuit dough or the bacon. A dash of black pepper or smoked paprika can elevate the flavor profile!
- Serve Immediately: These roll-ups are best enjoyed fresh out of the oven. The combination of warm, flaky biscuit and crispy bacon is simply irresistible!
With these tips in your back pocket, you’re all set to create the most scrumptious Maple Bacon Biscuit Roll-Ups. Enjoy the process, and remember, cooking is all about having fun and sharing delicious moments with those you love!
Breakdown of Time for Maple Bacon Biscuit Roll-Ups Recipe
As a home cook, I know that time management in the kitchen can make all the difference. When I whip up my Maple Bacon Biscuit Roll-Ups, I like to keep track of how long each step takes. Here’s a quick breakdown of the time you’ll need to create these delicious treats:
- Prep Time: Approximately 20 minutes. This includes gathering your ingredients, preheating the oven, and preparing the biscuit dough and bacon.
- Cooking Time: About 15-20 minutes. This is the time it takes to bake the roll-ups until they’re golden brown and puffed up.
- Total Time: Around 35-40 minutes. In just over half an hour, you’ll have a delightful batch of Maple Bacon Biscuit Roll-Ups ready to enjoy!
With this time breakdown, you can easily plan your cooking session. I love how quick and simple this recipe is, making it perfect for busy mornings or spontaneous brunch gatherings. Now, let’s get ready to savor these delicious roll-ups!
Nutritional Information for Maple Bacon Biscuit Roll-Ups Recipe
As a passionate home cook, I always find it helpful to know the nutritional information of the dishes I prepare. It allows me to enjoy my food while being mindful of what I’m eating. Here’s a general breakdown of the nutritional content for one serving of Maple Bacon Biscuit Roll-Ups, assuming the recipe yields about 8 roll-ups:
- Calories: Approximately 200-250 calories per roll-up, depending on the specific ingredients used.
- Protein: About 6-8 grams, thanks to the bacon and optional cheese.
- Carbohydrates: Roughly 25-30 grams, primarily from the biscuit dough.
- Fat: Around 10-15 grams, mostly from the bacon and any added cheese.
- Sugar: Approximately 3-5 grams, mainly from the maple syrup.
Keep in mind that these values can vary based on the specific brands and quantities of ingredients you use. If you’re looking to make these roll-ups a bit healthier, consider using turkey bacon or reducing the amount of cheese. I love how this recipe can be adjusted to fit different dietary needs while still being delicious!
Now that we have a better understanding of the nutritional content, let’s continue our culinary adventure with the Maple Bacon Biscuit Roll-Ups!
Frequently Asked Questions about Maple Bacon Biscuit Roll-Ups Recipe
As I’ve shared my Maple Bacon Biscuit Roll-Ups with friends and family, I’ve received quite a few questions about this delightful recipe. I love answering these queries because it shows how much people are excited to try it! Here are some of the most frequently asked questions, along with my answers:
Can I use homemade biscuit dough instead of store-bought?
Absolutely! Using homemade biscuit dough can add a personal touch to your roll-ups. Just make sure it’s chilled before rolling to achieve that perfect flaky texture. I often whip up a batch of my favorite biscuit dough when I have a little extra time!
What can I substitute for bacon?
If you’re looking for a vegetarian option, sautéed mushrooms or spinach work wonderfully. You can also try using turkey bacon or even crispy tofu for a different twist. The key is to maintain that savory flavor that complements the maple syrup.
How do I store leftovers?
If you happen to have any leftovers (which is rare in my house!), store them in an airtight container in the fridge. They can be reheated in the oven for a few minutes to regain their crispiness. I love enjoying them the next day for breakfast!
Can I make these roll-ups ahead of time?
Yes! You can prepare the roll-ups and assemble them, then cover and refrigerate them for a few hours before baking. Just remember to add a few extra minutes to the baking time if they go into the oven cold. It’s a great way to save time on busy mornings!
What’s the best way to serve these roll-ups?
These roll-ups are best served warm, straight from the oven. I love to present them on a platter with fresh fruit and a small bowl of maple syrup for dipping. It makes for a delightful brunch spread that everyone will enjoy!
These questions reflect the curiosity and excitement surrounding the Maple Bacon Biscuit Roll-Ups. I hope my answers inspire you to try this recipe and make it your own. Cooking is all about sharing experiences, and I can’t wait for you to create your own delicious memories with these roll-ups!
Conclusion on Maple Bacon Biscuit Roll-Ups Recipe
In conclusion, the Maple Bacon Biscuit Roll-Ups are more than just a recipe; they are a delightful experience that brings warmth and joy to any table. The combination of flaky biscuit, crispy bacon, and sweet maple syrup creates a symphony of flavors that dance on your taste buds. Whether you’re serving them for a cozy brunch or a festive gathering, these roll-ups are sure to impress your family and friends.
What I love most about this recipe is its versatility. You can easily customize it to suit your taste or dietary preferences, making it a dish that everyone can enjoy. Plus, the preparation is simple enough for cooks of all skill levels, allowing you to create something special without the stress.
So, why not gather your ingredients and embark on this delicious culinary adventure? I promise that each bite will remind you of the joy of cooking and the happiness it brings to those you love. Happy cooking, and enjoy every scrumptious roll-up!


