
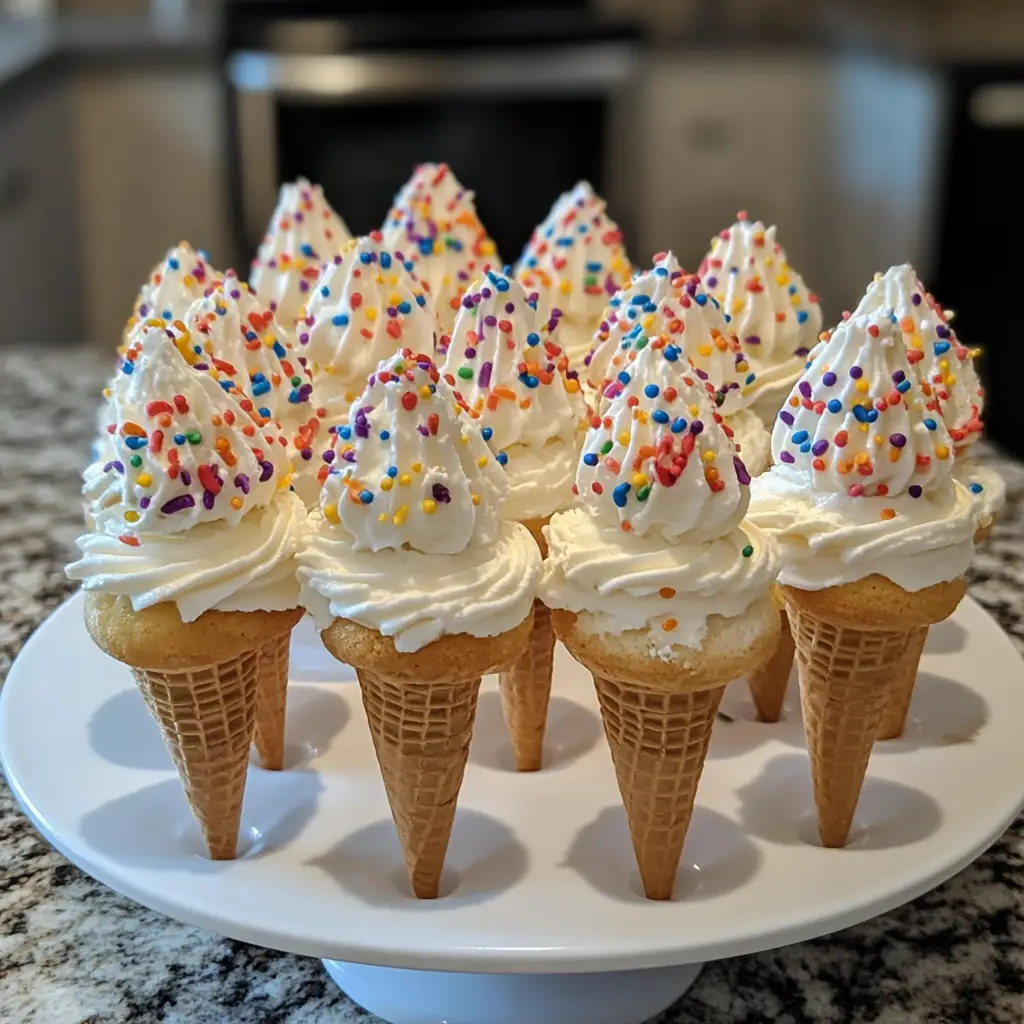
Imagine the unbridled joy of an ice cream cone meeting the whimsical, handheld delight of a cake pop. That is the magic of Ice Cream Cone Cake Pops. This ingenious dessert is a show-stopping creation that looks like a miniature soft-serve ice cream treat but is, in fact, a moist ball of cake and frosting, dipped in chocolate, and perched adorably on a cone. They are the ultimate fusion of nostalgia and modern baking creativity, perfect for birthdays, baby showers, summer parties, or any occasion that calls for a dose of pure, unadulterated fun. As a baker, I find these to be one of the most rewarding treats to make; they combine simple techniques with a truly spectacular final product that never fails to elicit smiles and delighted gasps from both children and adults alike.
Why Is This Ice Cream Cone Cake Pops So Popular?
The popularity of Ice Cream Cone Cake Pops is a testament to their genius design and universal appeal. Firstly, they are incredibly photogenic. In the age of social media, their charming, Instagram-worthy appearance makes them a star at any party. Secondly, they solve the classic party problem of portion control and mess. Each pop is a self-contained, single-serving dessert—no need for plates, forks, or slicing. The cone acts as its own edible handle, making it a clean and convenient treat for guests to enjoy. Furthermore, they offer immense creative freedom. From the color of the coating to the choice of sprinkles and decorations, they can be customized to match any theme, holiday, or color scheme. They are a conversation piece, a delicious treat, and a creative outlet, all rolled into one delightful package.
Why You’ll Love This Ice Cream Cone Cake Pops:
You will fall in love with this recipe because it transforms simple, humble ingredients into edible works of art. While they look professional and intricate, the process is surprisingly approachable and forgiving. This recipe is a fantastic way to use up leftover cake scraps or a slightly dry cake, giving it a glorious second life. The joy of decorating them is immense; it’s a fun activity to do solo while listening to music or a fantastic project to tackle with kids, letting them unleash their creativity with sprinkles. Most importantly, you will love the reaction they get. Presenting a platter of these adorable cake pops is guaranteed to be the highlight of any gathering, making you feel like a master pastry chef.
Here’s what you’ll need:
For the Cake Pop Base:
- 1 baked 9×13 cake: You can use a boxed cake mix (any flavor you like—chocolate, vanilla, and funfetti are classics) or your favorite homemade cake recipe. The cake should be completely cooled.
- ½ – ¾ cup frosting: Similarly, canned frosting works perfectly, or use a homemade buttercream or cream cheese frosting. Chocolate, vanilla, or a complementary flavor is best. Start with ½ cup and add more only if needed.
- 24 flat-bottomed ice cream cones: Also known as “wafer” or “cake” cones. The flat bottom is crucial for stability.
For the Coating and Decoration:
- 16-20 oz (approx. 2 cups) candy melting wafers: These are also known as candy melts or confectionery coating. They are available in white, chocolate, and a vast array of colors. They set harder and are easier to use than pure chocolate.
- 2 teaspoons coconut oil or vegetable shortening: This is optional but highly recommended to thin the candy melts for a smoother, easier dipping consistency.
- Sprinkles, sanding sugar, nonpareils: For decorating. Choose colors and shapes that fit your theme.
- Small edible decorations: Such as sugar pearls, mini chocolate chips, or even fondant shapes for added detail.
- Styrofoam block or a box: This is essential for holding the cake pops upright to dry without messing up the coating.
How to Make Ice Cream Cone Cake Pops:
Now that you have your ingredients ready, let’s dive into the steps for making this delightful Ice Cream Cone Cake Pops. It’s a process of crumbling, rolling, dipping, and decorating—a truly therapeutic baking session that yields incredible results!
Step 1: Create the Cake Crumbs
Begin by taking your fully cooled cake and crumbling it into a large bowl. You can do this with your hands, a fork, or even a stand mixer with a paddle attachment on low speed. You want fine, uniform crumbs with no large chunks.
Step 2: Bind with Frosting
Add your frosting to the cake crumbs, starting with ½ cup. Use a spatula or your hands to mix it thoroughly. The mixture is ready when it can hold its shape when pressed together. It should be moist and moldable but not overly sticky or greasy. If it’s too dry, add a tablespoon more frosting at a time. Be careful not to add too much, as this will make the balls heavy and difficult to stay on the cone.
Step 3: Form the Cake Balls
Using a small cookie scoop or a tablespoon, portion out the cake mixture. Roll each portion into a tight, smooth ball. Place the rolled balls on a baking sheet lined with parchment paper. You should get about 24-30 balls, depending on their size. Once all are rolled, place the entire baking sheet in the freezer for 15-20 minutes. This chilling step is critical as it firms up the balls, making them much easier to handle and attach to the cones.
Step 4: Attach the Balls to the Cones
Remove the cake balls from the freezer. Take a candy melt wafer or a small dab of your reserved frosting and place it inside the top of an ice cream cone. This acts as the “glue.” Gently but firmly press a chilled cake ball onto the top of the cone, securing it in place. Repeat with all cones and return them to the baking sheet. Place the entire sheet back into the freezer for a final 15-minute chill. This sets the “glue” and ensures the cake ball is very cold, which will help the coating set quickly later.
Step 5: Melt the Coating
While the cake pops are chilling, melt your candy wafers. Place them in a deep, microwave-safe bowl along with the coconut oil or shortening. Microwave in 30-second intervals, stirring thoroughly between each interval, until the mixture is completely smooth and fluid. Do not overheat, as this can cause the coating to seize and become thick and clumpy. If using multiple colors, melt them in separate bowls.
Step 6: Dip and Coat the Cake Pops
Remove a few cake pops from the freezer at a time (keeping the rest cold). Holding a cone by its tip, carefully dip the cake ball into the melted candy coating. Submerge it completely, then gently lift it out.
- Pro Tip: Slowly twist the pop as you lift it to allow the excess coating to drip off smoothly, creating a neat, even layer that resembles a swirl of soft-serve ice cream. Do not stir or shake it.
Step 7: Decorate and Dry
Immediately after dipping, while the coating is still wet, hold the pop over a separate bowl and generously add your sprinkles and decorations. Then, carefully poke the tip of the cone into your Styrofoam block or a box to hold it upright while the coating fully hardens. This prevents flat spots and keeps the “ice cream” look perfectly round. Allow them to set completely for at least 30 minutes at room temperature.
Tips for Success:
- The Chill is Key: Never skip chilling the cake balls before and after attaching them to the cones. A cold cake pop is much easier to dip and prevents it from falling off the cone into the coating.
- Avoid Frosting Overload: Using too much frosting will create a heavy, greasy cake ball that can slide off the cone. The mixture should just hold together.
- Fight Coating Clumps: If your melted candy coating becomes too thick, add a tiny bit more coconut oil (½ tsp at a time) and remelt gently.
- Work in Batches: Only take 3-4 cake pops out of the freezer at a time to dip. This keeps them firm and manageable.
- No Styrofoam? Use an upside-down egg carton or a colander to hold the pops upright.
Equipment Needed:
- Large mixing bowl
- Baking sheet
- Parchment paper
- Microwave-safe bowls (for melting coating)
- Whisk or spoons for stirring
- Styrofoam block or a box (for drying)
- Small cookie scoop (optional but helpful for even sizing)
Variations of Ice Cream Cone Cake Pops:
- Flavor Combinations: Get creative! Try red velvet cake with cream cheese frosting dipped in white chocolate, or lemon cake with vanilla frosting dipped in yellow candy coating and rolled in graham cracker crumbs for a “lemergency” pop.
- “Dipped Cone”: After the main coating has set, dip the very top of the “scoop” in a different colored melt to mimic a chocolate-dipped cone.
- “Sundae” Pops: Before the coating sets, place a single round sprinkle on top to look like a cherry.
- “Waffle Cone” Look: Use a food-safe marker to draw a criss-cross pattern on the cone itself before assembling.
Serving Suggestions for Ice Cream Cone Cake Pops:
Stand them upright in a tall glass filled with decorative sprinkles or coffee beans to create a stunning centerpiece. Arrange them on a tiered dessert stand for a dramatic effect. For a party favor, place each finished pop in a clear cellophane bag tied with a ribbon for guests to take home.
Prep Time: 1 hour 30 minutes (includes chilling time)
Cooking Time: 0 minutes (using pre-baked cake)
Total Time: 1 hour 30 minutes
Nutritional Information (per pop, estimated):
- Calories: ~220 kcal
- Protein: 2g
- Sodium: 150mg
- Sugar: 25g
- Fat: 10g
- Carbohydrates: 32g
- Fiber: 0.5g
Please note: This is a rough estimate and can vary significantly based on the specific cake mix, frosting, and coating brands and amounts used.
FAQs about Ice Cream Cone Cake Pops:
Q: Can I make these ahead of time?
A: Absolutely! They are perfect for making ahead. Once fully set, store them in a single layer in an airtight container at room temperature for up to 2 days. For longer storage, they can be refrigerated for up to a week.
Q: Why did my cake ball fall off into the coating?
A: This usually happens for two reasons: 1) The cake ball was not chilled enough before dipping, causing it to soften and detach. 2) Too much frosting was used, making the ball too heavy. Ensure a good chill and use just enough frosting to bind.
Q: My candy coating is too thick and lumpy. How can I fix it?
A: This means it was likely overheated. Try adding a small amount of additional coconut oil or paramount crystals (½ tsp at a time) and gently re-melting it, stirring vigorously until smooth.
Q: Can I use real chocolate instead of candy melts?
A: You can, but it requires an extra step. You must use “tempered” chocolate, or it will not set hard and shiny at room temperature. Candy melts are formulated to set perfectly without tempering.
Q: How do I transport these without ruining them?
A: The best method is to stand them upright in a cardboard box or a tall, rigid container. You can pre-poke holes in the bottom of the box to slot the cone tips into, keeping them secure during travel.
Final Thoughts:
Creating Ice Cream Cone Cake Pops is more than just following a recipe; it’s an experience. It’s about the tactile joy of rolling cake between your palms, the mesmerizing swirl of colorful chocolate, and the simple pleasure of showering them with sparkling sprinkles. The process is a delightful craft that yields not just desserts, but tiny, edible tokens of celebration. They prove that with a little creativity and patience, you can transform basic ingredients into pure magic. So, gather your supplies, embrace the fun, and get ready to serve up a heaping dose of happiness on a cone. Your friends and family will be utterly amazed, and you’ll be so proud of the beautiful, delicious treats you created with your own hands.


