
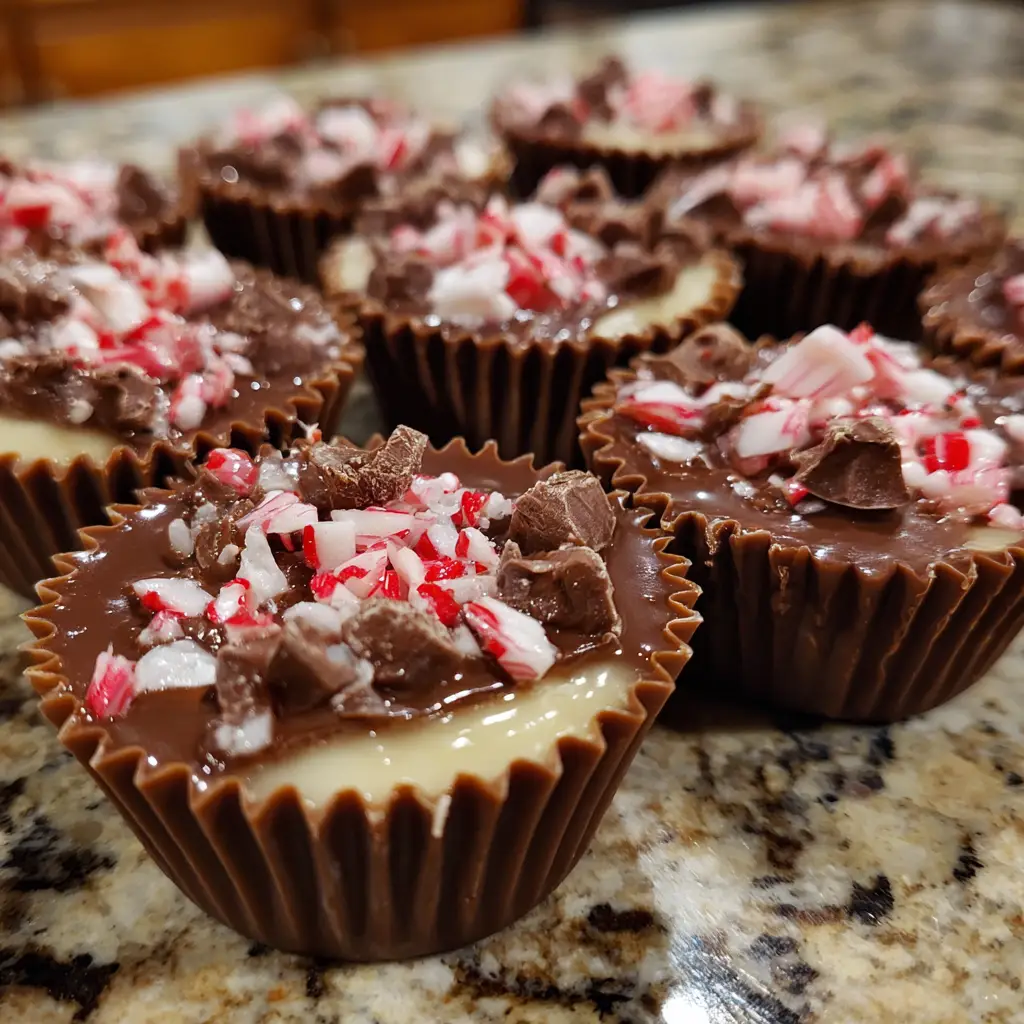
Holiday Candy Cane Fudge Cups are the ultimate festive confection, a whimsical, decadent, and irresistibly charming treat that distills the magic of the holiday season into a single, bite-sized indulgence. Imagine a creamy, ultra-smooth, and impossibly rich white chocolate fudge, infused with the cool, refreshing essence of pure peppermint, then artfully swirled with vibrant red and green food coloring to create a mesmerizing marbled effect. Each portion is individually cradled in a delicate fluted foil or paper cup, making them as beautiful to behold as they are to eat. The crowning glory is a sprinkle of crushed candy cane pieces, which add a delightful crunch and a burst of authentic peppermint flavor, along with a dusting of edible glitter or sparkling sugar for a touch of winter wonderland sparkle. These are not your standard slab fudge; their individual presentation elevates them into edible ornaments, perfect for gifting, adorning holiday dessert trays, or serving as a sweet finale to a festive meal.
Why Is This Holiday Candy Cane Fudge Cups Recipe So Popular?
The explosive popularity of this recipe lies in its perfect synergy of holiday spirit, effortless preparation, and stunning visual appeal. First, it is incredibly easy and no-bake, making it accessible to cooks of all skill levels, including children, and eliminating the stress of holiday baking. Second, it embodies iconic holiday flavors and aesthetics. The combination of peppermint and white chocolate is a quintessential Christmas pairing, and the red and green swirls with sparkling sugar are instantly recognizable and festive. Third, the individual portioning is a game-changer. It eliminates the mess of slicing fudge, makes serving and gifting effortless, and creates a professional, polished look that feels special. Furthermore, its popularity is fueled by its versatility as the perfect homemade gift. Packaged in a festive box or tin, these fudge cups become a heartfelt, personalized present that shows care and creativity. They are popular because they deliver maximum festive impact with minimal effort, creating a treat that is both delicious and a joy to give and receive.
Why You’ll Love This Holiday Candy Cane Fudge Cups:
- No-Bake & Foolproof: Simple stovetop steps with no fancy equipment or baking required—success is virtually guaranteed.
- Stunning Holiday Presentation: The marbled colors and individual cups look like they came from a gourmet chocolatier.
- Perfect Make-Ahead Treat: They need time to set, making them ideal for preparing days or even weeks before the holiday rush.
- Ideal for Gifting: Easy to package beautifully and transport, making them the perfect edible holiday gift for neighbors, teachers, and friends.
- Fun to Customize: Easily adjust colors, use different extracts, or add mix-ins to create your own signature version.
Here’s what you’ll need:
For the Fudge Base:
- 3 cups (18 oz / 510g) high-quality white chocolate baking bars, finely chopped (not white chocolate chips)
- 1 (14 oz / 397g) can sweetened condensed milk (full fat, not evaporated milk)
- 3 tablespoons unsalted butter
- ¼ teaspoon fine sea salt
- 1 ½ teaspoons pure peppermint extract (NOT mint extract—see note)
- 1 teaspoon pure vanilla extract (to round out the flavor)
For Color & Decoration:
- Red gel food coloring
- Green gel food coloring
- ½ cup (about 4-5 standard) candy canes or peppermint candies, finely crushed (divided)
- Edible glitter, sparkling sugar, or crushed white sanding sugar
- Optional: 2-3 drops of candy cane or peppermint oil (for an extra intense flavor punch)
Special Equipment:
- Mini muffin tin (for standard 24-cup size)
- 48 mini fluted foil or parchment paper cups (You will double-cup each for stability)
- Piping bags or small zip-top bags (optional, for precise swirling)
- Candy thermometer (optional but helpful)
How to Make Holiday Candy Cane Fudge Cups:
Now that you have your ingredients ready, let’s dive into the steps for making this delightful Holiday Candy Cane Fudge Cups. It’s as easy as pie, and I promise you’ll feel like a culinary superstar!
Step 1: Prepare the Pan and Cups
Nest two mini fluted paper or foil cups together for each fudge cup—this provides extra stability and a neater appearance. Place each double-layered cup securely into the wells of a mini muffin tin. This tin will hold the cups in perfect shape as the fudge sets. Have all your coloring and decorations ready.
Step 2: Melt the Fudge Base
In a medium, heavy-bottomed saucepan, combine the sweetened condensed milk, butter, and salt. Heat over medium-low heat, stirring constantly with a silicone spatula, until the butter is fully melted and the mixture is smooth and begins to steam slightly. Do not let it boil. Reduce the heat to low. Add all of the finely chopped white chocolate. Stir continuously until the chocolate is completely melted and the mixture is smooth, glossy, and uniform. This should take 5-7 minutes. Important: Keep the heat low to prevent the white chocolate from scorching or seizing.
Step 3: Flavor and Divide the Fudge
Once smooth, remove the saucepan from the heat. Stir in the peppermint extract and vanilla extract until fully incorporated. Immediately divide the fudge mixture evenly into three separate bowls. A kitchen scale is helpful here for precision, but aim for roughly equal portions.
Step 4: Color the Fudge Portions
Leave one portion plain white. To the second portion, add red gel food coloring, a drop or two at a time, stirring until you achieve a vibrant, festive red. To the third portion, add green gel food coloring until you reach a deep holly-green color. Gel coloring is preferred over liquid as it provides vibrant color without thinning the fudge.
Step 5: Layer and Swirl the Fudge into Cups
Working quickly before the fudge begins to set, spoon small amounts of each color into the prepared cups. You can do this randomly for a rustic look, or use a more precise method: transfer each colored fudge to a separate piping bag or small zip-top bag with a corner snipped off. Pipe small dollops of each color into each cup, layering them. Once all cups have a base of colored fudge, use a toothpick, wooden skewer, or a pin tool to gently swirl the colors together. Aim for just 2-3 swirls to create a beautiful marbled effect without blending them into a muddy brown.
Step 6: Decorate with Candy Canes and Sparkle
While the fudge surface is still soft and tacky, immediately sprinkle the top of each cup with the crushed candy cane pieces, pressing gently to adhere. Follow with a light sprinkle of edible glitter or sparkling sugar for a magical, frosty finish.
Step 7: Set and Serve
Allow the fudge cups to set at room temperature for 1 hour, then transfer the entire muffin tin to the refrigerator. Chill for at least 2-3 hours, or until completely firm. Once set, they can be stored in an airtight container in the refrigerator or a cool place. Serve directly from the cups. Let them sit at room temperature for 10-15 minutes before serving for the best creamy texture.
Tips for Success:
- Use a Baking Bar, Not Chips: White chocolate chips contain stabilizers that prevent smooth melting and can cause grainy fudge. A high-quality baking bar (like Ghirardelli or Baker’s) is essential.
- Low and Slow Melting: Patience is key. Melting the chocolate over low heat while stirring constantly prevents scorching and ensures a silky-smooth texture.
- Pure Peppermint Extract is Non-Negotiable: Imitation extract can taste medicinal. Pure peppermint extract delivers a clean, bright flavor.
- Gel Food Coloring: Liquid food coloring can cause the fudge to seize or become runny. Gel or paste coloring provides intense color without altering consistency.
- Double-Cup for Structure: The double layer of fluted cups prevents the fudge from leaking and makes them much easier to handle and gift.
- Decorate Immediately: Sprinkle the candy cane and glitter onto the fudge while it’s still wet so it sticks perfectly.
Equipment Needed:
- Mini Muffin Tin (24-cup standard)
- 48+ Mini Fluted Foil or Parchment Paper Cups
- Heavy-Bottomed Saucepan
- Silicone Spatula
- Small Bowls for Dividing Fudge
- Toothpicks or Wooden Skewers
- Plastic Bag or Plastic Wrap for Crushing Candy Canes
- Rolling Pin or Meat Mallet (for crushing candy)
Variations of Holiday Candy Cane Fudge Cups:
- Chocolate Peppermint Swirl: Replace the white chocolate base with semi-sweet or dark chocolate. Swirl in plain white fudge for a classic peppermint patty effect.
- Eggnog Fudge Cups: Use white chocolate, but replace peppermint extract with rum extract and add a pinch of nutmeg and cinnamon to the base.
- Cookies & Cream: Stir crushed Oreo cookies into the plain white fudge before portioning, omitting peppermint and food coloring.
- Salted Caramel Peppermint: Layer a small dollop of thick salted caramel sauce in the bottom of the cup before adding the fudge, then top with candy cane.
- Vegan/Dairy-Free: Use dairy-free white chocolate, vegan condensed milk (coconut based), and vegan butter.
- Adult-Only: Add 1-2 tablespoons of peppermint schnapps or crème de menthe in place of a portion of the extract.
Serving Suggestions for Holiday Candy Cane Fudge Cups:
- On a Dessert Tray: Arrange on a tiered stand with other holiday cookies and candies for a stunning display.
- As a Party Favor: Place each cup in a small cellophane bag tied with a ribbon and a gift tag.
- With After-Dinner Coffee: Serve alongside espresso or hot cocoa as a sweet, festive finale.
- In a Gift Box/Tin: Layer them in a festive holiday tin between sheets of parchment paper for a beautiful homemade gift.
- As a Holiday Buffet Item: Label them charmingly and let guests help themselves.
Prep Time:
25 minutes
Cooking Time:
10 minutes
Total Time:
35 minutes (plus 3+ hours setting time)
Nutritional Information:
(Estimated per fudge cup, based on 24 cups)
- Calories: ~180
- Protein: 2g
- Sodium: ~45mg
- Sugar: 22g
- Fat: 9g (Saturated Fat: 5g)
- Carbohydrates: 24g
- Fiber: 0g
FAQs about Holiday Candy Cane Fudge Cups:
Q: My fudge is grainy. What went wrong?
A: Graininess is almost always due to the white chocolate being overheated and seizing, or using white chocolate chips which don’t melt properly. Use a baking bar, melt over very low heat, and stir constantly.
Q: Can I make this without a mini muffin tin?
A: Yes, the tin simply provides support. You can place the double-layered cups closely together on a baking sheet or tray. They may just be slightly less uniform in shape.
Q: How far in advance can I make these?
A: Perfectly! They keep wonderfully for up to 2 weeks stored in an airtight container in the refrigerator. The flavors even improve over a few days.
Q: Can I freeze them?
A: Absolutely. Freeze in a single layer on a tray, then transfer to an airtight container. They will keep for 2-3 months. Thaw in the refrigerator overnight.
Q: The colors blended too much when I swirled.
A: You may have swirled too aggressively or the fudge was too warm. Let it cool slightly in the bowls before layering, and use a very gentle hand when swirling—less is more.
Q: What can I use instead of candy canes?
A: You can use crushed peppermint candies, peppermint baking chips, or for a non-peppermint version, use crushed freeze-dried raspberries or holiday sprinkles.
Final Thoughts:
Holiday Candy Cane Fudge Cups are more than just a sweet treat; they are a tangible piece of holiday cheer, a craft, and a heartfelt gift all rolled into one delightful package. This recipe celebrates the joy of creating something beautiful and delicious with your own hands, without the pressure of complex baking. The process of melting, coloring, swirling, and decorating is fun, festive, and deeply satisfying. The final result—a tray of these sparkling, marbled, minty confections—is guaranteed to bring smiles and spark holiday conversations. They are the perfect edible project to undertake with family, the ultimate last-minute hostess gift, and a surefire way to make your holiday dessert table unforgettable. So, gather your cups and colors, chop that fine white chocolate, and prepare to create a batch of these enchanting fudge cups that truly capture the sweet, sparkling spirit of the season
Print
Holiday Candy Cane Fudge Cups: Festive, Creamy & No-Bake
- Total Time: 35 minutes
Description
Rich, creamy white chocolate fudge cups swirled with peppermint and topped with crushed candy canes. An easy, festive no-bake treat perfect for holiday sharing.
Ingredients
For the Fudge Base:
-
3 cups (18 oz / 510g) high-quality white chocolate baking bars, finely chopped (not white chocolate chips)
-
1 (14 oz / 397g) can sweetened condensed milk (full fat, not evaporated milk)
-
3 tablespoons unsalted butter
-
¼ teaspoon fine sea salt
-
1 ½ teaspoons pure peppermint extract (NOT mint extract—see note)
-
1 teaspoon pure vanilla extract (to round out the flavor)
For Color & Decoration:
-
Red gel food coloring
-
Green gel food coloring
-
½ cup (about 4–5 standard) candy canes or peppermint candies, finely crushed (divided)
-
Edible glitter, sparkling sugar, or crushed white sanding sugar
-
Optional: 2-3 drops of candy cane or peppermint oil (for an extra intense flavor punch)
Special Equipment:
-
Mini muffin tin (for standard 24-cup size)
-
48 mini fluted foil or parchment paper cups (You will double-cup each for stability)
-
Piping bags or small zip-top bags (optional, for precise swirling)
-
Candy thermometer (optional but helpful)
Instructions
Step 1: Prepare the Pan and Cups
Nest two mini fluted paper or foil cups together for each fudge cup—this provides extra stability and a neater appearance. Place each double-layered cup securely into the wells of a mini muffin tin. This tin will hold the cups in perfect shape as the fudge sets. Have all your coloring and decorations ready.
Step 2: Melt the Fudge Base
In a medium, heavy-bottomed saucepan, combine the sweetened condensed milk, butter, and salt. Heat over medium-low heat, stirring constantly with a silicone spatula, until the butter is fully melted and the mixture is smooth and begins to steam slightly. Do not let it boil. Reduce the heat to low. Add all of the finely chopped white chocolate. Stir continuously until the chocolate is completely melted and the mixture is smooth, glossy, and uniform. This should take 5-7 minutes. Important: Keep the heat low to prevent the white chocolate from scorching or seizing.
Step 3: Flavor and Divide the Fudge
Once smooth, remove the saucepan from the heat. Stir in the peppermint extract and vanilla extract until fully incorporated. Immediately divide the fudge mixture evenly into three separate bowls. A kitchen scale is helpful here for precision, but aim for roughly equal portions.
Step 4: Color the Fudge Portions
Leave one portion plain white. To the second portion, add red gel food coloring, a drop or two at a time, stirring until you achieve a vibrant, festive red. To the third portion, add green gel food coloring until you reach a deep holly-green color. Gel coloring is preferred over liquid as it provides vibrant color without thinning the fudge.
Step 5: Layer and Swirl the Fudge into Cups
Working quickly before the fudge begins to set, spoon small amounts of each color into the prepared cups. You can do this randomly for a rustic look, or use a more precise method: transfer each colored fudge to a separate piping bag or small zip-top bag with a corner snipped off. Pipe small dollops of each color into each cup, layering them. Once all cups have a base of colored fudge, use a toothpick, wooden skewer, or a pin tool to gently swirl the colors together. Aim for just 2-3 swirls to create a beautiful marbled effect without blending them into a muddy brown.
Step 6: Decorate with Candy Canes and Sparkle
While the fudge surface is still soft and tacky, immediately sprinkle the top of each cup with the crushed candy cane pieces, pressing gently to adhere. Follow with a light sprinkle of edible glitter or sparkling sugar for a magical, frosty finish.
Step 7: Set and Serve
Allow the fudge cups to set at room temperature for 1 hour, then transfer the entire muffin tin to the refrigerator. Chill for at least 2-3 hours, or until completely firm. Once set, they can be stored in an airtight container in the refrigerator or a cool place. Serve directly from the cups. Let them sit at room temperature for 10-15 minutes before serving for the best creamy texture
Notes
-
Mini Muffin Tin (24-cup standard)
-
48+ Mini Fluted Foil or Parchment Paper Cups
-
Heavy-Bottomed Saucepan
-
Silicone Spatula
-
Small Bowls for Dividing Fudge
- Prep Time: 25 minutes
- Category: dessert
- Cuisine: American
Nutrition
- Calories: 180
- Sugar: 22g
- Sodium: 45mg
- Fat: 9g
- Saturated Fat: 5g
- Carbohydrates: 24g
- Protein: 2g


