In the realm of quick, addictive, and crowd-pleasing appetizers, few recipes have achieved the viral, cult-like status of the Pillsbury Biscuit Garlic Butter Cheese Bomb. This recipe is a masterclass in culinary alchemy, transforming a few humble, inexpensive ingredients into pure, unadulterated bliss. Imagine: a fluffy, pull-apart biscuit pillow encasing a core of molten, stretchy mozzarella cheese, all brushed with a generous coating of savory, garlic-infused butter and sprinkled with herbs.
Why Is This Pillsbury Biscuit Garlic Butter Cheese Bombs So Popular?
The popularity of this recipe is not accidental; it’s built on a foundation of irresistible attributes that cater to the modern cook and eater. First and foremost is the jaw-dropping ease and speed. Utilizing a can of Pillsbury biscuits, a staple of convenience, means there’s no need for yeast, proofing, or dough-making. The entire process from can to table is often under 30 minutes, making it accessible to anyone, regardless of baking skill. Secondly, it taps into a powerful nostalgic comfort. The combination of warm bread, melted cheese, and garlic butter is a trifecta of comfort foods that evokes feelings of family gatherings, pizza nights, and the irresistible allure of freshly baked bread. Furthermore, its visual and textural appeal is hugely impactful on social media. The “pull-apart” moment, revealing a long, stretchy cheese pull, is a viral video waiting to happen, making it a digitally-native recipe phenomenon. Finally, its versatility is key. It can be adapted with different cheeses, stuffings, and dips, ensuring it never gets boring.
Why You’ll Love This Pillsbury Biscuit Garlic Butter Cheese Bombs:
- Unbelievably Quick & Easy: From fridge to oven in under 10 minutes, with a total bake time of just 15-20 minutes. It’s the definition of a quick fix.
- Minimal Ingredients: You only need four core ingredients, with optional herbs for garnish. It’s a budget-friendly wonder.
- The Ultimate Crowd-Pleaser: It is physically impossible for someone to not enjoy a warm, cheesy, garlicky bread ball. They will disappear from the plate in minutes.
- Highly Customizable: The base recipe is a canvas for your creativity. Add pepperoni, different cheeses, or brush with everything bagel seasoning for endless variations.
- Perfect for Any Occasion: Equally suited for a Super Bowl party, a kid’s sleepover, a party appetizer, or a indulgent solo snack.
Here’s what you’ll need:
For the Cheese Bombs:
- 1 (16.3 oz) can Pillsbury Grands!™ Flaky Layers Biscuits: This is the ideal size. The “Grands” version provides enough dough to properly encase the cheese cube. Do not use the smaller, “original” biscuits.
- 4-5 sticks (approx. 4-5 oz) low-moisture, part-skim mozzarella string cheese: This is the secret to a perfect, non-leaky melt. String cheese is designed to melt beautifully and stretch. You will cut each stick in half.
- Optional Fillings: 40-50 small pepperoni slices, 1-2 teaspoons of finely chopped pepperoncini, or a small slice of cooked sausage for each bomb.
For the Garlic Butter Glaze:
- 3 tablespoons unsalted butter: Salted butter can be used, but you may want to reduce any added salt later.
- 2 large cloves garlic, minced finely: About 1 heaping tablespoon. For maximum flavor, use fresh garlic.
- ½ teaspoon Italian seasoning: A blend of dried oregano, basil, thyme, and rosemary.
- ¼ teaspoon garlic powder: This double garlic hit provides a deeper, toasted garlic flavor.
- ⅛ teaspoon onion powder: Adds a subtle savory-sweet background note.
- 1 tablespoon fresh parsley, finely chopped: For garnish and a burst of fresh color and flavor.
- Optional for Topping: 2 tablespoons of grated Parmesan cheese and a pinch of flaky sea salt.
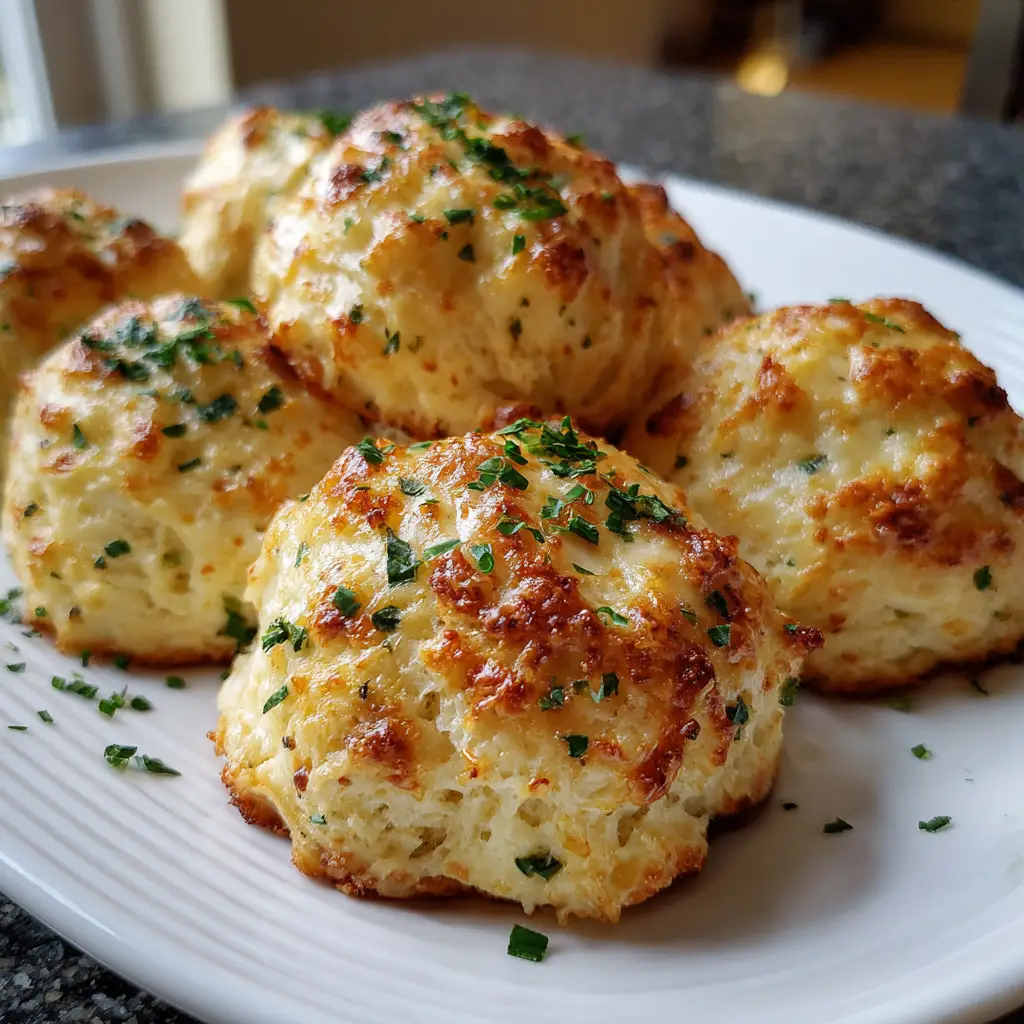
How to Make Pillsbury Biscuit Garlic Butter Cheese Bombs
Now that you have your ingredients ready, let’s dive into the steps for making this delightful Pillsbury Biscuit Garlic Butter Cheese Bombs. It’s as easy as pie, and I promise you’ll feel like a culinary superstar!
Step 1: Prepare the Garlic Butter Glaze
Before you handle the dough, prepare the glaze so it’s ready to use. In a small, microwave-safe bowl, combine the 3 tablespoons of butter, minced garlic, Italian seasoning, garlic powder, and onion powder. Microwave in 20-second intervals, stirring in between, until the butter is fully melted. Alternatively, you can melt this mixture in a small saucepan over low heat. Once melted, set it aside to allow the flavors to meld. Stir in the fresh parsley just before brushing to keep it vibrant.
Step 2: Preheat Oven and Prepare Pan
Preheat your oven to 375°F (190°C). This is the standard temperature for these biscuits. Take a standard muffin tin and generously grease 8-10 cups with non-stick cooking spray or a bit of butter. Using a muffin tin is crucial as it helps the bombs hold their round shape and prevents any melted cheese from leaking all over your baking sheet.
Step 3: Separate and Flatten the Biscuits
Open the can of biscuits (the satisfying “pop” is part of the experience!). Separate the 8 biscuits. On a clean, dry surface, gently flatten and stretch each biscuit into a circle about 4-5 inches in diameter. The center should be slightly thicker than the edges to prevent the cheese from breaking through.
Step 4: Add Cheese and Fillings
Take a half-stick of mozzarella string cheese and place it in the center of a flattened biscuit. If you are adding any optional fillings like pepperoni, place 3-4 slices on top of the cheese stick now.
Step 5: Form the “Bombs”
This is the most important step. Gather the edges of the biscuit dough up and over the cheese, pinching them firmly at the top to create a tight seal. There should be no cheese visible. Gently roll the sealed dough ball between your palms to smooth it out and ensure it’s perfectly round. The seal must be secure to contain the molten cheese during baking.
Step 6: Place in Pan and Glaze
Place each sealed dough ball, seam-side down, into a prepared cup of your muffin tin. Using a pastry brush, generously brush the top and sides of each bomb with the prepared garlic butter glaze. Reserve about half of the glaze for a second application after baking.
Step 7: Bake to Golden Perfection
Place the muffin tin in the preheated oven and bake for 14-18 minutes. Watch for a deep, golden brown color on the top and sides. The biscuits should be puffed up and beautifully browned.
Step 8: The Final Glaze and Serve
As soon as you remove the pan from the oven, immediately brush the remaining garlic butter glaze over the hot bombs. This second coating is essential for an intense garlic butter flavor and a gorgeous glossy finish. If using, sprinkle immediately with grated Parmesan cheese and a pinch of flaky salt. Let them cool in the pan for exactly 2-3 minutes—this allows the cheese to set slightly, preventing a lava-like burn, but keeps them warm and gooey. Use a spoon or offset spatula to carefully remove them from the tin. Serve immediately while the cheese is at its peak stretchiness.
Tips for Success:
- The Seal is Sacred: Pinch the dough together thoroughly. If the seal is weak, the cheese will leak out during baking.
- Don’t Overstretch: Stretching the dough too thin can create holes that the cheese will escape from.
- Use a Muffin Tin: This is non-negotiable for the classic round shape and contained baking.
- Serve Immediately: These are at their absolute prime within 10 minutes of leaving the oven. The cheese pull is most dramatic when they are fresh and hot.
- Double the Glaze: If you are a garlic butter fanatic, consider making 1.5 times the glaze recipe for an extra decadent finish.
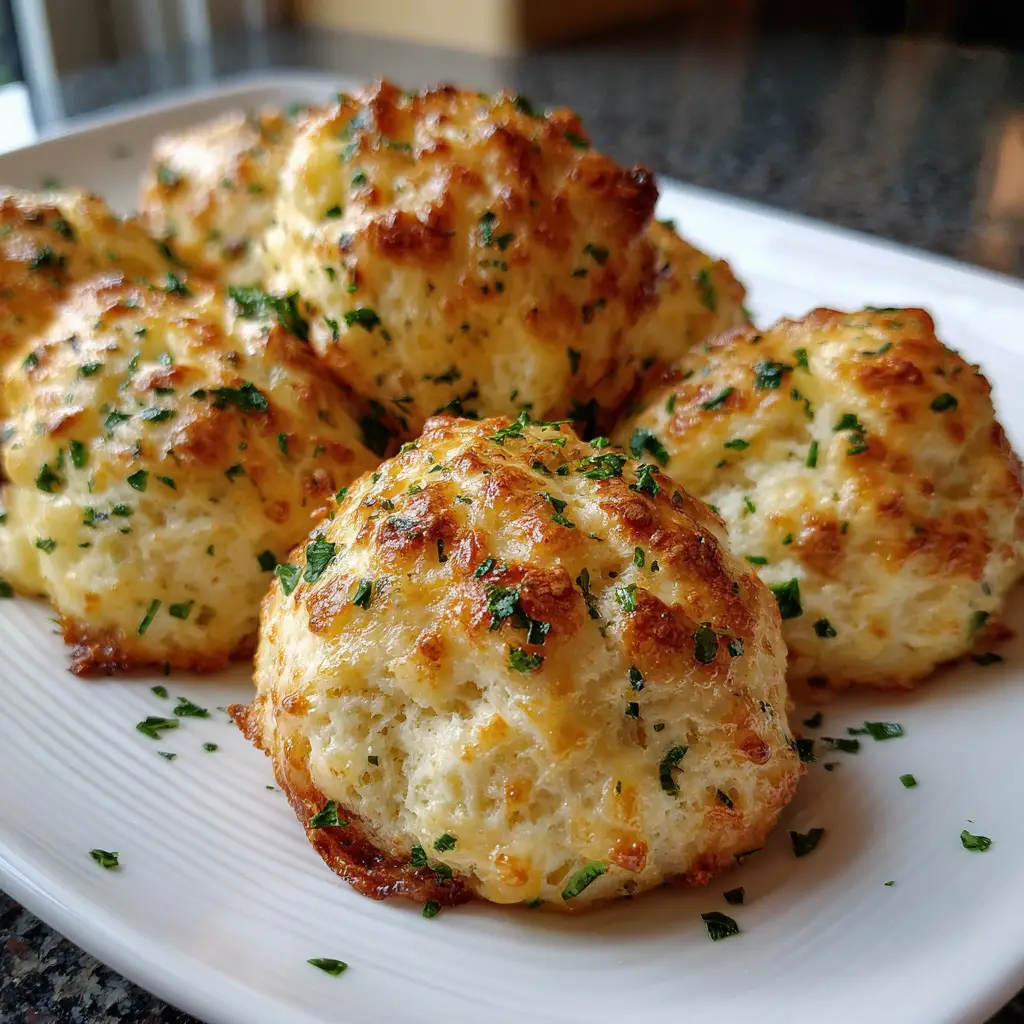
Equipment Needed:
- Standard 12-Cup Muffin Tin
- Small Microwave-Safe Bowl or Saucepan
- Pastry Brush
- Measuring Spoons
- Cutting Board
- Sharp Knife (for cutting string cheese)
Variations of Pillsbury Biscuit Garlic Butter Cheese Bombs:
- Pepperoni Pizza Bombs: Add 4-5 mini pepperoni and a small teaspoon of marinara sauce inside with the cheese. Serve with extra marinara for dipping.
- Everything Bagel Bombs: Replace the garlic butter glaze with an egg wash and sprinkle the tops generously with everything bagel seasoning before baking.
- Jalapeño Popper Bombs: Add a few finely diced jalapeños (fresh or pickled) and a half-teaspoon of cream cheese inside with the mozzarella.
- Cinnamon Sugar Bombs: For a sweet version, omit the garlic and herbs. Fill with a marshmallow or a cube of cream cheese. After baking, brush with melted butter and roll in a mixture of cinnamon and sugar.
- Three-Cheese Bombs: Use a blend of cheeses inside, such as a piece of mozzarella string cheese with a small cube of cheddar and a pinch of shredded provolone.
Serving Suggestions for Pillsbury Biscuit Garlic Butter Cheese Bombs:
- The Classic Dipper: Serve a platter of warm bombs with a side of warm marinara sauce, ranch dressing, or a creamy garlic aioli for dipping.
- As a Side Dish: These are the perfect, indulgent side to a bowl of pasta, a hearty salad, or a warm bowl of tomato soup.
- Game Day Spread: Arrange them on a platter alongside wings, nachos, and other finger foods.
- Party Appetizer: Skewer each bomb with a decorative toothpick for easy grabbing and minimal mess.
Prep Time:
10 minutes
Cooking Time:
15-18 minutes
Total Time:
25-28 minutes
Nutritional Information
(Please note: This is an estimated calculation per cheese bomb, based on the recipe making 8 bombs.)
- Calories: ~250 kcal
- Protein: 8g
- Sodium: ~650mg
- Sugar: 4g
- Fat: 14g (Saturated Fat: 6g)
- Carbohydrates: 23g
- Fiber: 0g
FAQs about Pillsbury Biscuit Garlic Butter Cheese Bombs:
Q: Can I make these ahead of time?
A: You can assemble the bombs up to 2 hours ahead of time. Keep them covered in the refrigerator on the muffin tin until you are ready to bake. You may need to add 1-2 minutes to the baking time since they will be cold.
Q: Can I use shredded mozzarella instead of string cheese?
A: It is not recommended. Shredded mozzarella has a cellulose coating to prevent clumping and contains more moisture, making it much more likely to leak out and create a mess. String cheese is the superior choice for a clean, stretchy pull.
Q: My cheese leaked out! What did I do wrong?
A: The two most common reasons are 1) an incomplete seal on the dough, or 2) the dough was stretched too thin, creating a weak spot. Ensure you have a thick, well-pinched seal.
Q: Can I use a different canned dough?
A: Yes, you can use other brands of jumbo-sized flaky biscuits. Canned crescent roll dough can also be used, though you will need to press the perforations together to form a solid sheet of dough before filling.
Q: How do I store and reheat leftovers?
A: Store cooled leftovers in an airtight container in the refrigerator for up to 2 days. Reheat in an air fryer at 350°F for 3-4 minutes or in a conventional oven at 350°F for 5-8 minutes. The microwave will make them soft and chewy, not crisp.
Final Thoughts:
The Pillsbury Biscuit Garlic Butter Cheese Bomb is more than just a recipe; it’s a phenomenon for a reason. It perfectly encapsulates the joy of cooking something that feels special and indulgent without requiring any stress or advanced planning. The process is fun, the result is spectacular, and the taste is universally adored. It’s a recipe that builds confidence in novice cooks and provides a reliable, guaranteed-success option for seasoned entertainers. So the next time you hear that iconic can “pop,” think beyond the basic biscuit and embark on the simple, glorious journey of creating these warm, buttery, cheesy, garlicky spheres of pure happiness. Your taste buds, and your guests, will thank you.
Print
Pillsbury Biscuit Garlic Butter Cheese Bombs: Easy 20-Minute Appetizer
- Total Time: 25 minutes
Description
Bake these Pillsbury biscuit garlic butter cheese bombs! Gooey, garlicky, buttery pull-apart rolls perfect for parties. Only 4 ingredients & ready in 20 minutes!
Ingredients
For the Cheese Bombs:
-
1 (16.3 oz) can Pillsbury Grands!™ Flaky Layers Biscuits: This is the ideal size. The “Grands” version provides enough dough to properly encase the cheese cube. Do not use the smaller, “original” biscuits.
-
4-5 sticks (approx. 4-5 oz) low-moisture, part-skim mozzarella string cheese: This is the secret to a perfect, non-leaky melt. String cheese is designed to melt beautifully and stretch. You will cut each stick in half.
-
Optional Fillings: 40-50 small pepperoni slices, 1-2 teaspoons of finely chopped pepperoncini, or a small slice of cooked sausage for each bomb.
For the Garlic Butter Glaze:
-
3 tablespoons unsalted butter: Salted butter can be used, but you may want to reduce any added salt later.
-
2 large cloves garlic, minced finely: About 1 heaping tablespoon. For maximum flavor, use fresh garlic.
-
½ teaspoon Italian seasoning: A blend of dried oregano, basil, thyme, and rosemary.
-
¼ teaspoon garlic powder: This double garlic hit provides a deeper, toasted garlic flavor.
-
⅛ teaspoon onion powder: Adds a subtle savory-sweet background note.
-
1 tablespoon fresh parsley, finely chopped: For garnish and a burst of fresh color and flavor.
-
Optional for Topping: 2 tablespoons of grated Parmesan cheese and a pinch of flaky sea salt
Instructions
Now that you have your ingredients ready, let’s dive into the steps for making this delightful Pillsbury Biscuit Garlic Butter Cheese Bombs. It’s as easy as pie, and I promise you’ll feel like a culinary superstar!
Step 1: Prepare the Garlic Butter Glaze
Before you handle the dough, prepare the glaze so it’s ready to use. In a small, microwave-safe bowl, combine the 3 tablespoons of butter, minced garlic, Italian seasoning, garlic powder, and onion powder. Microwave in 20-second intervals, stirring in between, until the butter is fully melted. Alternatively, you can melt this mixture in a small saucepan over low heat. Once melted, set it aside to allow the flavors to meld. Stir in the fresh parsley just before brushing to keep it vibrant.
Step 2: Preheat Oven and Prepare Pan
Preheat your oven to 375°F (190°C). This is the standard temperature for these biscuits. Take a standard muffin tin and generously grease 8-10 cups with non-stick cooking spray or a bit of butter. Using a muffin tin is crucial as it helps the bombs hold their round shape and prevents any melted cheese from leaking all over your baking sheet.
Step 3: Separate and Flatten the Biscuits
Open the can of biscuits (the satisfying “pop” is part of the experience!). Separate the 8 biscuits. On a clean, dry surface, gently flatten and stretch each biscuit into a circle about 4-5 inches in diameter. The center should be slightly thicker than the edges to prevent the cheese from breaking through.
Step 4: Add Cheese and Fillings
Take a half-stick of mozzarella string cheese and place it in the center of a flattened biscuit. If you are adding any optional fillings like pepperoni, place 3-4 slices on top of the cheese stick now.
Step 5: Form the “Bombs”
This is the most important step. Gather the edges of the biscuit dough up and over the cheese, pinching them firmly at the top to create a tight seal. There should be no cheese visible. Gently roll the sealed dough ball between your palms to smooth it out and ensure it’s perfectly round. The seal must be secure to contain the molten cheese during baking.
Step 6: Place in Pan and Glaze
Place each sealed dough ball, seam-side down, into a prepared cup of your muffin tin. Using a pastry brush, generously brush the top and sides of each bomb with the prepared garlic butter glaze. Reserve about half of the glaze for a second application after baking.
Step 7: Bake to Golden Perfection
Place the muffin tin in the preheated oven and bake for 14-18 minutes. Watch for a deep, golden brown color on the top and sides. The biscuits should be puffed up and beautifully browned.
Step 8: The Final Glaze and Serve
As soon as you remove the pan from the oven, immediately brush the remaining garlic butter glaze over the hot bombs. This second coating is essential for an intense garlic butter flavor and a gorgeous glossy finish. If using, sprinkle immediately with grated Parmesan cheese and a pinch of flaky salt. Let them cool in the pan for exactly 2-3 minutes—this allows the cheese to set slightly, preventing a lava-like burn, but keeps them warm and gooey. Use a spoon or offset spatula to carefully remove them from the tin. Serve immediately while the cheese is at its peak stretchiness.
Notes
-
Standard 12-Cup Muffin Tin
-
Small Microwave-Safe Bowl or Saucepan
-
Pastry Brush
-
Measuring Spoons
-
Cutting Board
- Prep Time: 10 minutes
- Cook Time: 15 minutes
- Cuisine: American
Nutrition
- Calories: 250 kcal
- Sugar: 4g
- Sodium: 650mg
- Fat: 14g
- Carbohydrates: 23g
- Protein: 8g

