
Introduction to Easter Bunny Oreo Truffles
As a passionate home cook, I find joy in creating delightful treats that bring smiles to faces, especially during festive occasions. Easter is one of those special times when families gather, and the air is filled with laughter and joy. This year, I decided to whip up something extra special: Easter Bunny Oreo Truffles. These little bites of heaven are not only delicious but also a fun way to celebrate the holiday.
Let me take you back to my childhood. I remember eagerly waiting for Easter morning, my heart racing with excitement as I searched for hidden eggs in the garden. The thrill of discovery was always accompanied by sweet treats, and the Easter Bunny was my favorite character of all. Inspired by those cherished memories, I wanted to create a dessert that captures the whimsy and joy of the season.
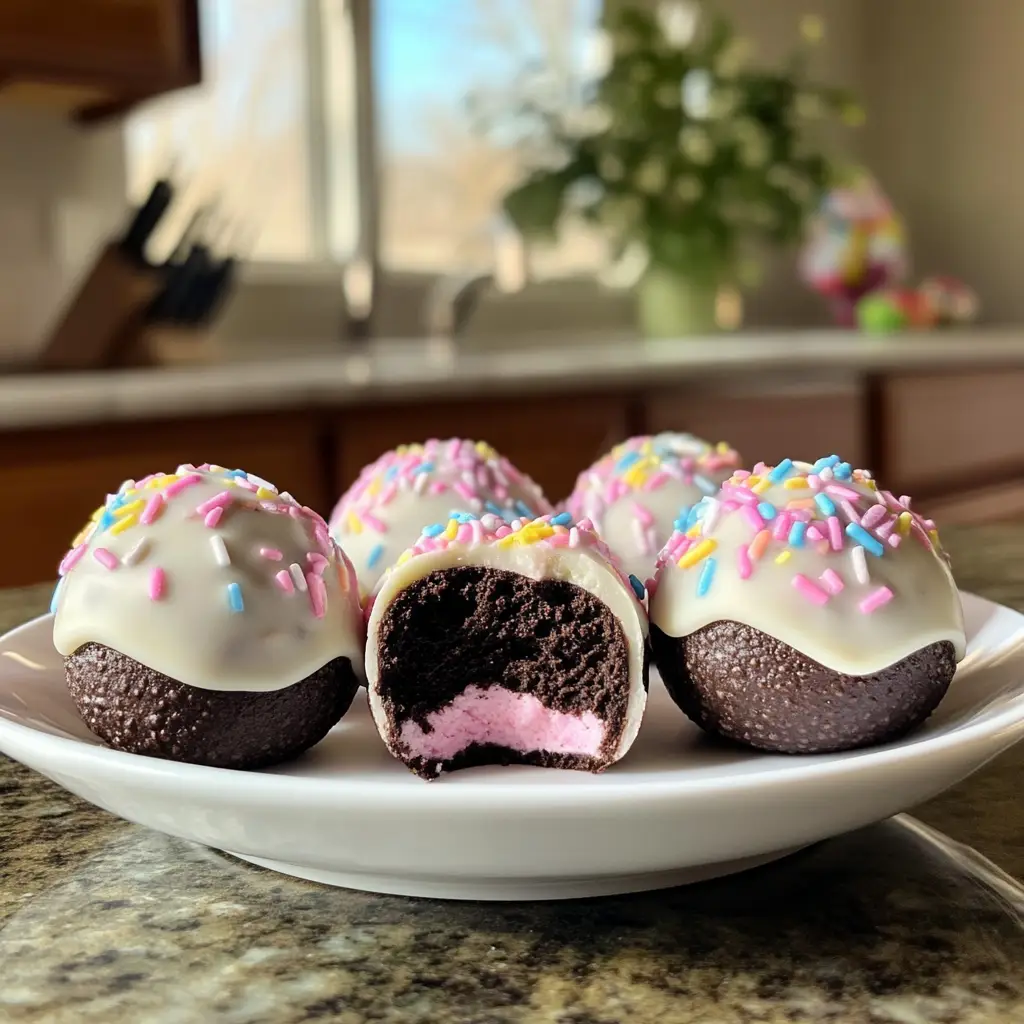
These truffles are a delightful combination of crushed Oreos and cream cheese, coated in chocolate, and decorated to resemble adorable little bunnies. They are simple to make, and the best part? You can involve your kids in the process! Watching their faces light up as they dip and decorate is a memory I treasure. Plus, these truffles make for a perfect centerpiece on your Easter dessert table.
So, roll up your sleeves and get ready to embark on a sweet adventure with me. Let’s dive into the world of Easter Bunny Oreo Truffles, where every bite is a celebration of love, creativity, and the joy of sharing delicious treats with family and friends!
Ingredients for Easter Bunny Oreo Truffles
Before we dive into the fun of making these delightful Easter Bunny Oreo Truffles, let’s gather our ingredients. Having everything ready makes the process smoother and more enjoyable. Trust me, there’s nothing like the sweet aroma of chocolate and cream cheese wafting through your kitchen!
Main Ingredients
- 1 package (15.25 oz) of Oreo cookies
- 8 oz cream cheese, softened
- 1 cup white chocolate chips (or melting chocolate)
- 1 tablespoon vegetable oil (for thinning the chocolate)
- Colored sprinkles (for decoration)
When choosing your ingredients, I always recommend going for high-quality chocolate. It makes a world of difference in flavor! I love using Ghirardelli or Wilton chocolate chips for their smooth melting properties and rich taste. And don’t forget to let your cream cheese sit out for a bit; it should be soft enough to mix easily with the crushed Oreos.
Optional Add-ons
- Mini chocolate chips (for eyes)
- Pink candy melts (for bunny noses)
- Shredded coconut (for a fluffy bunny tail)
- Food coloring (to tint the white chocolate)
These optional add-ons can really elevate your truffles! I love adding mini chocolate chips for the eyes; they give the bunnies a cute, playful look. If you want to get creative, you can even tint the white chocolate with a few drops of food coloring to match your Easter theme. The possibilities are endless, and that’s what makes this recipe so much fun!
How to Prepare Easter Bunny Oreo Truffles
Now that we have our ingredients ready, it’s time to roll up our sleeves and get to the fun part—preparing our Easter Bunny Oreo Truffles! This process is not only simple but also a wonderful opportunity to create lasting memories with your loved ones. Let’s break it down step by step.
Step 1: Crush the Oreos
First things first, we need to crush those Oreos into fine crumbs. You can do this by placing them in a zip-top bag and using a rolling pin, or you can use a food processor for a quicker method. I prefer the food processor because it gives me a nice, even texture.
Tips for Crushing Oreos
- Make sure to crush them until they resemble sand. This helps the truffles hold together better.
- If you’re using a bag, be careful not to overfill it. Crush in batches if needed!
Step 2: Mix with Cream Cheese
Once your Oreos are crushed, it’s time to mix them with the softened cream cheese. In a large bowl, combine the Oreo crumbs and cream cheese. Use a spatula or your hands to mix until everything is well combined. The mixture should be moist and easy to shape.
Tips for Mixing
- Don’t be afraid to get your hands in there! It’s the best way to ensure everything is mixed thoroughly.
- If the mixture feels too dry, add a little more cream cheese until it reaches the right consistency.
Step 3: Form the Truffles
Now comes the fun part—shaping the mixture into truffles! Take a small amount of the mixture and roll it into a ball, about the size of a tablespoon. Place each ball on a baking sheet lined with parchment paper. This is where you can get creative with the size; make them as big or small as you like!
Tips for Shaping
- Keep your hands slightly damp to prevent the mixture from sticking to your palms.
- For a uniform look, use a cookie scoop to portion out the mixture before rolling.
Step 4: Dip in Chocolate
Next, it’s time to dip our truffles in chocolate! Melt the white chocolate chips in a microwave-safe bowl, adding the vegetable oil to help thin it out. Dip each truffle into the melted chocolate, making sure it’s fully coated. Use a fork to lift it out, allowing any excess chocolate to drip off before placing it back on the parchment paper.
Tips for Dipping
- Make sure your chocolate is smooth and not too hot; otherwise, it can melt the truffles.
- If you’re feeling adventurous, try using colored chocolate melts for a fun twist!
Step 5: Decorate as Easter Bunnies
Finally, it’s time to bring our bunnies to life! While the chocolate is still wet, sprinkle on colored sprinkles for fur, and use mini chocolate chips for eyes. If you have pink candy melts, melt them and use a toothpick to create little bunny noses. Let your creativity shine!
Tips for Decoration
- Work quickly while the chocolate is still soft to ensure the decorations stick.
- Don’t hesitate to let your kids help with this part; it’s a great way to bond and have fun!
Equipment Needed for Easter Bunny Oreo Truffles
Before we dive into the delightful world of Easter Bunny Oreo Truffles, let’s make sure we have the right tools at hand. Having the right equipment can make the process smoother and more enjoyable. Here’s what you’ll need:
- Food Processor or Rolling Pin: A food processor is my go-to for crushing Oreos quickly and evenly. If you don’t have one, a rolling pin and a zip-top bag work just as well!
- Mixing Bowl: A large mixing bowl is essential for combining the Oreo crumbs and cream cheese. I love using a glass bowl so I can see the mixture come together.
- Spatula or Hands: You can use a spatula to mix, but I find that using my hands gives me the best results. Just make sure they’re clean!
- Baking Sheet: Line a baking sheet with parchment paper to place your truffles on. This prevents sticking and makes cleanup a breeze.
- Microwave-Safe Bowl: You’ll need this for melting the chocolate. A glass bowl works perfectly, but any microwave-safe bowl will do.
- Fork: A fork is handy for dipping the truffles into the melted chocolate. It helps to lift them out without making a mess.
- Toothpick: If you’re using pink candy melts for noses, a toothpick is great for precision when decorating.
And there you have it! With these simple tools, you’ll be well on your way to creating adorable Easter Bunny Oreo Truffles. If you don’t have something on this list, don’t worry! You can often find alternatives around your kitchen. The most important thing is to have fun and enjoy the process!
Variations of Easter Bunny Oreo Truffles
As I’ve experimented with my Easter Bunny Oreo Truffles, I’ve discovered that there are so many fun variations to try! Each twist adds a unique flavor and flair, making these treats even more delightful. Here are a few variations that I absolutely love:
- Peanut Butter Oreo Truffles: Swap out regular Oreos for peanut butter-flavored ones. The creamy peanut butter adds a rich, nutty flavor that pairs beautifully with the chocolate coating.
- Mint Chocolate Truffles: Use mint Oreos for a refreshing twist. The cool mint flavor is perfect for spring and adds a delightful surprise!
- Carrot Cake Truffles: For a seasonal touch, mix in some finely grated carrots and spices like cinnamon and nutmeg with the cream cheese. Dip in white chocolate and decorate with green sprinkles for a carrot top effect.
- Chocolate-Dipped Coconut Truffles: Add shredded coconut to the Oreo and cream cheese mixture for a tropical vibe. Dip in dark chocolate for a rich contrast.
These variations not only keep things exciting but also allow you to cater to different tastes and preferences. I love how each version can spark new memories and traditions during the Easter season. So, don’t hesitate to get creative and make these truffles your own!
Cooking Notes for Easter Bunny Oreo Truffles
As I’ve made my fair share of Easter Bunny Oreo Truffles, I’ve picked up a few cooking notes that can help you achieve the best results. These little tips can make a big difference in your truffle-making adventure!
- Chill the Mixture: After mixing the Oreo crumbs and cream cheese, consider chilling the mixture for about 30 minutes. This makes it easier to shape the truffles and helps them hold their form during dipping.
- Use a Double Boiler: If you’re melting chocolate on the stovetop, a double boiler is a great way to ensure even melting without burning. Just simmer water in a pot and place a heatproof bowl on top to melt your chocolate gently.
- Keep It Cool: If your kitchen is warm, the chocolate may melt too quickly. Try to work in a cooler environment or chill the truffles again after dipping to help the chocolate set properly.
- Storage Tips: Store your truffles in an airtight container in the fridge. They can last up to a week, but I doubt they’ll last that long—they’re just too delicious!
These cooking notes are simple yet effective. They can help you navigate any hiccups along the way and ensure your Easter Bunny Oreo Truffles turn out perfectly every time. Happy cooking!
Serving Suggestions for Easter Bunny Oreo Truffles
Now that our Easter Bunny Oreo Truffles are ready, it’s time to think about how to present these adorable treats! Presentation can elevate the experience, making your truffles not just delicious but also visually appealing. Here are some fun serving suggestions that I love:
- Easter Basket: Arrange the truffles in a colorful Easter basket, surrounded by faux grass or shredded paper. This creates a festive centerpiece that’s perfect for any gathering.
- Decorative Plates: Use a beautiful serving platter or cake stand to display your truffles. You can even sprinkle some extra colored sprinkles around them for a pop of color.
- Individual Treat Bags: For a fun party favor, place each truffle in a small clear bag tied with a ribbon. This makes for a sweet gift that guests can take home!
- On a Dessert Table: If you’re hosting a larger gathering, include the truffles on a dessert table alongside other treats. They’ll add a whimsical touch to your spread.
These serving suggestions not only enhance the visual appeal but also create a delightful atmosphere for your Easter celebrations. I love seeing the smiles on my family’s faces when they spot these cute little bunnies on the table. So, get creative and have fun with your presentation!
Tips for Making Perfect Easter Bunny Oreo Truffles
As I’ve crafted my fair share of Easter Bunny Oreo Truffles, I’ve gathered some golden tips that can help you achieve truffle perfection. These little nuggets of wisdom can make your truffle-making experience even more enjoyable and successful!
- Use Fresh Ingredients: Always check the expiration dates on your cream cheese and chocolate. Fresh ingredients make a noticeable difference in flavor and texture.
- Don’t Rush the Chilling: Allow your truffles to chill in the fridge for at least 30 minutes after shaping. This helps them firm up and makes dipping easier.
- Experiment with Flavors: Don’t hesitate to mix in different flavors or extracts, like vanilla or almond, to add a unique twist to your truffles.
- Practice Patience: When dipping in chocolate, take your time. A smooth, even coat is key to a beautiful finish. If you rush, you might end up with a messy look!
- Have Fun with Decorations: Let your creativity shine! Use different colored sprinkles, edible glitter, or even small candies to make each bunny unique.
These tips are simple yet effective, and they can help you create truffles that not only taste amazing but also look adorable. Remember, the joy of cooking comes from the love you put into it, so enjoy every moment of making these delightful treats!
Breakdown of Time for Easter Bunny Oreo Truffles
When it comes to making Easter Bunny Oreo Truffles, timing is everything! I love how this recipe is not only fun but also quick to whip up. Here’s a simple breakdown of the time you’ll need to create these delightful treats:
- Prep Time: 20 minutes – This includes gathering your ingredients, crushing the Oreos, and mixing everything together. It’s a great time to get your kids involved!
- Chilling Time: 30 minutes – Allowing the mixture to chill makes shaping the truffles easier and helps them hold their form during dipping.
- Cooking Time: 10 minutes – This is the time it takes to melt the chocolate and dip the truffles. It’s a quick process, but be sure to take your time for a smooth finish!
- Total Time: 1 hour – In just one hour, you can have a batch of adorable Easter Bunny Oreo Truffles ready to impress your family and friends!
With this time breakdown, you can easily plan your baking session. I find that the anticipation of waiting for the truffles to chill only adds to the excitement. Plus, the end result is always worth it! So, gather your ingredients and let’s get started on this sweet adventure!
Nutritional Information for Easter Bunny Oreo Truffles
As a passionate home cook, I always find it helpful to know the nutritional information of the treats I make, especially when sharing them with family and friends. While these Easter Bunny Oreo Truffles are a delightful indulgence, it’s good to be aware of what’s in them. Here’s a general breakdown of the nutritional information per truffle, assuming you make about 24 truffles from the recipe:
- Calories: Approximately 120 calories
- Fat: 7g (Saturated Fat: 4g)
- Carbohydrates: 14g (Sugars: 10g)
- Protein: 1g
- Sodium: 50mg
Keep in mind that these values can vary based on the specific brands of ingredients you use and any optional add-ons you include. For instance, if you decide to use dark chocolate instead of white chocolate, the nutritional profile will change slightly. While these truffles are a sweet treat, moderation is key, especially during the festive season. Enjoying them as part of a balanced diet can make your Easter celebrations even sweeter!
Frequently Asked Questions about Easter Bunny Oreo Truffles
As I’ve shared my love for making Easter Bunny Oreo Truffles, I often get questions from fellow home cooks eager to try this delightful recipe. Here are some of the most frequently asked questions, along with my answers to help you on your truffle-making journey!
Can I make these truffles ahead of time?
Absolutely! In fact, making them a day or two in advance can enhance their flavor. Just store them in an airtight container in the fridge. They’ll stay fresh and delicious, ready to impress your guests!
What if I don’t have cream cheese?
If you’re out of cream cheese, you can substitute it with mascarpone cheese or even a nut-based cream cheese alternative. Just keep in mind that the flavor and texture may vary slightly, but they’ll still be tasty!
Can I freeze the truffles?
Yes, you can freeze these truffles! Just make sure to place them in a single layer on a baking sheet until they’re frozen solid, then transfer them to an airtight container. They can last up to three months in the freezer. When you’re ready to enjoy them, let them thaw in the fridge for a few hours.
How do I get the chocolate coating smooth?
To achieve a smooth chocolate coating, make sure to melt the chocolate slowly and stir it well. Adding a tablespoon of vegetable oil can help thin it out, making it easier to dip the truffles without clumping.
Can I use different types of chocolate?
Definitely! While I love using white chocolate for a classic look, you can experiment with milk chocolate, dark chocolate, or even colored candy melts for a fun twist. Each type will give your truffles a unique flavor and appearance!
These FAQs should help clear up any uncertainties you might have while making your Easter Bunny Oreo Truffles. Remember, the most important part is to have fun and enjoy the process. Happy truffle-making!
Conclusion on Easter Bunny Oreo Truffles
As I wrap up my journey of creating Easter Bunny Oreo Truffles, I can’t help but feel a sense of joy and accomplishment. These delightful treats are not just a feast for the taste buds; they are a celebration of creativity, family bonding, and the spirit of Easter. The combination of rich Oreo flavor and creamy texture, all wrapped in a sweet chocolate coating, makes them irresistible!
What I love most about this recipe is its simplicity. It’s easy enough for kids to join in, turning the kitchen into a playground of laughter and creativity. Plus, the variations and decorations allow for endless possibilities, making each batch unique and special. Whether you’re hosting a festive gathering or simply looking to spread some cheer, these truffles are sure to bring smiles to everyone’s faces.
So, gather your loved ones, roll up your sleeves, and dive into the delightful world of Easter Bunny Oreo Truffles. With every bite, you’ll be reminded of the joy of sharing sweet moments together. Happy Easter, and may your celebrations be filled with love, laughter, and, of course, delicious treats!


