
Introduction to Cookie Dough Bars Recipe
Ah, cookie dough! Just the thought of it brings back sweet memories of my childhood. I remember sneaking spoonfuls of that creamy, sugary goodness while my mom baked cookies. The smell of warm vanilla and melting chocolate filled the air, and I could hardly wait for the cookies to come out of the oven. But let’s be honest, who can resist the allure of raw cookie dough? It’s like a hug in a bowl, comforting and indulgent.
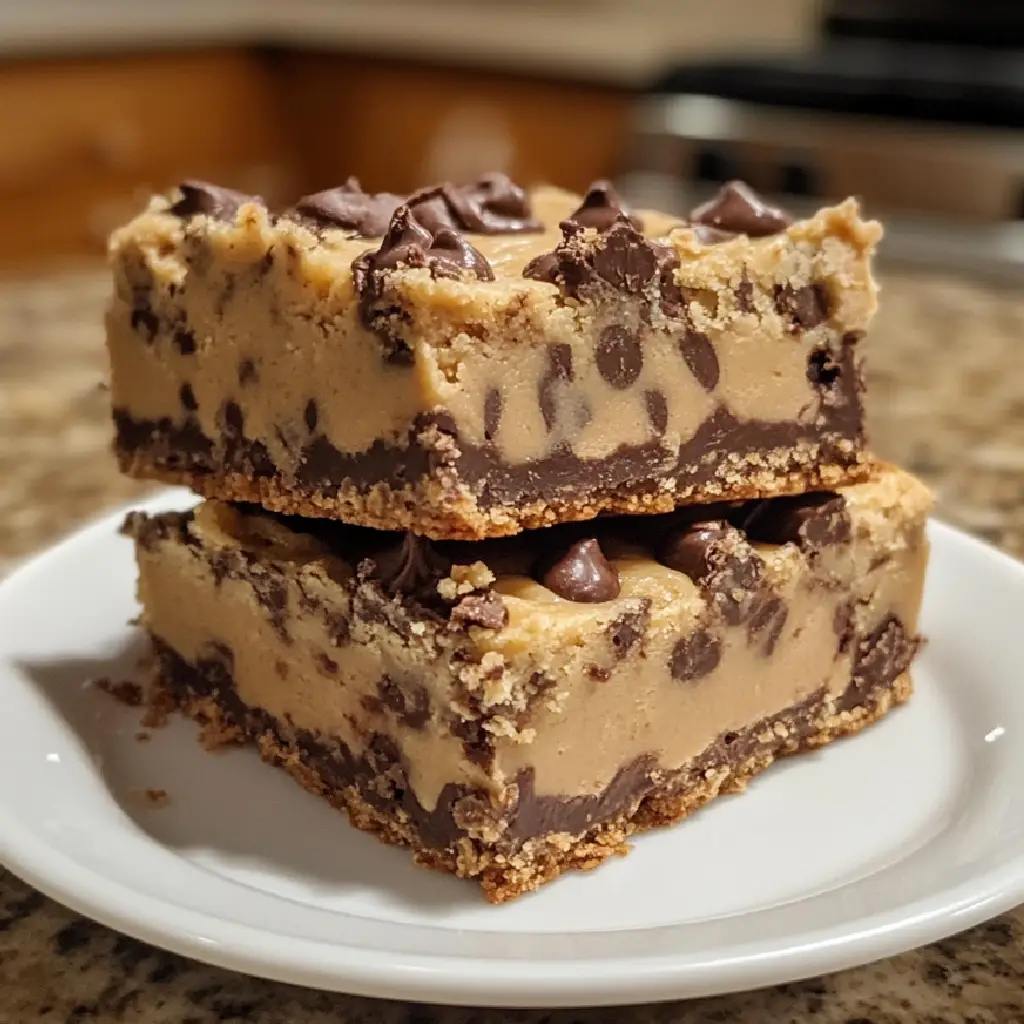
That’s why I’m excited to share my Cookie Dough Bars Recipe with you! These bars capture all the delightful flavors of cookie dough without the worry of raw eggs. They’re perfect for satisfying that sweet tooth, whether you’re hosting a gathering or just treating yourself after a long day. Plus, they’re super easy to make, which is a huge win in my book!
As I whipped up my first batch, I couldn’t help but think of all the ways to customize them. You can add nuts, swap in different types of chocolate, or even throw in some sprinkles for a festive touch. The possibilities are endless! I love how this recipe allows for creativity while still being simple enough for anyone to try.
So, grab your mixing bowl and let’s dive into this delicious adventure together. I promise, once you take that first bite of these chewy, sweet bars, you’ll be hooked. Let’s get started on making your new favorite treat!
Ingredients for Cookie Dough Bars Recipe
Before we dive into the fun of mixing and baking, let’s gather our ingredients! Having everything ready makes the process smoother and more enjoyable. Here’s what you’ll need for my Cookie Dough Bars Recipe.
Main Ingredients
- 1 cup unsalted butter, softened
- 1 cup brown sugar, packed
- 1/2 cup granulated sugar
- 2 teaspoons vanilla extract
- 2 cups all-purpose flour
- 1/2 teaspoon salt
- 1 cup chocolate chips (semi-sweet or milk chocolate)
When it comes to butter, I always opt for unsalted. This way, I can control the saltiness of my bars. And trust me, using high-quality chocolate chips makes a world of difference! I love to use semi-sweet chocolate for that perfect balance of sweetness and richness.
Optional Add-ons
- 1/2 cup chopped nuts (walnuts or pecans work great)
- 1/2 cup mini marshmallows for a gooey twist
- 1/4 cup sprinkles for a fun, festive touch
- 1/2 cup peanut butter chips for an extra layer of flavor
Feel free to get creative! I often toss in some chopped nuts for a delightful crunch. If you’re feeling adventurous, why not mix in some peanut butter chips? They add a lovely nutty flavor that pairs beautifully with the cookie dough base. And let’s not forget about sprinkles—who doesn’t love a pop of color in their treats?
Now that we have our ingredients ready, it’s time to roll up our sleeves and start mixing! But before we do, make sure to check your pantry for these essentials. You might already have some of them on hand!
How to Prepare Cookie Dough Bars Recipe
Now that we have our ingredients all lined up like eager little soldiers, it’s time to get our hands dirty! Making these Cookie Dough Bars is a delightful process, and I can’t wait to share the steps with you. Let’s dive right in!
Step 1: Gather Your Ingredients
First things first, let’s make sure we have everything we need. I like to lay out all my ingredients on the counter. It makes me feel organized and ready to tackle the task ahead. Plus, it’s a great way to double-check that I haven’t forgotten anything!
Tips for Ingredient Quality
When it comes to baking, quality matters! I always choose fresh ingredients. For butter, make sure it’s softened but not melted. And for the sugars, I prefer organic when possible. It really enhances the flavor of the bars!
Step 2: Mix the Base
In a large mixing bowl, cream together the softened butter, brown sugar, and granulated sugar. I love using a hand mixer for this part; it makes the process quick and easy. You want the mixture to be light and fluffy, almost like a cloud!
Tips for Achieving the Right Consistency
Don’t rush this step! Creaming the butter and sugars properly is key to achieving that perfect texture. If you’re using a hand mixer, mix for about 2-3 minutes. You’ll know it’s ready when it looks pale and fluffy.
Step 3: Fold in Chocolate Chips
Now comes the fun part—chocolate chips! Gently fold them into the mixture. I like to use a spatula for this, as it helps keep the chips intact. You want them evenly distributed throughout the dough.
Choosing the Right Type of Chocolate
For this recipe, I usually go for semi-sweet chocolate chips. They add just the right amount of sweetness without overpowering the cookie dough flavor. But if you’re a milk chocolate fan, go ahead and use those instead!
Step 4: Press into the Pan
Next, grab a 9×9 inch baking pan and line it with parchment paper. This makes for easy removal later. Now, take your cookie dough mixture and press it evenly into the pan. I like to use my hands for this, but a spatula works just as well.
Tips for Even Distribution
Make sure to press the dough down firmly, so it holds together when it sets. I often use the back of a measuring cup to smooth it out. This ensures that every bite is just as delicious as the last!
Step 5: Chill and Set
Once your dough is pressed into the pan, it’s time to chill! Pop it in the refrigerator for at least 30 minutes. This step is crucial, as it helps the bars firm up and makes them easier to cut.
Importance of Chilling Time
Don’t skip this step! Chilling allows the flavors to meld together beautifully. Plus, it gives the bars that perfect chewy texture. Trust me, the wait will be worth it!
And there you have it! Follow these steps, and you’ll be well on your way to creating the most scrumptious Cookie Dough Bars you’ve ever tasted. I can already smell the sweet aroma wafting through my kitchen!
Equipment Needed for Cookie Dough Bars Recipe
Before we dive into the delicious world of cookie dough bars, let’s make sure we have the right tools at our disposal. Having the right equipment can make the process smoother and more enjoyable. Here’s what you’ll need to whip up these delightful treats!
- Mixing Bowl: A large mixing bowl is essential for combining all your ingredients. If you don’t have one, any large bowl will do—just make sure it’s sturdy!
- Hand Mixer or Whisk: A hand mixer makes creaming the butter and sugars a breeze. If you don’t have one, a good old-fashioned whisk will work just fine, though it may take a bit more elbow grease!
- Spatula: A spatula is perfect for folding in the chocolate chips and pressing the dough into the pan. If you don’t have one, a wooden spoon can be a great alternative.
- Baking Pan: You’ll need a 9×9 inch baking pan for this recipe. If you don’t have that size, a similar-sized pan will work, just keep an eye on the baking time.
- Parchment Paper: Lining your baking pan with parchment paper makes for easy removal of the bars. If you’re out of parchment paper, you can lightly grease the pan with butter or cooking spray.
With these tools in hand, you’re all set to create your cookie dough bars! I always find that having everything organized and ready to go makes the baking experience so much more enjoyable. So, let’s get cooking!
Variations of Cookie Dough Bars Recipe
One of the things I adore about my Cookie Dough Bars Recipe is how versatile it is! You can easily switch things up to suit your taste or to use what you have on hand. Here are a few fun variations that I’ve tried and loved:
- Brownie Cookie Dough Bars: Swap out half of the flour for cocoa powder to create a rich, chocolatey base. It’s like a brownie and cookie dough combined—pure bliss!
- Oatmeal Cookie Dough Bars: Add 1 cup of rolled oats to the mixture for a chewy texture. This gives the bars a wholesome twist that’s perfect for breakfast or a snack.
- Nutty Cookie Dough Bars: Incorporate 1/2 cup of your favorite nut butter, like almond or cashew, into the base. It adds a creamy richness that’s simply irresistible.
- Cookie Dough Ice Cream Bars: Fold in some mini chocolate chips and freeze the bars for a cool treat. You can even drizzle melted chocolate on top for an extra indulgence!
These variations not only keep things exciting but also allow you to experiment with flavors and textures. I love how a simple tweak can transform the entire experience. So, don’t be afraid to get creative and make these bars your own!
Cooking Notes for Cookie Dough Bars Recipe
As I’ve learned through my culinary adventures, a few cooking notes can make all the difference when whipping up my Cookie Dough Bars Recipe. Here are some tips that I’ve gathered over time to ensure your bars turn out perfectly every time!
- Room Temperature Ingredients: Make sure your butter is softened to room temperature. This helps it blend smoothly with the sugars, creating that fluffy texture we all love.
- Don’t Overmix: When you add the flour, mix just until combined. Overmixing can lead to tough bars, and we want them to be soft and chewy!
- Storage Tips: Once your bars are set, store them in an airtight container. They’ll stay fresh for up to a week—if they last that long!
- Freezing for Later: If you want to make a batch ahead of time, these bars freeze beautifully. Just wrap them tightly in plastic wrap and pop them in the freezer. Thaw them in the fridge when you’re ready to enjoy!
These little notes have helped me avoid common pitfalls and elevate my baking game. I hope they serve you well on your journey to creating the most delicious cookie dough bars! Happy baking!
Serving Suggestions for Cookie Dough Bars Recipe
Now that your Cookie Dough Bars are ready to be devoured, let’s talk about how to serve them for maximum enjoyment! I’ve found that presentation can elevate even the simplest treats, and these bars are no exception.
- Classic Slice: Cut the bars into squares and serve them on a beautiful platter. A sprinkle of sea salt on top adds a gourmet touch that contrasts beautifully with the sweetness.
- With Ice Cream: For a decadent dessert, serve a warm slice alongside a scoop of vanilla or chocolate ice cream. The combination of warm and cold is simply heavenly!
- Drizzle of Chocolate: Melt some chocolate and drizzle it over the bars before serving. It adds an extra layer of richness that chocolate lovers will adore.
- Pair with Coffee: These bars make a delightful afternoon snack with a cup of coffee or tea. The flavors complement each other perfectly, making for a cozy treat.
- Gift Them: If you’re feeling generous, wrap a few bars in cellophane and tie them with a ribbon. They make a sweet homemade gift for friends or family!
These serving suggestions not only enhance the experience but also allow you to share the joy of your cookie dough bars with others. Whether you’re enjoying them solo or with loved ones, I guarantee they’ll be a hit!
Tips for Perfect Cookie Dough Bars Recipe
As a passionate home cook, I’ve learned a few tricks along the way to ensure my Cookie Dough Bars turn out perfectly every time. Here are my top tips to help you achieve that dreamy, chewy texture and rich flavor!
- Measure Accurately: Baking is a science, so precise measurements are key. I always use a kitchen scale for the best results, especially for flour. Too much flour can lead to dry bars!
- Chill the Dough: Don’t skip the chilling step! It not only helps the bars set but also enhances the flavors. I like to chill mine for at least an hour for the best results.
- Use Quality Ingredients: The better the ingredients, the better the bars! I always choose high-quality butter and chocolate. It makes a noticeable difference in taste.
- Don’t Overbake: Since these bars are no-bake, you want to ensure they’re set but not too hard. Keep an eye on them while they chill; they should be firm but still soft to the touch.
- Let Them Cool Completely: Patience is key! Allow the bars to cool completely before cutting. This helps them hold their shape and makes for cleaner slices.
With these tips in your back pocket, you’re well on your way to creating the most delicious cookie dough bars. I can’t wait for you to experience the joy of biting into these sweet treats!
Breakdown of Time for Cookie Dough Bars Recipe
Now that we’ve covered the ingredients and steps, let’s talk about the time it takes to whip up these delightful Cookie Dough Bars. I find that knowing the time commitment helps me plan my baking adventures better. Here’s a quick breakdown:
- Prep Time: 15 minutes
- Chilling Time: 30 minutes
- Total Time: 45 minutes
In just under an hour, you can have these scrumptious bars ready to chill in your fridge! The prep time is quick, and the chilling allows the flavors to meld beautifully. I often use this time to clean up my kitchen or prepare a cup of tea to enjoy with my freshly made treats. It’s a win-win!
Nutritional Information for Cookie Dough Bars Recipe
As a passionate home cook, I believe it’s important to know what goes into our delicious treats. While my Cookie Dough Bars Recipe is all about indulgence, I like to keep track of the nutritional aspects too. Here’s a general breakdown of the nutritional information per serving, assuming you cut the bars into 16 squares:
- Calories: Approximately 200
- Fat: 10g
- Saturated Fat: 6g
- Cholesterol: 30mg
- Sodium: 100mg
- Carbohydrates: 28g
- Fiber: 1g
- Sugar: 15g
- Protein: 2g
Keep in mind that these values can vary based on the specific ingredients you use and any optional add-ons you choose to include. If you’re looking to lighten things up, consider using less sugar or swapping in some healthier alternatives. Regardless, these bars are a delightful treat that’s worth every bite!
Frequently Asked Questions about Cookie Dough Bars Recipe
As I’ve shared my Cookie Dough Bars Recipe with friends and family, I’ve noticed a few common questions pop up. It’s always great to clarify any doubts, especially when it comes to baking. So, let’s tackle some of the most frequently asked questions to help you on your cookie dough bar journey!
Can I use whole wheat flour instead of all-purpose flour?
Absolutely! You can substitute whole wheat flour for all-purpose flour. Just keep in mind that it may change the texture slightly, making the bars a bit denser. I’ve tried it, and they still turn out delicious!
How long do these cookie dough bars last?
When stored in an airtight container, your cookie dough bars will stay fresh for about a week. If you want to keep them longer, you can freeze them for up to three months. Just make sure to wrap them tightly!
Can I add different types of chocolate chips?
Of course! Feel free to mix and match chocolate chips. I love using dark chocolate chips for a richer flavor, or even white chocolate for a sweeter twist. The choice is yours!
What if I don’t have a 9×9 inch pan?
No worries! If you don’t have a 9×9 inch pan, you can use a similar-sized baking dish. Just keep an eye on the chilling time, as it may vary slightly depending on the pan size.
Can I make these bars vegan?
Yes! To make vegan cookie dough bars, substitute the butter with a plant-based alternative and use a flax egg instead of regular eggs. You can also find vegan chocolate chips to keep it dairy-free!
Is it safe to eat raw cookie dough?
In traditional cookie dough, raw eggs and flour can pose health risks. However, my recipe is egg-free and uses heat-treated flour, making it safe to enjoy without any worries. So dig in!
These questions are just a few of the common queries I’ve encountered while sharing my cookie dough bars. If you have any more questions, feel free to reach out! I’m always here to help you create the perfect batch of these delightful treats.
Conclusion on Cookie Dough Bars Recipe
As we wrap up our delicious journey through the world of Cookie Dough Bars Recipe, I can’t help but feel a sense of joy. These bars are not just a treat; they’re a celebration of flavors and memories. With their creamy, sweet cookie dough base and delightful chocolate chips, they bring a smile to anyone who takes a bite.
What I love most about this recipe is its simplicity and versatility. Whether you’re whipping them up for a cozy night in, a festive gathering, or just because you deserve a little indulgence, these bars are sure to impress. Plus, the fact that they’re no-bake means you can enjoy them without the fuss of turning on the oven!
So, gather your ingredients, unleash your creativity with fun add-ons, and dive into the delightful world of cookie dough bars. I promise, once you make them, they’ll become a staple in your kitchen. Happy baking, and may your cookie dough adventures be as sweet as the treats themselves!


