

In the pantheon of classic American desserts, few hold a more revered and comforting position than the Classic Apple Crisp. It is the epitome of rustic, home-cooked simplicity, a dessert that feels like a warm, welcoming embrace at the end of any meal. Imagine a deep dish filled with tender, sweet-tart baked apples, bubbling in their own syrupy juices, all hidden beneath a blanket of buttery, nutty, and irresistibly crunchy oat streusel. Unlike its cousin, the apple pie, a crisp is unpretentious and forgiving, there’s no finicky pastry dough to roll out, yet the result is every bit as satisfying, if not more so.
Why Is This Classic Apple Crisp So Popular?
The enduring and universal popularity of apple crisp is built on a foundation of profound comfort, effortless preparation, and its incredibly versatile and crowd-pleasing nature. It is a dessert that solves the problem of what to serve for nearly any occasion.
First, it is the ultimate comfort food dessert. The warm, spiced apples and the buttery, crunchy topping trigger deep-seated feelings of nostalgia and well-being. It’s a dessert that feels nourishing and wholesome, evoking memories of family gatherings, school cafeterias, and grandmothers’ kitchens. It’s psychologically soothing and physically satisfying in a way that few other desserts can match.
Second, it is dramatically easier than pie. There is no chilling, rolling, or crimping of a pastry crust. The topping comes together in minutes with a bowl and your fingers, and the filling requires little more than peeling and slicing. This accessibility makes it a go-to for novice bakers and a reliable, stress-free option for experienced cooks feeding a crowd. It’s a dessert that delivers maximum reward for minimal effort.
Finally, its versatility and adaptability are nearly limitless. It can be made with virtually any variety of apple, tailored to your preferred level of sweetness or spice, and easily scaled up or down. It’s a brilliant vehicle for using up less-than-perfect apples and can be made gluten-free or vegan with simple swaps. This ability to be customized ensures it never gets old and can always be tailored to the ingredients you have on hand.
Why You’ll Love This Classic Apple Crisp:
You will love this specific recipe because it is meticulously balanced to achieve the perfect harmony between a juicy, not-soggy filling and a crisp, clumpy topping. You will love the technique of using a mix of apple varieties, which provides a more complex flavor and better texture, as some apples break down into sauce while others hold their shape. You will appreciate the addition of a touch of apple cider or juice to the filling, which guarantees a saucy, luscious base without making the bottom crust soggy.
You will adore the generous amount of brown sugar and spices in the filling, which creates a deep, caramel-like sauce as it bakes. You will be thrilled by the clumpy, crunchy streusel topping that doesn’t melt away, achieved by using cold butter and a precise ratio of oats to flour. Most of all, you will love the spectacular, foolproof result—a bubbling, golden-brown dessert with a perfect contrast of textures and flavors that is guaranteed to elicit sighs of delight and requests for second helpings. It is the definitive apple crisp recipe you will return to for a lifetime.
Here’s what you’ll need:
For the Apple Filling:
- 3 lbs mixed baking apples (about 6-7 large), such as Granny Smith, Honeycrisp, and Braeburn
- ⅓ cup light brown sugar, packed
- ¼ cup granulated sugar
- 2 tablespoons all-purpose flour
- 1 tablespoon fresh lemon juice
- 1 ½ teaspoons ground cinnamon
- ¼ teaspoon ground nutmeg
- ⅛ teaspoon ground allspice or cardamom (optional)
- A pinch of salt
- 2 tablespoons apple cider, apple juice, or water
For the Crisp Topping:
- 1 cup old-fashioned rolled oats
- ¾ cup all-purpose flour
- ¾ cup light brown sugar, packed
- ½ teaspoon ground cinnamon
- ¼ teaspoon salt
- ½ cup (1 stick) cold unsalted butter, cut into small cubes
- ½ cup chopped walnuts or pecans (optional)
For Serving:
- Vanilla ice cream or freshly whipped cream

How to Make Classic Apple Crisp:
Now that you have your ingredients ready, let’s dive into the steps for making this delightful Classic Apple Crisp. It’s as easy as pie, and I promise you’ll feel like a culinary superstar!
Step 1: Prepare the Apples and Oven
Preheat your oven to 375°F (190°C). Peel, core, and slice the apples into ¼ to ½-inch thick slices. Using a mix of apples is highly recommended for the best flavor and texture. Place the slices in a large bowl.
Step 2: Create the Flavorful Filling
To the bowl of apples, add the ⅓ cup brown sugar, ¼ cup granulated sugar, 2 tablespoons of flour, lemon juice, 1 ½ teaspoons of cinnamon, nutmeg, optional allspice, and a pinch of salt. Toss everything together until the apple slices are evenly coated. The flour will help thicken the natural juices as the crisp bakes.
Step 3: Transfer to Baking Dish
Pour the seasoned apple mixture into a 9×9 inch or 2-quart baking dish. Spread the apples into an even layer. Drizzle the 2 tablespoons of apple cider or juice evenly over the top. This adds extra moisture and apple flavor to the sauce.
Step 4: Make the Crisp Topping
In a separate medium bowl, combine the rolled oats, ¾ cup flour, ¾ cup brown sugar, ½ teaspoon cinnamon, and ¼ teaspoon salt. Whisk to combine. Add the cold, cubed butter.
Step 5: Create the Buttery Streusel
Using your fingertips, a pastry cutter, or two forks, work the cold butter into the oat mixture. Continue until the mixture is crumbly and the butter is well incorporated, with clumps ranging from pea-sized to coarse sand. Stir in the chopped nuts, if using.
Step 6: Assemble the Crisp
Sprinkle the oat streusel topping evenly over the apple filling, covering it completely. Do not press down.
Step 7: Bake to Bubbly, Golden Perfection
Place the baking dish on a rimmed baking sheet (to catch any potential bubble-overs) and bake for 40-50 minutes. The crisp is done when the filling is bubbling vigorously around the edges and the topping is a deep, golden brown.
Step 8: The Crucial Rest
Remove the crisp from the oven and let it rest for at least 20-30 minutes before serving. This resting period is essential for the fruit filling to thicken up, transforming the juices into a perfect, syrupy sauce. Serving it too soon will result in a soupy consistency.
Step 9: Serve Warm
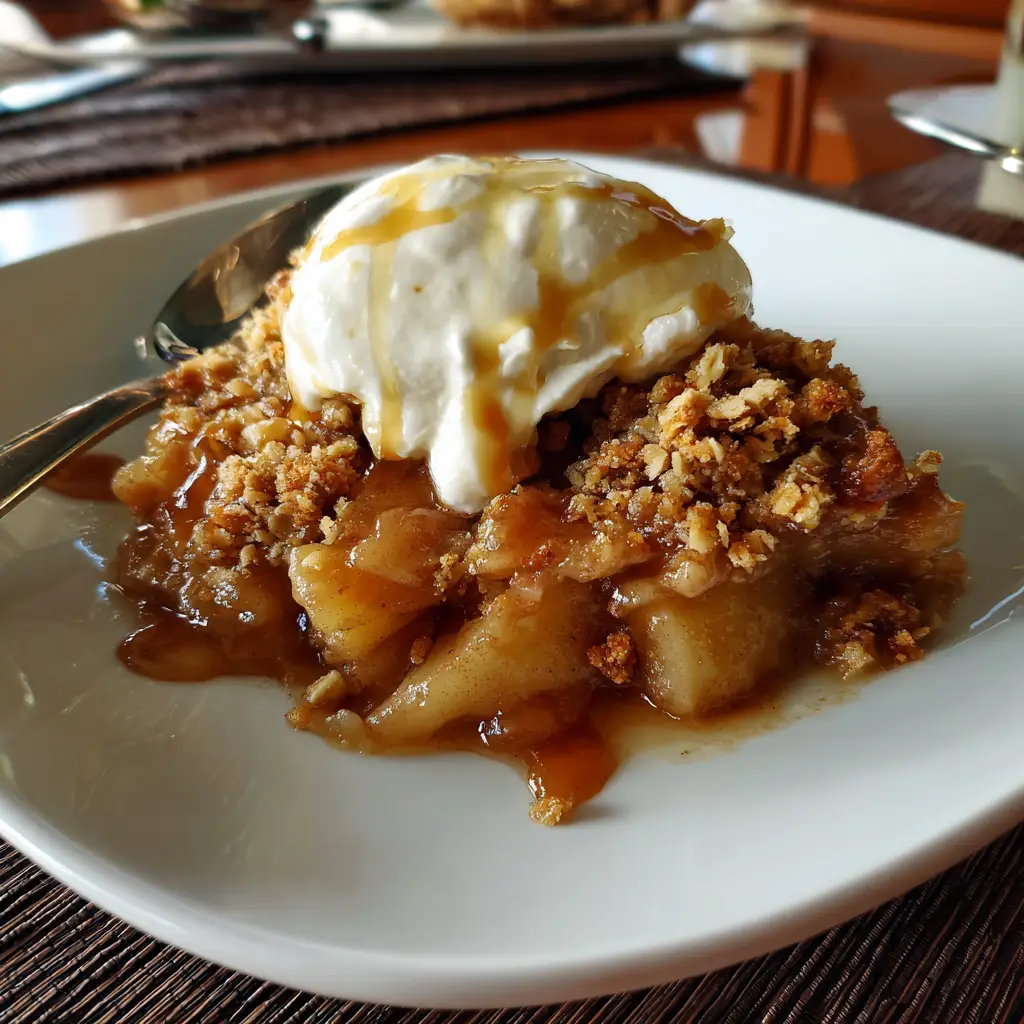
Scoop the warm apple crisp into bowls and top with a generous scoop of cold vanilla ice cream or a dollop of freshly whipped cream. The contrast of temperatures and textures is divine.
Tips for Success:
- Use Cold Butter: This is the secret to a clumpy, crunchy topping. The cold butter will melt slowly in the oven, creating steam pockets that result in a flaky, crisp texture.
- Mix Your Apples: Using a combination of tart (Granny Smith) and sweet (Honeycrisp) apples creates a more complex and balanced flavor profile.
- Don’t Skip the Lemon Juice: The acid in the lemon juice not only prevents the apples from browning but also brightens the entire dish, balancing the sweetness.
- Let it Rest: The 20-minute rest is not a suggestion; it’s a requirement for the perfect saucy, not soupy, consistency.
- Bake on a Sheet Pan: This simple step protects your oven from any messy spillovers and makes handling the hot, bubbling dish much safer.
Equipment Needed:
- 9×9 inch or 2-quart Baking Dish
- Rimmed Baking Sheet
- Large Mixing Bowl
- Medium Mixing Bowl
- Whisk
- Vegetable Peeler & Sharp Knife
Variations of Classic Apple Crisp:
- Apple Cranberry Crisp: Add 1 cup of fresh or frozen cranberries to the apple filling for a tart, festive twist.
- Pear and Ginger Crisp: Substitute half the apples with ripe pears and add 1 tablespoon of finely chopped crystallized ginger to the topping.
- Salted Caramel Apple Crisp: Drizzle ½ cup of good-quality salted caramel sauce over the apple filling before adding the topping.
- Gluten-Free Apple Crisp: Use a 1:1 gluten-free flour blend in both the filling and the topping, and ensure your oats are certified gluten-free.
- Vegan Apple Crisp: Use vegan butter or solid coconut oil in the topping.
Serving Suggestions for Classic Apple Crisp:
This dessert is sublime when served à la mode with a high-quality vanilla bean ice cream. A drizzle of salted caramel sauce or a sprinkle of toasted pecans adds an extra layer of indulgence. For a beverage pairing, a hot cup of coffee, a spiced chai latte, or a glass of dessert wine like a Riesling or Late Harvest wine are perfect companions.
Prep Time:
20 minutes
Cooking Time:
45 minutes
Total Time:
1 hour 5 minutes (plus resting time)
Nutritional Information:
(Please note: This is a general estimate for one serving without ice cream.)
- Calories: ~380
- Protein: 3g
- Sodium: 75mg
- Sugar: 45g
- Fat: 12g
- Carbohydrates: 70g
- Fiber: 6g
FAQs about Classic Apple Crisp:
Q: Can I make this ahead of time?
A: Absolutely! You can assemble the entire crisp, cover it tightly, and refrigerate it for up to 24 hours before baking. You may need to add 5-10 minutes to the baking time since it will be starting from cold.
Q: What are the best apples to use?
A: The best crisps use a mix! Granny Smith for tartness and structure, Honeycrisp for sweetness and a firm bite, and Braeburn or Jonagold for a soft, saucy texture. Avoid Red Delicious, as they become mushy.
Q: My topping burned before the apples were tender. What happened?
A: Your oven temperature may be too high, or your baking dish may be too shallow, exposing the topping to more direct heat. Next time, tent the crisp loosely with aluminum foil halfway through baking if the top is browning too quickly.
Q: How do I store and reheat leftovers?
A: Store covered in the refrigerator for up to 4 days. Reheat individual portions in the microwave, or cover the whole dish with foil and reheat in a 350°F oven for 15-20 minutes until warm.
Q: Can I freeze apple crisp?
A: Yes, both baked and unbaked. For unbaked, assemble and freeze solid before wrapping tightly. Bake from frozen, adding 15-20 minutes to the baking time. Baked crisp can also be frozen and reheated.
Final Thoughts:
Classic Apple Crisp is more than a recipe; it is a culinary heirloom, a simple yet profound dessert that speaks the language of home and heart. It demonstrates that the most beloved dishes are often the least complicated, built on a foundation of good technique and quality ingredients. The process, from the rhythmic slicing of apples to the triumphant presentation of a bubbling, golden dish, is a rewarding ritual that fills your home with an aroma of warmth and welcome. It’s a dessert that encourages sharing, evokes nostalgia, and creates new, delicious memories around the table. So, head to the orchard, select your finest apples, and prepare to bake a timeless classic that is sure to be requested for generations to come


