
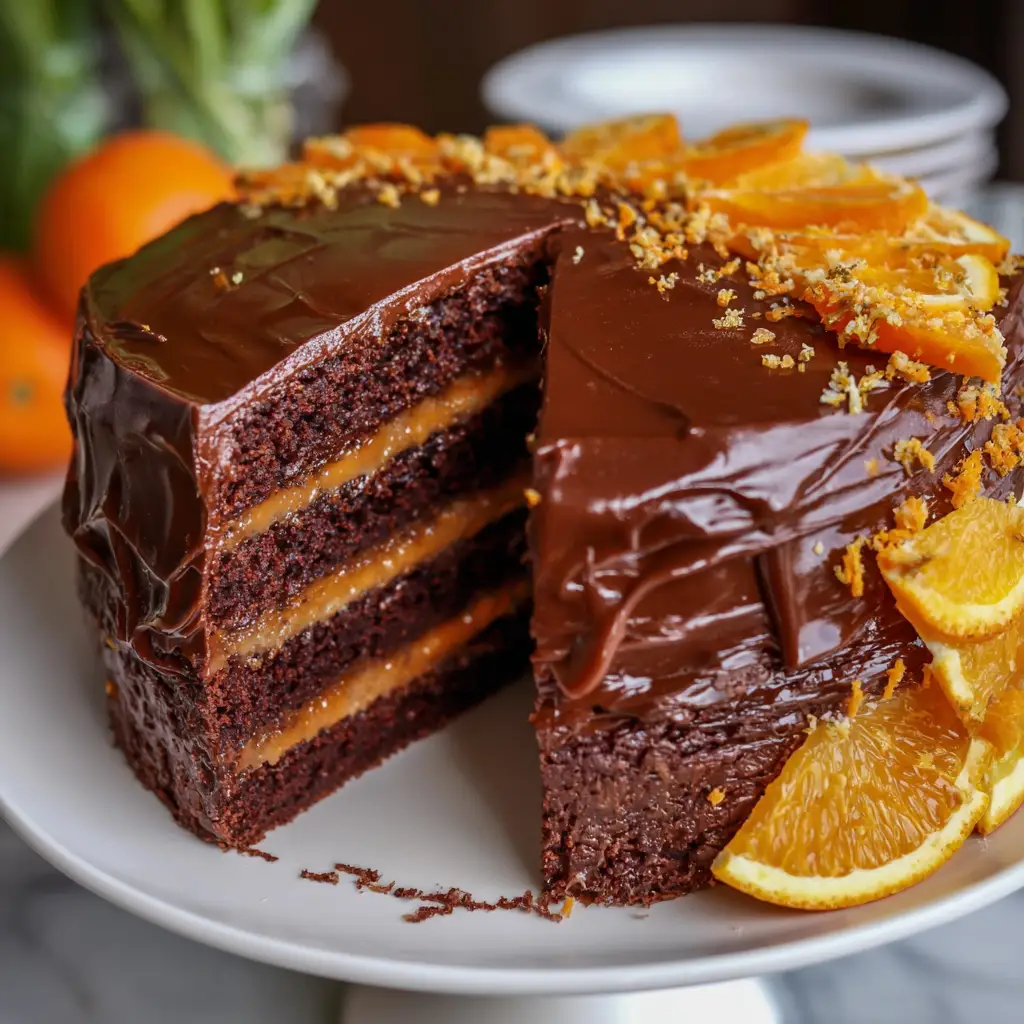
The Chocolate Orange Layer Cake is not simply a dessert; it is an iconic, sophisticated flavor pairing realized in its most celebratory and visually stunning form. This cake represents a harmonious duet between two culinary powerhouses: the deep, resonant, and sometimes bittersweet notes of premium chocolate and the bright, aromatic, and sun-kissed citrus essence of orange. When combined, they create a symphony of taste that is greater than the sum of its parts, the chocolate becomes richer and more complex, while the orange gains a luxurious, velvety depth. This particular cake elevates that pairing into a true centerpiece. Imagine layers of supremely moist, tender chocolate cake, each bite infused with the subtle fragrance of orange, stacked high with a luxuriously smooth and velvety chocolate orange buttercream.
Why Is This Chocolate Orange Layer Cake So Popular?
The enduring and widespread popularity of the Chocolate Orange Layer Cake stems from its perfect balance of familiarity and excitement. Chocolate cake is a universal love language, a dependable source of comfort and joy. The introduction of orange transforms the familiar into the extraordinary, cutting through the richness with a sparkling, sophisticated acidity that delights the palate. This combination, reminiscent of classic holiday treats and gourmet confections, evokes a sense of nostalgia and luxury simultaneously. Furthermore, its popularity is visual and theatrical; a tall, beautifully layered cake commands attention and promises indulgence. It is versatile enough for both winter festivities (where the orange brings a needed brightness) and summer gatherings (where the pairing feels refreshingly chic). It caters to a mature sweetness—less cloying than all-chocolate desserts and more substantial than a simple citrus cake. In essence, it is popular because it feels both classic and special, satisfying deep cravings while surprising and delighting the senses with every nuanced bite.
Why You’ll Love This Chocolate Orange Layer Cake:
- Sophisticated Flavor Profile: It offers a complex, adult-oriented taste that is rich yet bright, deeply satisfying yet never heavy.
- Showstopping Presentation: Its layered structure and elegant finish make it a breathtaking centerpiece for any table.
- Perfect Texture: The cake is exceptionally moist and tender, thanks to the use of oil and buttermilk, while the buttercream is cloud-like and smooth.
- Aromatic Delight: The scent of orange zest and chocolate that fills your kitchen is intoxicating and builds incredible anticipation.
- Celebration-Worthy: This is the cake you make for birthdays, anniversaries, holidays, or any moment that demands a memorable, homemade triumph.
Here’s what you’ll need:
For the Chocolate Orange Cake Layers:
- 2 cups (400g) granulated sugar
- 1 ¾ cups (220g) all-purpose flour, spooned and leveled
- ¾ cup (75g) Dutch-processed cocoa powder (for a darker, richer color and flavor)
- 2 teaspoons baking soda
- 1 teaspoon baking powder
- 1 teaspoon fine sea salt
- 2 large eggs, at room temperature
- 1 cup (240ml) full-fat buttermilk, at room temperature
- ½ cup (120ml) vegetable or canola oil
- 2 teaspoons pure vanilla extract
- 2 tablespoons finely grated orange zest (from about 2-3 large oranges)
- 1 cup (240ml) freshly brewed strong hot coffee (or boiling water)*
- *The coffee intensifies the chocolate flavor without adding a coffee taste.
For the Chocolate Orange Swiss Meringue Buttercream:
- 5 large egg whites (about 150g)
- 1 ¼ cups (250g) granulated sugar
- 1 ½ cups (340g) unsalted butter, cubed and softened to cool room temperature
- 8 ounces (225g) high-quality semi-sweet or bittersweet chocolate, finely chopped and cooled
- ¼ cup (25g) Dutch-processed cocoa powder, sifted
- 2 teaspoons pure vanilla extract
- 2 tablespoons freshly squeezed orange juice
- 1 tablespoon finely grated orange zest
- A pinch of salt
For the Soaking Syrup (Optional but Recommended):
- ¼ cup (60ml) fresh orange juice
- 2 tablespoons granulated sugar
- 1 tablespoon Cointreau or Grand Marnier (optional)
For Assembly & Decoration:
- Chocolate Orange Curd (for filling variation, see below)
- Candied Orange Slices
- Chocolate Shavings or Sprinkles
- Fresh Orange Zest
How to Make Chocolate Orange Layer Cake:
Now that you have your ingredients ready, let’s dive into the steps for making this delightful Chocolate Orange Layer Cake. It’s as easy as pie, and I promise you’ll feel like a culinary superstar!
Step 1: Prepare and Preheat
Preheat your oven to 350°F (175°C). Grease three 8-inch round cake pans with butter or non-stick spray. Line the bottoms with parchment paper circles and flour the sides. This guarantees flawless release.
Step 2: Combine Dry Ingredients
In the bowl of a stand mixer fitted with the paddle attachment (or a large bowl with a hand mixer), sift together the sugar, flour, cocoa powder, baking soda, baking powder, and salt. Whisk on low speed for one minute to ensure absolute homogeneity and aeration.
Step 3: Add Wet Ingredients (Except Coffee)
To the dry ingredients, add the eggs, buttermilk, oil, vanilla extract, and orange zest. Mix on medium speed for exactly 2 minutes. The batter will be thick and pale. Scrape down the bowl thoroughly.
Step 4: Incorporate the Hot Liquid
With the mixer on low speed, carefully and slowly pour in the hot coffee or boiling water. The batter will be very thin—this is correct and essential for the moist, tender crumb. Mix just until combined, about 30 seconds. Do not overmix.
Step 5: Bake to Perfection
Divide the batter evenly between the prepared pans (using a kitchen scale is ideal for perfect layers). Bake for 25-30 minutes, or until a wooden skewer inserted into the center comes out with just a few moist crumbs attached. The cakes will have just begun to pull away from the sides.
Step 6: Cool Completely
Let the cakes cool in their pans on a wire rack for 15 minutes. Then, run a thin knife around the edges, invert them onto the rack, peel off the parchment, and allow them to cool completely. Wrap each layer tightly in plastic wrap and refrigerate for at least 2 hours, or freeze for 1 hour. A cold cake is infinitely easier to frost without crumbs.
Step 7: Make the Swiss Meringue Buttercream
Combine egg whites and sugar in the heatproof bowl of a stand mixer. Place over a pot of simmering water (double boiler), ensuring the bowl doesn’t touch the water. Whisk constantly until the mixture reaches 160°F (71°C) and the sugar is fully dissolved (rub a bit between fingers; it should feel smooth). Attach the bowl to the mixer fitted with the whisk. Whip on high speed until a thick, glossy, cool meringue forms and the bowl is cool to the touch (10-15 minutes). Switch to the paddle attachment. With the mixer on medium-low, add the softened butter one cube at a time, waiting for each to incorporate. It may look curdled briefly; keep beating until it becomes smooth, thick, and creamy. Beat in the melted (and cooled) chocolate, sifted cocoa powder, vanilla, orange juice, zest, and salt until perfectly uniform and silky.
Tips for Success:
- Room Temperature is Key: Eggs, buttermilk, and butter for the frosting must be at true room temperature to ensure proper emulsification and a smooth texture.
- Zest First, Juice Later: Zest your oranges before juicing them. Use a microplane for the finest zest, which releases maximum oil without bitter pith.
- Weigh Your Ingredients: For baking precision, especially with flour, use a digital kitchen scale. It is the single best way to guarantee consistent results.
- Don’t Skip the Hot Liquid: The hot coffee/water “blooms” the cocoa powder, intensifying its flavor, and helps create the cake’s signature tender texture.
- Chill the Cake Layers: Frosting a cold, firm cake layer is the professional secret to a clean, crumb-free finish.
- Flavor the Frosting to Taste: After making the buttercream, taste it. You can add a touch more orange juice or zest, or a pinch of salt, to perfectly balance the sweetness.
Equipment Needed:
- Stand Mixer or Hand Mixer
- Three 8-inch Round Cake Pans
- Digital Kitchen Scale
- Microplane Zester
- Parchment Paper
- Cooling Racks
- Sifter or Fine-Mesh Sieve
- Angled and Straight Icing Spatulas
- Cake Turntable (highly recommended)
- Candy/Instant-Read Thermometer (for buttercream)
Variations of Chocolate Orange Layer Cake:
- Chocolate Orange Truffle Cake: Add a layer of dark chocolate ganache mixed with orange liqueur between the cake layers along with the buttercream.
- Jaffa Cake Style: Spread a thin layer of orange marmalade over each cake layer before adding the buttercream for a tangy punch.
- Gluten-Free: Substitute the all-purpose flour with a high-quality 1:1 gluten-free flour blend.
- Vegan Adaptation: Use flax eggs, plant-based buttermilk (soy milk + vinegar), vegan butter, and ensure chocolate is dairy-free.
- Mocha Orange: Add 1 tablespoon of instant espresso powder to the dry ingredients for a triple-flavor experience.
- Mini Layer Cakes: Bake in 6-inch pans for a taller, more intimate cake, adjusting baking time downward slightly.
Serving Suggestions for Chocolate Orange Layer Cake:
- The Classic Slice: Serve at room temperature with a cup of strong espresso, a glass of cold milk, or a dessert wine like a late-harvest Riesling or Tawny Port.
- With a Creamy Element: A dollop of lightly sweetened whipped cream or crème fraîche on the side contrasts beautifully.
- For a Dinner Party: Plate individual slices with a drizzle of chocolate sauce and a few segments of fresh orange for a restaurant-quality presentation.
- Celebration Style: Adorn the top with a ring of candied orange slices and a mound of chocolate curls for a spectacular, festive look.
Prep Time:
1 hour (plus cooling/chilling time)
Cooking Time:
30 minutes
Total Time:
4 hours (including cooling and assembly)
Nutritional Information:
(Estimated per slice, based on 12 servings)
- Calories: ~720
- Protein: 7g
- Sodium: ~380mg
- Sugar: 65g
- Fat: 42g (Saturated Fat: 24g)
- Carbohydrates: 85g
- Fiber: 4g
FAQs about Chocolate Orange Layer Cake:
Q: Can I make this cake ahead of time?
A: Absolutely. You can bake, cool, wrap, and freeze the cake layers for up to a month. The buttercream can be made and refrigerated for up to 5 days (re-whip to restore texture). The fully assembled cake can be refrigerated, well-covered, for 2 days. Bring to room temperature before serving for the best texture and flavor.
Q: What if my buttercream looks soupy or curdled?
A: This is almost always a temperature issue. Ensure your meringue is completely cool before adding butter. If it curdles, the butter is likely too warm. Chill the bowl for 15-minute intervals, then re-whip. If it’s soupy, the butter may be too cold; gently warm the bowl over a double boiler for a few seconds, then rewhip.
Q: I don’t have buttermilk. What can I use?
A: Make a soured milk: for 1 cup, add 1 tablespoon of fresh lemon juice or white vinegar to a liquid measuring cup, then fill with whole milk to the 1-cup line. Stir and let sit for 10 minutes until curdled.
Q: Can I use a different frosting?
A: Yes, though Swiss meringue buttercream is ideal for its stability and less-sweet profile. A classic American chocolate buttercream or a chocolate orange cream cheese frosting would also work well.
Q: Why Dutch-processed cocoa?
A: It is alkalized, resulting in a darker color, richer flavor, and less acidity that pairs beautifully with orange. In a pinch, natural cocoa can be used, but the flavor profile will be different.
Final Thoughts:
The Chocolate Orange Layer Cake is the pinnacle of celebratory baking—a project that rewards patience, precision, and passion with a dessert of undeniable grandeur and soul-satisfying flavor. The process of zesting the fragrant oranges, watching the silky batter come together, building the towering layers, and finally slicing into your creation to reveal the perfect crumb is a journey of pure joy. This cake does more than satisfy a sweet tooth; it creates a moment, a memory, a shared experience of awe and delight. It demonstrates the alchemy that can happen when two classic flavors are combined with care and intention. So, gather your finest ingredients, clear your counter, and embark on the rewarding process of creating this masterpiece. The result, a moist, flavorful cake enveloped in the most luxurious frosting—will not only stand as a testament to your skill but will leave an indelible impression of warmth and indulgence on everyone fortunate enough to enjoy a slice.
Print
Chocolate Orange Layer Cake: Moist, Zesty & Decadent
- Total Time: 4 hours
Description
Layers of moist chocolate cake brushed with orange syrup, filled with silky orange cream, and covered in rich chocolate ganache.
Ingredients
Here’s what you’ll need:
For the Chocolate Orange Cake Layers:
-
2 cups (400g) granulated sugar
-
1 ¾ cups (220g) all-purpose flour, spooned and leveled
-
¾ cup (75g) Dutch-processed cocoa powder (for a darker, richer color and flavor)
-
2 teaspoons baking soda
-
1 teaspoon baking powder
-
1 teaspoon fine sea salt
-
2 large eggs, at room temperature
-
1 cup (240ml) full-fat buttermilk, at room temperature
-
½ cup (120ml) vegetable or canola oil
-
2 teaspoons pure vanilla extract
-
2 tablespoons finely grated orange zest (from about 2–3 large oranges)
-
1 cup (240ml) freshly brewed strong hot coffee (or boiling water)*
-
*The coffee intensifies the chocolate flavor without adding a coffee taste.
For the Chocolate Orange Swiss Meringue Buttercream:
-
5 large egg whites (about 150g)
-
1 ¼ cups (250g) granulated sugar
-
1 ½ cups (340g) unsalted butter, cubed and softened to cool room temperature
-
8 ounces (225g) high-quality semi-sweet or bittersweet chocolate, finely chopped and cooled
-
¼ cup (25g) Dutch-processed cocoa powder, sifted
-
2 teaspoons pure vanilla extract
-
2 tablespoons freshly squeezed orange juice
-
1 tablespoon finely grated orange zest
-
A pinch of salt
For the Soaking Syrup (Optional but Recommended):
-
¼ cup (60ml) fresh orange juice
-
2 tablespoons granulated sugar
-
1 tablespoon Cointreau or Grand Marnier (optional)
For Assembly & Decoration:
-
Chocolate Orange Curd (for filling variation, see below)
-
Candied Orange Slices
-
Chocolate Shavings or Sprinkles
-
Fresh Orange Zest
Instructions
Step 1: Prepare and Preheat
Preheat your oven to 350°F (175°C). Grease three 8-inch round cake pans with butter or non-stick spray. Line the bottoms with parchment paper circles and flour the sides. This guarantees flawless release.
Step 2: Combine Dry Ingredients
In the bowl of a stand mixer fitted with the paddle attachment (or a large bowl with a hand mixer), sift together the sugar, flour, cocoa powder, baking soda, baking powder, and salt. Whisk on low speed for one minute to ensure absolute homogeneity and aeration.
Step 3: Add Wet Ingredients (Except Coffee)
To the dry ingredients, add the eggs, buttermilk, oil, vanilla extract, and orange zest. Mix on medium speed for exactly 2 minutes. The batter will be thick and pale. Scrape down the bowl thoroughly.
Step 4: Incorporate the Hot Liquid
With the mixer on low speed, carefully and slowly pour in the hot coffee or boiling water. The batter will be very thin—this is correct and essential for the moist, tender crumb. Mix just until combined, about 30 seconds. Do not overmix.
Step 5: Bake to Perfection
Divide the batter evenly between the prepared pans (using a kitchen scale is ideal for perfect layers). Bake for 25-30 minutes, or until a wooden skewer inserted into the center comes out with just a few moist crumbs attached. The cakes will have just begun to pull away from the sides.
Step 6: Cool Completely
Let the cakes cool in their pans on a wire rack for 15 minutes. Then, run a thin knife around the edges, invert them onto the rack, peel off the parchment, and allow them to cool completely. Wrap each layer tightly in plastic wrap and refrigerate for at least 2 hours, or freeze for 1 hour. A cold cake is infinitely easier to frost without crumbs.
Step 7: Make the Swiss Meringue Buttercream
Combine egg whites and sugar in the heatproof bowl of a stand mixer. Place over a pot of simmering water (double boiler), ensuring the bowl doesn’t touch the water. Whisk constantly until the mixture reaches 160°F (71°C) and the sugar is fully dissolved (rub a bit between fingers; it should feel smooth). Attach the bowl to the mixer fitted with the whisk. Whip on high speed until a thick, glossy, cool meringue forms and the bowl is cool to the touch (10-15 minutes). Switch to the paddle attachment. With the mixer on medium-low, add the softened butter one cube at a time, waiting for each to incorporate. It may look curdled briefly; keep beating until it becomes smooth, thick, and creamy. Beat in the melted (and cooled) chocolate, sifted cocoa powder, vanilla, orange juice, zest, and salt until perfectly uniform and silky.
Notes
-
Stand Mixer or Hand Mixer
-
Three 8-inch Round Cake Pans
-
Digital Kitchen Scale
-
Microplane Zester
-
Parchment Paper
-
Cooling Racks
- Prep Time: 1 hour
- Category: dessert
- Cuisine: American
Nutrition
- Serving Size: 0
- Calories: 720
- Sugar: 65g
- Sodium: 380mg
- Fat: 42g
- Saturated Fat: 24g
- Unsaturated Fat: 0
- Trans Fat: 0
- Carbohydrates: 85g
- Fiber: 4g
- Protein: 7g
- Cholesterol: 0


