
Introduction to Berry Cheesecake Danish Twists Recipe
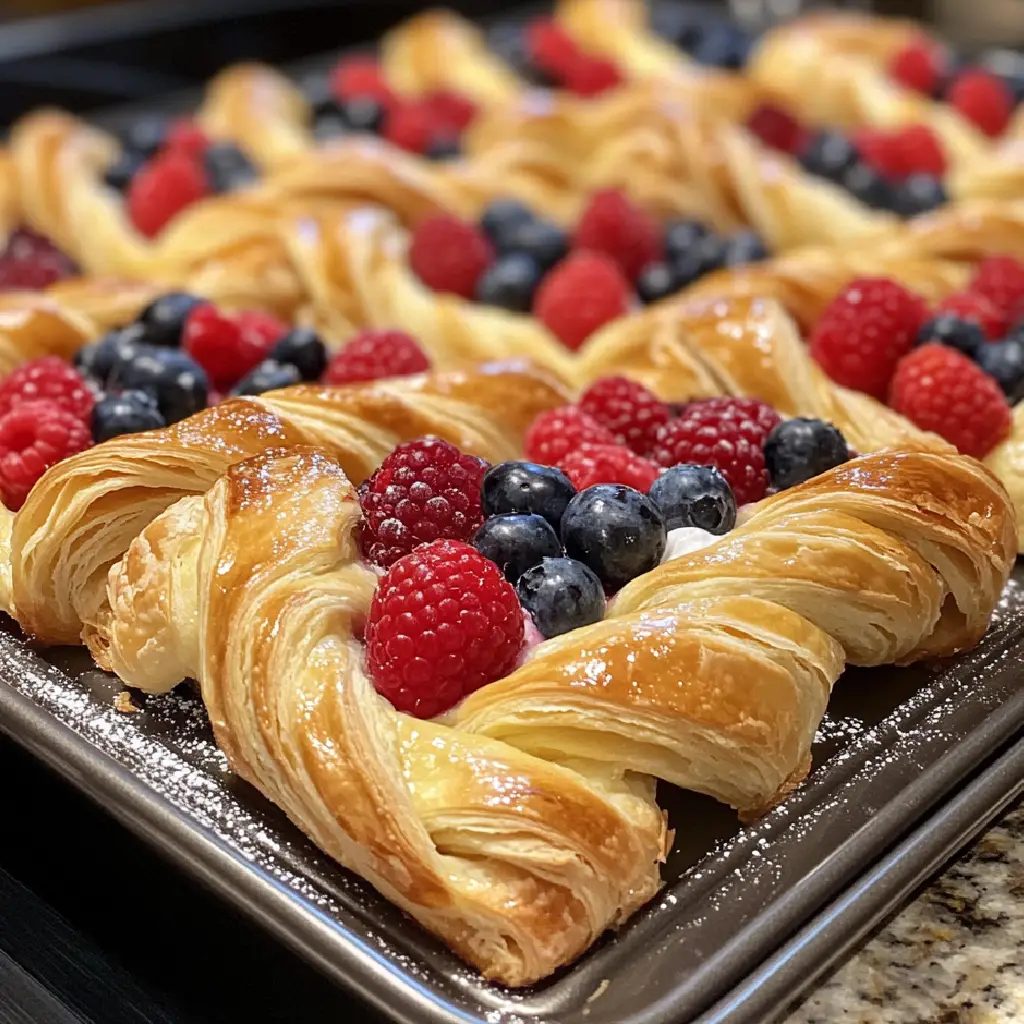
As a passionate home cook, I find joy in creating delightful treats that not only satisfy my sweet tooth but also bring smiles to the faces of my loved ones. One of my all-time favorite recipes is the Berry Cheesecake Danish Twists. This recipe is like a warm hug on a plate, combining the creamy richness of cheesecake with the vibrant flavors of fresh berries, all wrapped in a flaky, golden pastry. It’s a dessert that feels special, yet it’s surprisingly easy to make!
Let me take you back to the first time I made these delightful twists. It was a sunny Saturday morning, and I had a basket full of ripe strawberries and blueberries from the local farmer’s market. The colors were so vibrant, they practically begged to be transformed into something delicious. I decided to experiment, and that’s when the Berry Cheesecake Danish Twists were born. The moment I pulled them out of the oven, the sweet aroma filled my kitchen, and I knew I had created something magical.
These twists are perfect for any occasion—whether it’s a cozy brunch with friends, a festive holiday gathering, or simply a treat for yourself after a long day. The best part? You can customize them with your favorite berries or even add a sprinkle of lemon zest for a refreshing twist. I love sharing this recipe with others because it’s not just about the food; it’s about the memories we create while cooking and enjoying it together.
So, grab your apron and let’s dive into the world of Berry Cheesecake Danish Twists! I promise you, once you try them, they’ll become a staple in your kitchen, just like they have in mine.
Ingredients for Berry Cheesecake Danish Twists Recipe
Before we embark on this delicious journey, let’s gather all the ingredients we need for our Berry Cheesecake Danish Twists. I always believe that quality ingredients make a world of difference in the final product. So, let’s make sure we have everything ready to go!
Main Ingredients
- 1 package (8 oz) of cream cheese, softened
- 1/4 cup granulated sugar
- 1 teaspoon vanilla extract
- 1 package (17.3 oz) of frozen puff pastry, thawed
- 1 cup mixed berries (strawberries, blueberries, raspberries), fresh or frozen
- 1 egg, beaten (for egg wash)
- Powdered sugar, for dusting
When choosing your berries, I recommend going for fresh ones if they’re in season. They add a burst of flavor and color that makes these twists even more appealing. If fresh berries aren’t available, frozen ones work just as well—just make sure to thaw and drain them before using!
Optional Add-ons
- 1 tablespoon lemon zest (for a zesty kick)
- 1/2 teaspoon almond extract (for a nutty flavor)
- Chopped nuts (like almonds or walnuts) for added crunch
- Chocolate drizzle for a decadent touch
These optional add-ons can elevate your Danish twists to a whole new level. I love adding lemon zest for that refreshing zing, especially during the summer months. And if you’re a chocolate lover like me, a drizzle of melted chocolate on top is simply divine!
How to Prepare Berry Cheesecake Danish Twists Recipe
Now that we have all our ingredients ready, it’s time to roll up our sleeves and get cooking! Making Berry Cheesecake Danish Twists is a fun and rewarding process. I love how each step brings us closer to that delicious final product. Let’s dive into the preparation!
Step 1: Prepare the Dough
First things first, we need to prepare our puff pastry. If you’re using frozen puff pastry, make sure it’s completely thawed before you start. I usually take it out of the freezer a few hours before I plan to bake. Once it’s thawed, unfold the pastry on a lightly floured surface. Gently roll it out to smooth any creases. This will help create those beautiful layers when we bake!
Tips for Step 1
- Keep the pastry cold. If it gets too warm, it can become sticky and hard to work with. If needed, pop it back in the fridge for a few minutes.
- Use a sharp knife or pizza cutter to cut the pastry into rectangles. This will make it easier to assemble the twists later.
Step 2: Make the Cheesecake Filling
Next up is the cheesecake filling! In a mixing bowl, combine the softened cream cheese, granulated sugar, and vanilla extract. I like to use a hand mixer for this step, as it makes the mixture nice and smooth. Beat until it’s creamy and well combined. If you’re adding lemon zest or almond extract, now’s the time to mix those in!
Tips for Step 2
- Make sure your cream cheese is at room temperature. This helps it blend smoothly without lumps.
- Taste the filling! If you want it sweeter, feel free to add a little more sugar.
Step 3: Assemble the Danish Twists
Now comes the fun part—assembling our twists! Take one rectangle of puff pastry and place a spoonful of the cheesecake filling in the center. Top it with a few berries, then fold the pastry over to create a pocket. Pinch the edges to seal it well. I like to twist the ends a bit for that classic Danish look. Repeat this process with the remaining pastry and filling.
Tips for Step 3
- Don’t overfill! If you add too much filling, it can ooze out while baking.
- For a beautiful finish, brush the tops of the twists with the beaten egg. This gives them a lovely golden color.
Step 4: Bake the Danish Twists
Finally, it’s time to bake! Preheat your oven to 375°F (190°C). Line a baking sheet with parchment paper and place your assembled twists on it, leaving some space between each one. Bake for about 20-25 minutes, or until they’re puffed and golden brown. The aroma that fills your kitchen will be absolutely heavenly!
Tips for Step 4
- Keep an eye on them towards the end of baking. Ovens can vary, and you don’t want them to over-bake.
- Let them cool for a few minutes before dusting with powdered sugar. This way, the sugar won’t melt into the pastry.
Equipment Needed for Berry Cheesecake Danish Twists Recipe
Before we dive into the deliciousness of Berry Cheesecake Danish Twists, let’s make sure we have the right tools at our disposal. Having the right equipment can make the cooking process smoother and more enjoyable. Here’s what you’ll need:
- Baking Sheet: A standard baking sheet will do just fine. If you have a non-stick one, that’s even better!
- Parchment Paper: This is essential for preventing the twists from sticking to the baking sheet. If you don’t have parchment paper, you can lightly grease the baking sheet with butter or cooking spray.
- Mixing Bowls: You’ll need a couple of mixing bowls—one for the cheesecake filling and another for any additional ingredients.
- Hand Mixer or Whisk: A hand mixer makes it easy to achieve a smooth cheesecake filling, but a whisk works just as well if you’re up for a little workout!
- Sharp Knife or Pizza Cutter: This will help you cut the puff pastry into neat rectangles. A pizza cutter is especially handy for this task!
- Pastry Brush: Use this to apply the egg wash for that beautiful golden finish. If you don’t have one, you can use the back of a spoon or even your fingers.
With these tools in hand, you’re all set to create your Berry Cheesecake Danish Twists. Remember, cooking is all about improvisation, so if you don’t have a specific tool, think creatively! The most important thing is to have fun in the kitchen.
Variations of Berry Cheesecake Danish Twists Recipe
One of the things I love most about cooking is the ability to experiment and make a recipe your own. The Berry Cheesecake Danish Twists are no exception! Here are a few fun variations that I’ve tried and absolutely adored:
- Mixed Berry Medley: Instead of just using strawberries and blueberries, why not throw in some blackberries or raspberries? The combination of flavors creates a delightful burst in every bite!
- Chocolate Lovers Delight: For a decadent twist, add mini chocolate chips to the cheesecake filling. The melty chocolate pairs beautifully with the tangy cream cheese and sweet berries.
- Nutty Crunch: Sprinkle some chopped nuts, like pecans or almonds, into the filling for an added crunch. It gives the twists a lovely texture that contrasts with the creamy filling.
- Seasonal Spices: During the fall, I love adding a pinch of cinnamon or nutmeg to the cheesecake filling. It adds warmth and a cozy flavor that’s perfect for chilly days.
- Fruit-Infused Glaze: After baking, drizzle a simple glaze made from powdered sugar and a splash of berry juice over the twists. It not only looks beautiful but also enhances the berry flavor!
These variations allow you to tailor the Berry Cheesecake Danish Twists to your taste or the season. I encourage you to get creative and make this recipe your own. After all, the kitchen is a playground for flavors, and every twist can tell a different story!
Cooking Notes for Berry Cheesecake Danish Twists Recipe
As I’ve learned through my culinary adventures, a few cooking notes can make all the difference in achieving the perfect Berry Cheesecake Danish Twists. Here are some tips that I always keep in mind when whipping up this delightful treat:
- Thawing Puff Pastry: Make sure to thaw your puff pastry in the refrigerator overnight or at room temperature for about 30 minutes. This helps maintain its flaky texture.
- Don’t Skip the Egg Wash: Brushing the twists with a beaten egg before baking not only gives them a beautiful golden color but also adds a lovely sheen.
- Cooling Time: Allow the twists to cool on the baking sheet for a few minutes before transferring them to a wire rack. This prevents them from becoming soggy.
- Storage Tips: If you have leftovers (which is rare in my house!), store them in an airtight container at room temperature for up to two days. They’re best enjoyed fresh, but you can reheat them in the oven for a few minutes to regain that crispy texture.
- Experiment with Berries: Feel free to mix and match your favorite berries! Each type brings its own unique flavor, making every batch a new experience.
These cooking notes are like little nuggets of wisdom I’ve gathered over time. They help ensure that each batch of Berry Cheesecake Danish Twists turns out just as delicious as the last. Happy baking!
Serving Suggestions for Berry Cheesecake Danish Twists Recipe
Once your Berry Cheesecake Danish Twists are out of the oven and cooled just enough to handle, it’s time to think about how to serve them. I love to present these delightful treats in a way that makes them even more inviting. Here are some of my favorite serving suggestions:
- With Fresh Berries: Serve the twists alongside a small bowl of fresh berries. The vibrant colors and flavors complement the twists beautifully, making for a stunning presentation.
- Drizzled with Glaze: A simple glaze made from powdered sugar and a splash of milk or berry juice can elevate the twists. Drizzle it over the top for a sweet finishing touch.
- Accompanied by Whipped Cream: A dollop of freshly whipped cream adds a light and airy texture that pairs perfectly with the creamy cheesecake filling.
- On a Dessert Platter: Arrange the twists on a decorative platter for a beautiful dessert display. Add some mint leaves for a pop of color and freshness.
- With a Cup of Coffee or Tea: These twists make a delightful afternoon treat. Pair them with your favorite coffee or tea for a cozy experience.
Serving these Berry Cheesecake Danish Twists is all about creating a moment of joy. Whether it’s a casual family brunch or a special gathering with friends, these twists are sure to impress and delight everyone at the table. Enjoy every bite!
Tips for Perfecting Berry Cheesecake Danish Twists Recipe
As I’ve spent countless hours perfecting my Berry Cheesecake Danish Twists, I’ve gathered a treasure trove of tips that can help you achieve the best results. These little nuggets of wisdom can make a world of difference in your baking journey. Here’s what I’ve learned:
- Chill Your Ingredients: Keeping your cream cheese and puff pastry cold helps maintain that flaky texture. If the dough gets too warm, it can lose its puffiness while baking.
- Use a Light Hand: When rolling out the puff pastry, be gentle. Overworking it can lead to tough twists instead of the light, airy ones we crave.
- Don’t Rush the Baking: Allow the twists to bake until they’re golden brown. This ensures they’re cooked through and have that delightful crunch.
- Experiment with Flavors: Don’t hesitate to try different berry combinations or add spices. Each twist can be a new adventure in flavor!
- Presentation Matters: A sprinkle of powdered sugar or a drizzle of glaze can elevate the visual appeal. Remember, we eat with our eyes first!
With these tips in your back pocket, you’ll be well on your way to creating Berry Cheesecake Danish Twists that not only taste amazing but also look like they came straight from a bakery. Happy baking!
Breakdown of Time for Berry Cheesecake Danish Twists Recipe
As a home cook, I know that time management is key in the kitchen. When I’m whipping up my Berry Cheesecake Danish Twists, I like to keep track of how long each step takes. This way, I can plan my baking adventure without feeling rushed. Here’s a quick breakdown of the time you’ll need:
- Prep Time: 30 minutes
- Cooking Time: 25 minutes
- Total Time: 55 minutes
During the prep time, you’ll be gathering your ingredients, preparing the dough, and making the cheesecake filling. It’s a great time to enjoy some music or a podcast while you work! The cooking time is when the magic happens in the oven, filling your kitchen with that irresistible aroma. In just under an hour, you’ll have a batch of delicious Berry Cheesecake Danish Twists ready to impress your family and friends. Trust me, the wait will be worth it!
Nutritional Information for Berry Cheesecake Danish Twists Recipe
As a passionate home cook, I always find it helpful to know the nutritional content of the treats I make. While these Berry Cheesecake Danish Twists are a delightful indulgence, they can also fit into a balanced diet when enjoyed in moderation. Here’s a general breakdown of the nutritional information per serving (assuming the recipe yields about 8 twists):
- Calories: Approximately 200 calories
- Protein: 3g
- Fat: 10g
- Carbohydrates: 25g
- Fiber: 1g
- Sugar: 5g
Keep in mind that these values can vary based on the specific ingredients you use and any optional add-ons you choose to include. For instance, adding nuts or chocolate will increase the calorie count, while using low-fat cream cheese can help reduce it. I always encourage my friends and family to enjoy these twists as a special treat, savoring each bite while being mindful of their overall dietary choices. After all, cooking is about balance and joy!
Frequently Asked Questions about Berry Cheesecake Danish Twists Recipe
As I’ve shared my Berry Cheesecake Danish Twists with friends and family, I’ve noticed a few common questions pop up. It’s always great to clarify any doubts, especially when it comes to baking. Here are some of the most frequently asked questions I receive, along with my answers to help you on your baking journey!
Can I use different types of berries?
Absolutely! One of the best things about this recipe is its versatility. You can mix and match your favorite berries, such as blackberries, raspberries, or even cherries. Each berry brings its own unique flavor, making every batch a delightful surprise!
What if I don’t have puff pastry?
If puff pastry isn’t available, you can use crescent roll dough as a substitute. While it won’t have the same flaky texture, it will still create a delicious treat. Just roll it out and follow the same steps for assembling the twists!
Can I make the filling ahead of time?
Yes, you can prepare the cheesecake filling a day in advance! Just store it in an airtight container in the refrigerator. When you’re ready to bake, simply take it out and let it come to room temperature before using it in your twists.
How do I store leftovers?
If you happen to have any twists left (which is rare in my house!), store them in an airtight container at room temperature for up to two days. For longer storage, you can freeze them. Just make sure to wrap them tightly in plastic wrap and then place them in a freezer bag. When you’re ready to enjoy, thaw them in the fridge and reheat in the oven for a few minutes!
Can I make these twists gluten-free?
Yes! If you’re looking for a gluten-free option, you can use gluten-free puff pastry. Just be sure to check the packaging for any specific instructions, as gluten-free dough can behave differently than traditional puff pastry.
These questions are just a few of the common queries I’ve encountered while sharing my Berry Cheesecake Danish Twists recipe. I hope this section helps clear up any uncertainties you might have. Remember, baking is all about experimenting and having fun, so don’t hesitate to make this recipe your own!
Conclusion on Berry Cheesecake Danish Twists Recipe
In conclusion, the Berry Cheesecake Danish Twists recipe is a delightful blend of flavors and textures that brings joy to any occasion. From the flaky, golden pastry to the creamy cheesecake filling and the burst of fresh berries, each bite is a celebration of sweetness. I love how this recipe not only satisfies my cravings but also creates cherished moments with family and friends around the table.
Whether you’re a seasoned baker or just starting your culinary journey, these twists are approachable and fun to make. They offer endless possibilities for customization, allowing you to experiment with different berries and flavors. Plus, the aroma that fills your kitchen while they bake is simply irresistible!
So, the next time you’re looking for a treat that’s sure to impress, remember this Berry Cheesecake Danish Twists recipe. It’s more than just a dessert; it’s a way to create memories, share love, and indulge in the simple pleasures of life. Happy baking, and may your kitchen always be filled with warmth and delicious aromas!


