
Introduction to BBQ Chicken Panini Recipe
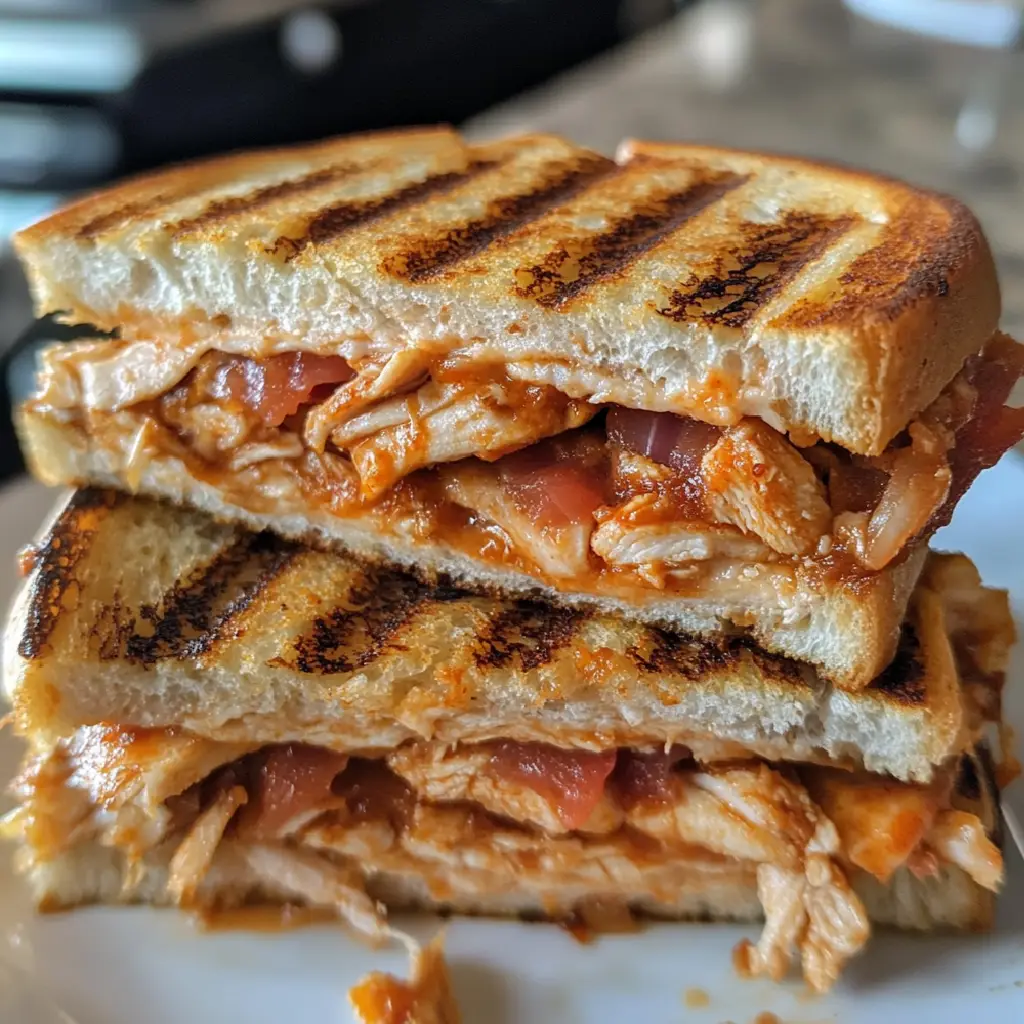
As a passionate home cook, I find joy in creating meals that not only satisfy hunger but also bring people together. One of my all-time favorite recipes is the BBQ Chicken Panini. It’s a delightful blend of smoky, tangy flavors wrapped in crispy, golden bread. Every time I make this dish, it feels like a mini celebration in my kitchen.
Let me take you back to the first time I made this panini. It was a sunny Saturday afternoon, and I had friends over for a casual lunch. I wanted to impress them with something delicious yet easy to prepare. After rummaging through my pantry, I stumbled upon some leftover grilled chicken and a bottle of BBQ sauce. That’s when the idea struck me! I decided to whip up a BBQ Chicken Panini, and it was an instant hit. The combination of tender chicken, zesty sauce, and melted cheese made everyone smile.
What I love most about this recipe is its versatility. You can customize it with your favorite ingredients, making it perfect for any occasion. Whether you’re hosting a backyard barbecue or just looking for a quick weeknight dinner, this panini is sure to please. Plus, it’s a fantastic way to use up leftover chicken, reducing food waste while creating something scrumptious.
In this article, I’ll guide you through the ingredients, preparation steps, and tips to make the best BBQ Chicken Panini. So, roll up your sleeves, and let’s dive into this culinary adventure together!
Ingredients for BBQ Chicken Panini Recipe
Before we get our hands dirty, let’s gather all the ingredients for this mouthwatering BBQ Chicken Panini. I always believe that the quality of ingredients can make or break a dish. So, I recommend sourcing fresh, high-quality items whenever possible. Here’s what you’ll need:
Main Ingredients
- 2 cups cooked chicken, shredded (I love using rotisserie chicken for its flavor and convenience)
- 1/2 cup BBQ sauce (choose your favorite brand or homemade for a personal touch)
- 4 slices of sourdough or ciabatta bread (the crusty texture adds a delightful crunch)
- 1 cup shredded cheese (cheddar or mozzarella works beautifully)
- 1/4 cup red onion, thinly sliced (for a bit of zing)
- 1 tablespoon olive oil (for grilling)
Optional Add-ons
Now, let’s talk about optional ingredients that can elevate your panini experience:
- 1/2 avocado, sliced (adds creaminess and healthy fats)
- Fresh cilantro or parsley, chopped (for a burst of freshness)
- Pickles or jalapeños (if you like a spicy kick)
- Spinach or arugula (for a nutritious green touch)
Feel free to mix and match these add-ons based on your taste preferences. The beauty of this BBQ Chicken Panini recipe is its flexibility. You can create a version that’s uniquely yours!
How to Prepare BBQ Chicken Panini Recipe
Now that we have our ingredients ready, it’s time to roll up our sleeves and get cooking! Making a BBQ Chicken Panini is a fun and straightforward process. I promise you’ll be savoring every bite in no time. Let’s break it down step by step.
Step 1: Prepare the Chicken
First things first, we need to prepare the chicken. If you’re using leftover grilled chicken, you’re already ahead of the game! Just shred it into bite-sized pieces. If you’re starting from scratch, here’s how I like to cook my chicken:
- Season the chicken breasts with salt, pepper, and a sprinkle of garlic powder for extra flavor.
- Heat a skillet over medium heat and add a drizzle of olive oil.
- Cook the chicken for about 6-7 minutes on each side, or until it’s cooked through and no longer pink in the center.
- Once cooked, let it rest for a few minutes before shredding.
Tips for Cooking Chicken
To ensure your chicken stays juicy, avoid overcooking it. I often use a meat thermometer to check for doneness; it should read 165°F (75°C). If you’re in a hurry, rotisserie chicken is a fantastic shortcut. Just shred it, and you’re good to go!
Step 2: Assemble the Panini
With the chicken ready, it’s time to assemble our panini. This is where the magic happens! Grab your slices of bread and let’s get creative:
- Spread a generous amount of BBQ sauce on one side of each slice of bread.
- Layer the shredded chicken evenly on two of the slices.
- Add the sliced red onion and cheese on top of the chicken.
- If you’re using any optional add-ons, now’s the time to sprinkle them on!
- Top with the other slices of bread, BBQ sauce side down.
Tips for Layering Ingredients
Don’t be shy with the BBQ sauce! It adds so much flavor. Also, try to keep the layers even to ensure a balanced bite. I like to press down gently on the assembled panini to help everything stick together.
Step 3: Grill the Panini
Now comes the fun part—grilling! This is where we achieve that crispy, golden exterior that makes paninis so irresistible:
- Heat your grill pan or panini press over medium heat. If you don’t have a panini press, a regular skillet works just fine.
- Brush the outside of the bread with olive oil to help it crisp up.
- Place the panini on the grill and cook for about 3-4 minutes on each side, or until the bread is golden brown and the cheese is melted.
Tips for Achieving Perfect Grill Marks
To get those beautiful grill marks, press down on the panini with a spatula while it cooks. This helps create that lovely crunch. If you’re using a skillet, you can place a heavy pan on top of the panini to mimic a press.
And there you have it! Your BBQ Chicken Panini is ready to be devoured. The aroma wafting through your kitchen will have everyone gathering around, eager to take a bite. Let’s move on to the next section where we’ll discuss the equipment you’ll need for this delicious recipe!
Equipment Needed for BBQ Chicken Panini Recipe
Before we dive into grilling our delicious BBQ Chicken Panini, let’s make sure we have the right tools at hand. Having the right equipment can make the cooking process smoother and more enjoyable. Here’s what you’ll need:
- Grill Pan or Panini Press: A grill pan is perfect for achieving those beautiful grill marks. If you have a panini press, it’s even better! It evenly grills both sides at once.
- Spatula: A sturdy spatula is essential for flipping the panini without losing any of that delicious filling.
- Cutting Board: You’ll need a cutting board for shredding the chicken and assembling your panini.
- Knife: A sharp knife will help you slice the bread and any additional ingredients with ease.
- Measuring Cups and Spoons: These are handy for measuring out your BBQ sauce and other ingredients accurately.
If you don’t have a grill pan or panini press, don’t worry! A regular skillet works just as well. You can still achieve that crispy texture by following the grilling tips I shared earlier. Now that we have our equipment ready, let’s get back to the fun part—making that BBQ Chicken Panini!
Variations of BBQ Chicken Panini Recipe
One of the things I adore about the BBQ Chicken Panini is its adaptability. You can easily switch things up to suit your taste or to use what you have on hand. Here are a few variations that I’ve tried and loved:
- Buffalo Chicken Panini: Swap out the BBQ sauce for buffalo sauce for a spicy twist. Add some blue cheese crumbles for that classic flavor combination.
- Caprese BBQ Chicken Panini: Layer fresh mozzarella, tomatoes, and basil with the BBQ chicken for a fresh, Italian-inspired version. Drizzle with balsamic glaze for an extra kick!
- BBQ Chicken and Pineapple Panini: Add slices of grilled pineapple for a sweet and savory flavor explosion. It’s like a tropical vacation in every bite!
- Vegetarian BBQ Panini: Replace the chicken with grilled vegetables like zucchini, bell peppers, and mushrooms. Toss them in BBQ sauce for a hearty, meat-free option.
These variations not only keep things exciting but also allow you to explore new flavors. I encourage you to experiment and find your favorite combination. After all, cooking is all about creativity and having fun in the kitchen!
Cooking Notes for BBQ Chicken Panini Recipe
As I’ve learned through my culinary adventures, a few cooking notes can make a world of difference in your BBQ Chicken Panini experience. Here are some tips that I always keep in mind:
- Don’t Rush the Grilling: Allow the panini to grill slowly over medium heat. This ensures the bread gets crispy while the cheese melts perfectly. Patience is key!
- Experiment with Bread: While sourdough and ciabatta are my go-to choices, feel free to try other types of bread. Whole grain or even a baguette can add a unique twist.
- Adjust the BBQ Sauce: Depending on your taste, you can mix different BBQ sauces for a more complex flavor. A smoky sauce paired with a sweet one can create a delightful balance.
- Let It Rest: After grilling, let the panini sit for a minute before slicing. This helps the cheese set a bit, making it easier to cut without spilling all the delicious filling.
These little notes have helped me elevate my BBQ Chicken Panini game, and I hope they do the same for you! Remember, cooking is all about enjoying the process and making it your own.
Serving Suggestions for BBQ Chicken Panini Recipe
Now that your BBQ Chicken Panini is grilled to perfection, it’s time to think about how to serve it! Presentation can elevate your meal from ordinary to extraordinary. Here are some serving suggestions that I absolutely love:
- Side Salads: Pair your panini with a fresh side salad. A simple mixed greens salad with a light vinaigrette complements the richness of the panini beautifully.
- Chips or Fries: For a classic touch, serve your panini with crispy potato chips or homemade sweet potato fries. The crunch adds a delightful contrast to the soft, melty sandwich.
- Coleslaw: A tangy coleslaw can provide a refreshing crunch. The coolness of the slaw balances the warm, smoky flavors of the panini.
- Dipping Sauce: Consider serving a small bowl of extra BBQ sauce or ranch dressing for dipping. It adds an interactive element to your meal!
When I serve my BBQ Chicken Panini, I like to arrange everything on a colorful platter. It makes the meal feel special and inviting. Plus, it’s a great way to showcase your culinary creation! Enjoy your delicious panini with friends and family, and watch as they savor every bite.
Tips for Making the Best BBQ Chicken Panini Recipe
As I’ve experimented with my BBQ Chicken Panini over the years, I’ve gathered a treasure trove of tips that can truly elevate your sandwich game. Here are some of my favorite nuggets of wisdom to ensure your panini turns out absolutely delicious:
- Choose the Right Bread: The bread is the foundation of your panini. Opt for a sturdy bread like sourdough or ciabatta that can hold up to the fillings without getting soggy.
- Balance Flavors: Aim for a balance of flavors. If your BBQ sauce is sweet, consider adding a tangy element like pickles or a sprinkle of vinegar-based coleslaw to cut through the richness.
- Don’t Skimp on Cheese: Cheese is the glue that holds everything together. Use a generous amount of cheese to ensure it melts beautifully and adds that gooey goodness we all love.
- Preheat Your Grill: Make sure your grill or panini press is hot before you start cooking. This helps achieve those perfect grill marks and a crispy exterior.
- Experiment with Seasoning: Don’t hesitate to season your chicken with herbs and spices. A sprinkle of smoked paprika or a dash of cayenne can add an extra layer of flavor to your panini.
These tips have transformed my BBQ Chicken Panini from good to unforgettable. I encourage you to try them out and make this recipe your own. Happy cooking!
Breakdown of Time for BBQ Chicken Panini Recipe
Now that we’ve covered all the delicious details of making a BBQ Chicken Panini, let’s talk about the time it takes to whip up this delightful dish. I always appreciate knowing how long I’ll be spending in the kitchen, especially when I’m hungry! Here’s a quick breakdown:
- Prep Time: 15 minutes. This includes gathering your ingredients, shredding the chicken, and assembling the panini. If you’re using leftover chicken, you’ll save even more time!
- Cooking Time: 10 minutes. This is the time it takes to grill your panini to crispy perfection. Just a few minutes on each side, and you’ll have a golden, melty masterpiece.
- Total Time: 25 minutes. In just under half an hour, you can have a delicious BBQ Chicken Panini ready to serve. Perfect for a quick lunch or a satisfying dinner!
Knowing the time commitment helps me plan my meals better, especially on busy days. I love how this recipe is quick yet delivers big on flavor. So, gather your ingredients and get ready to enjoy a scrumptious BBQ Chicken Panini in no time!
Nutritional Information for BBQ Chicken Panini Recipe
As a home cook, I always find it helpful to know the nutritional value of the meals I prepare. It allows me to enjoy my food while being mindful of what I’m eating. Here’s a general breakdown of the nutritional information for one serving of the BBQ Chicken Panini, assuming it’s made with the main ingredients listed earlier:
- Calories: Approximately 450-500 calories
- Protein: About 30 grams (thanks to the chicken and cheese)
- Carbohydrates: Roughly 40 grams (mostly from the bread)
- Fat: Around 20 grams (depending on the cheese and any add-ons)
- Sodium: Approximately 800-900 mg (varies with BBQ sauce and cheese)
These values can change based on the specific ingredients you choose, especially if you opt for low-fat cheese or whole grain bread. I love to customize my panini, and knowing the nutritional content helps me make healthier choices. Enjoying a BBQ Chicken Panini can be part of a balanced diet, especially when paired with a fresh salad or some veggies on the side. Happy cooking and eating!
Frequently Asked Questions about BBQ Chicken Panini Recipe
As I’ve shared my BBQ Chicken Panini recipe with friends and family, I’ve noticed a few common questions pop up. It’s always great to clarify any doubts and help others enjoy this delicious dish as much as I do! Here are some frequently asked questions about the BBQ Chicken Panini:
Can I use raw chicken instead of cooked chicken?
Absolutely! If you prefer to use raw chicken, just make sure to cook it thoroughly before shredding. Season it well and grill or sauté it until it reaches an internal temperature of 165°F (75°C). This way, you’ll have juicy, flavorful chicken for your panini!
What type of bread works best for a panini?
I love using sourdough or ciabatta for my BBQ Chicken Panini. They have a sturdy texture that holds up well to the fillings. However, feel free to experiment with other types of bread like whole grain or even a baguette. Just make sure it’s thick enough to support the ingredients without getting soggy!
Can I make this panini ahead of time?
While I recommend enjoying the BBQ Chicken Panini fresh off the grill for the best texture, you can prepare the ingredients ahead of time. Shred the chicken and assemble the panini, then store it in the fridge. When you’re ready to eat, just grill it up! It’s a great way to save time on busy days.
What can I serve with my BBQ Chicken Panini?
There are so many delicious options! I love pairing my panini with a fresh side salad, crispy chips, or homemade sweet potato fries. You could also serve it with coleslaw or a dipping sauce for an extra touch. The possibilities are endless!
Can I make a vegetarian version of the BBQ Chicken Panini?
Definitely! You can replace the chicken with grilled vegetables like zucchini, bell peppers, and mushrooms. Toss them in BBQ sauce for a hearty, meat-free option. It’s just as delicious and satisfying!
These FAQs should help clear up any questions you might have about making your BBQ Chicken Panini. Remember, cooking is all about experimenting and having fun, so don’t hesitate to make this recipe your own. Enjoy your culinary adventure!
Conclusion on BBQ Chicken Panini Recipe
In conclusion, the BBQ Chicken Panini is more than just a sandwich; it’s a delightful culinary experience that brings joy to the table. With its smoky, tangy flavors and crispy, golden crust, this recipe is perfect for any occasion—whether it’s a casual lunch with friends or a cozy family dinner. I love how easy it is to customize, allowing you to add your favorite ingredients and make it uniquely yours.
Not only does this panini satisfy your taste buds, but it also helps reduce food waste by utilizing leftover chicken. Plus, it’s a quick meal that can be prepared in under 30 minutes, making it a go-to option for busy days. I hope you feel inspired to try this BBQ Chicken Panini recipe and share it with your loved ones. Happy cooking, and may your kitchen always be filled with delicious aromas and laughter!


