
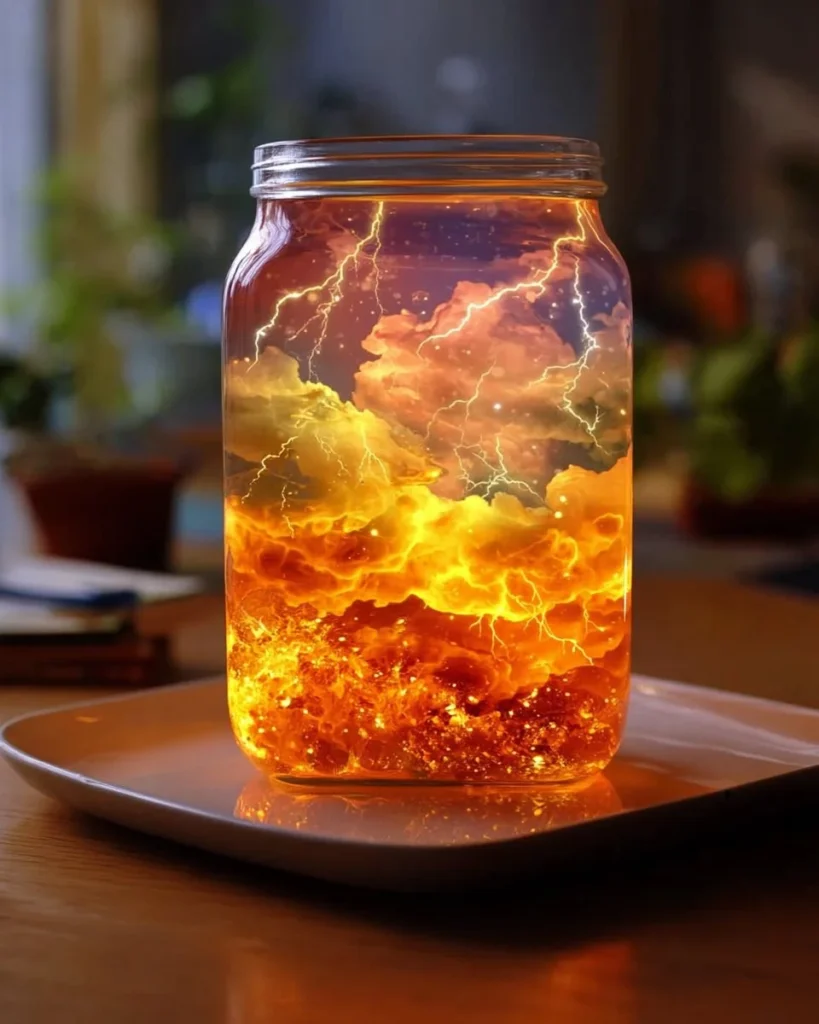
Creating decorative magic doesn’t always require intricate crafting skills or expensive supplies. Sometimes, the simplest of ideas can evoke the most warmth and joy. Imagine a glowing jar, flickering softly in the evening light, casting whimsical shadows that dance playfully across the walls. This enchanting piece, reminiscent of summer nights spent gazing at fireflies, brings a slice of nostalgia into your home, transforming any corner into a cozy retreat. As you gather around with loved ones, the gentle radiance encapsulated within your “Lightning in a Jar” breathes life into your space, evoking moments of laughter, storytelling, and togetherness.
This delightful DIY project is not just an ordinary home decor item; it’s an invitation to creativity. Picture your chosen jar, filled with colorful layers of glittering materials, each addition sparking joy and a sense of accomplishment. The excitement builds as you watch your vision come to life, from the moment the first item tumbles inside to the glowing finish that beckons guests to come closer. Whether you’re prepping for a joyful celebration or simply wishing to add a touch of charm to your day-to-day surroundings, this project captures the essence of warmth and personal touch that transforms any space.
With an age-old charm and a modern twist, this easy DIY home decor project empowers you to create something truly unique—your very own “Lightning in a Jar.” Each element sparks your imagination, encouraging you to tailor your creation to fit your style and mood. Elevate your home with this craft that speaks of you and awaits you with open arms.
Why You’ll Love This Lightning in a Jar
Embracing the enchanting glow of a “Lightning in a Jar” offers numerous benefits that enhance your living space. First and foremost, this project celebrates individuality. You can design your jar according to your personal aesthetic—that means vibrant colors to brighten a children’s room or muted tones for a cozy reading nook. Each jar also serves as a delightful conversation starter when friends visit, infusing your gatherings with sparkle and warmth.
This project is not strictly confined to home decor; it holds the potential to transform any occasion into an extraordinary experience. Picture it adorning your rustic dinner table, providing a warm glow during intimate family meals, or standing proud on a picnic blanket at an outdoor gathering. It effortlessly evolves to suit every environment, radiating joy and harmony. Furthermore, creating your jar not only nurtures your creativity but also allows for a satisfying sense of accomplishment each time you light it up. You’ll feel proud each time you turn off the main lights and bask in the gentle luminescence of your creation.
Preparation Phase & Tools to Use
Embarking on this exciting DIY project requires a few essential tools to help your vision come to fruition.
- Glass jars: Choose jars with varied shapes and sizes for an eclectic look. Mason jars work wonderfully for a rustic feel, while decorative jars can add elegance.
- Twinkling lights: Battery-operated fairy lights are ideal, as they appear magical and eliminate worries about cords.
- Decorative fillers (glitter, beads, sand): These options elevate the final presentation, providing stunning visual layers and enhancing the overall glow.
- Scissors and tape: For securing your lights and ensuring your decorations stay in place.
- Optional paint or washi tape: Use these for personalizing your jars further and giving them a unique flair.
As you gather your materials, embrace the process! Lay everything out neatly and create an inspiring workspace that helps bring your vision to life.
Ingredients for Lightning in a Jar
Creating your own “Lightning in a Jar” is highly adaptable, allowing you to explore various materials and personal touches. Here are some key ingredients—you might even have many of them at home:
- Glass jars: The base of this project. You can use anything from recycled cereal jars to store-bought decorative options.
- Twinkling lights (fairy lights): The heart of the glow. Consider LED options as they provide a soft, inviting light and remain cool.
- Decorative fillers: Options include colored sand, glitter, or even dry flowers. Each adds its unique spin and personality to your jar.
- DIY elements: Feel free to include small objects that spark memories—perhaps seashells from a beach trip or leaves from a cherished park visit.
The beauty lies in customizing these ingredients. If you don’t have glitter, perhaps you’ll use colorful marbles instead. Make it your own!
How to Make Lightning in a Jar
Bringing your “Lightning in a Jar” to life is a simple and rewarding process. Follow these clear steps, and watch as your masterpiece unfolds!
- Select your jar: Choose the perfect size to suit the space where you intend to showcase your creation.
- Prep your lights: Uncoil your fairy lights and ensure they fit inside the jar. For a magical effect, leave a bit of twinkling light peeking out at the top.
- Layer your fillers: Begin pouring your chosen decorative fillers into the jar. Start with a base layer of sand or glitter, gently patting it down. Add layers of other materials, mixing colors and textures to create a stunning visual display.
- Insert your lights: Carefully place the fairy lights within the jar, ensuring they’re evenly distributed among the fillers. It’s helpful to zigzag the lights to maximize coverage. You might even twirl the lights around for a more organic look.
- Seal and illuminate: If needed, secure your lights with tape to keep them from shifting once in place. Replace the jar lid, or leave it open for an airy feel, and turn on the lights for the grand reveal.
- Show it off: Find the perfect spot for your jar to shine, whether that’s a table centerpiece, a bedside lamp, or a charming addition to your windowsill.
Each step offers a chance to embrace creativity, allowing you to tailor your masterpiece to your heart’s content.
Chef’s Notes & Helpful Tips
To make your “Lightning in a Jar” truly special, consider the following tips:
- Make-ahead tips: This project works fantastically as a last-minute decoration. You can prepare your jars ahead of time, leaving them unopened until the perfect moment to light them up.
- Cooking alternatives: Although this recipe doesn’t require cooking, it’s a joyful project perfect for creating with loved ones! Use this as a group activity to share ideas and inspirations.
- Customization ideas: Want to elevate your jar even further? Think about painting the outside with a dazzling design or incorporating natural elements, like pinecones or dried flowers, to evoke the essence of the season. You might even personalize this project for each family member!
Common Mistakes to Avoid
While creating your “Lightning in a Jar” is meant to be fun, it’s easy to make a few common errors. Here’s how to sidestep them:
- Overfilling the jar: Resist the urge to cram too many elements in at once. A light touch encourages an airy feel and enhances the effect of the glowing lights.
- Using too heavy fillers: Stick to lightweight materials that ensure the lights stay visible. Oversized items can obscure the glow.
- Ignoring light orientation: Take care with how you place your lights. If the lights don’t shine evenly, some areas may appear dim.
- Not securing the lights: Make sure your lights stay put, or they might shift with movement or dust.
By steering clear of these missteps, your project brings the intended joy and beauty into your space.
What to Serve With Lightning in a Jar
This DIY home decor piece complements a variety of settings and occasions beautifully. Here are some charming pairing ideas:
- Soft pillows and cozy blankets: Create the ultimate relaxing corner where your jar shines alongside plush comforts.
- Fresh flowers: Arrange wildflowers or orchids in vases nearby for an elegant touch that draws the eye.
- Candles: Introduce additional candlelight; the interplay of flickering lights enhances the atmosphere.
- Seasonal decor: Pair your jar with harvest-themed items in autumn or nautical accents in summer for thematic flair.
- Homemade treats: Position your jar near plates of cookies or seasonal pastries to invite warmth and indulgence.
- Artistic prints: Hang artwork nearby that resonates with your jar’s color scheme, effectively harmonizing the overall aesthetic.
- Potted plants: Add greenery for a natural touch; the jar’s glow beautifully contrasts vibrant foliage.
- Holiday ornaments: Leverage your jar as part of larger holiday displays, with ornaments nestled alongside it for added charm.
These suggestions invite a cozy atmosphere that your guests will love.
Storage & Reheating Instructions
One of the best aspects of your “Lightning in a Jar” project is its low-maintenance nature. To keep your masterpiece looking fabulous:
- Storage: If not in use, store your jars in a cool, dry place. Avoid direct sunlight, which may cause fading in your materials.
- Reheating: Since this project doesn’t involve actual cooking or ingredients that require reheating, enjoy the longevity of your decor by using it throughout the seasons and special occasions.
Simply switch out the fillers as your style changes, ensuring you keep your decor fresh and intriguing.
Estimated Nutrition Information
As this delectable DIY home decor project doesn’t involve edible items, nutritional values won’t apply. However, the joy it brings—infusing warmth, creativity, and personalization into your space—is certainly priceless!
FAQs
What if I don’t have fairy lights?
You can substitute rustic candles fitted inside your jar for a cozy glow. Just make sure the jar is appropriate for candle use and remember to monitor the flame closely.
Can I use a plastic jar instead of glass?
Plastic jars can work, but they may not provide the same aesthetic and light diffusion benefits as glass. Choose wisely to achieve that enchanting glow!
How can I clean the jar for reuse?
Simply wash your jar with warm soapy water and a non-abrasive sponge to ensure it’s ready for your next creative endeavor.
Can I make mini jars?
Absolutely! Mini jars create adorable accents and can be used for party favors or table settings, spreading cheer in smaller spaces.
How can I change the light colors?
Look for colored LED fairy lights to swap colors easily. This allows you to customize the ambiance based on seasons or special events!
Conclusion
Crafting your “Lightning in a Jar” creates an emotional connection and offers endless opportunities for self-expression. Watching the lights twinkle warmly is deeply satisfying, lighting up your space and turning your home into a haven of joy and comfort. So gather your materials, embrace your creativity, and experience the magic that comes from creating something truly unique. Each jar tells a story, bringing a touch of “lightning” into your life, striking the perfect balance between nostalgia and innovation. It’s more than craft; it’s a delightful piece of your legacy waiting to illuminate your world. Happy crafting!
Print
Lightning in a Jar
- Total Time: 15 minutes
- Yield: 1 jar
- Diet: N/A
Description
Create a magical ‘Lightning in a Jar’ home decor project that evokes warmth and nostalgia with its enchanting glow.
Ingredients
- Glass jars (various shapes and sizes)
- Battery-operated fairy lights
- Decorative fillers (colored sand, glitter, dry flowers)
- Small decorative objects (seashells, leaves)
- Optional paint or washi tape
Instructions
- Select your jar: Choose the perfect size to suit the space where you intend to showcase your creation.
- Prep your lights: Uncoil your fairy lights and ensure they fit inside the jar.
- Layer your fillers: Start pouring your chosen decorative fillers into the jar, beginning with a base layer of sand or glitter.
- Insert your lights: Carefully place the fairy lights within the jar, ensuring even distribution.
- Seal and illuminate: Secure your lights with tape, replace the lid, and turn on the lights for the grand reveal.
- Show it off: Find the perfect spot for your jar to shine.
Notes
Feel free to customize the fillers and decorations to match seasons or themes.
- Prep Time: 15 minutes
- Cook Time: 0 minutes
- Category: DIY Project
- Method: Crafting
- Cuisine: N/A
Nutrition
- Serving Size: 1 jar
- Calories: 0
- Sugar: 0g
- Sodium: 0mg
- Fat: 0g
- Saturated Fat: 0g
- Unsaturated Fat: 0g
- Trans Fat: 0g
- Carbohydrates: 0g
- Fiber: 0g
- Protein: 0g
- Cholesterol: 0mg
Keywords: DIY, home decor, crafts, Lightning in a Jar, decorative crafts


