
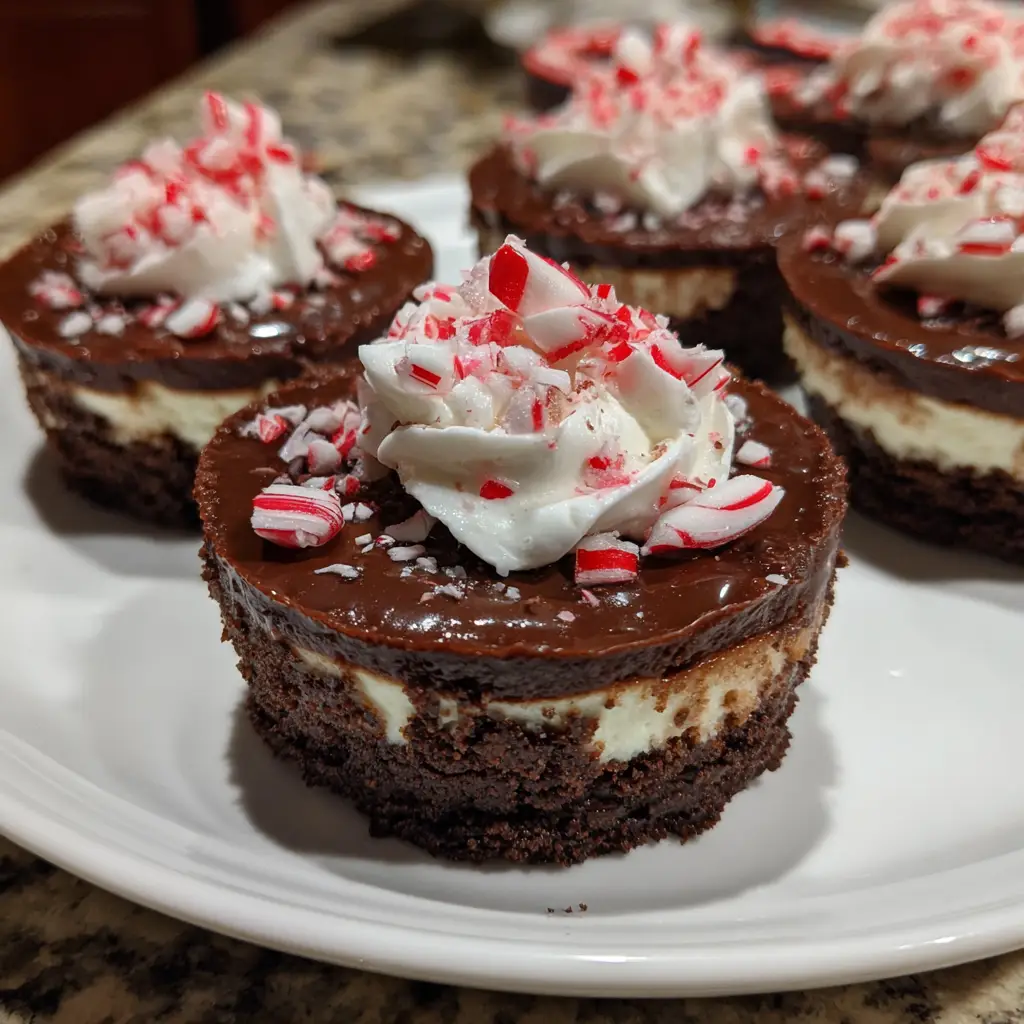
Mini Chocolate Peppermint Cheesecakes are a festive, elegant, and utterly enchanting dessert that captures the very essence of holiday magic in a single, perfectly portioned bite. These miniature masterpieces combine the rich, decadent luxury of a chocolate cheesecake with the cool, refreshing burst of peppermint, all nestled upon a crisp chocolate cookie crust and crowned with a swirl of snowy whipped cream and a sprinkle of festive crushed candy canes. Each individual cheesecake is a symphony of textures and flavors: the buttery, crumbly base gives way to a velvety-smooth, dense filling that is simultaneously creamy and intensely chocolatey, punctuated by the bright, clean notes of pure peppermint. Unlike their full-sized counterpart, these mini cheesecakes boast an ideal crust-to-filling ratio in every bite and require no slicing, making them the ultimate shareable treat for holiday parties, cookie exchanges, or as a stunning finale to a special dessert.
Why Is This Mini Chocolate Peppermint Cheesecakes Recipe So Popular?
The immense popularity of this recipe lies in its perfect alignment with holiday culinary desires and practical entertaining needs. First, it embodies the holiday flavor profile—chocolate and peppermint is a quintessential, nostalgic pairing that instantly evokes feelings of warmth and celebration. Second, the miniature format is inherently appealing: it offers built-in portion control, eliminates the stress of slicing a whole cheesecake, and creates an adorable, customizable presentation that feels special and personal for guests. Third, it is a make-ahead dream. These cheesecakes must chill thoroughly, meaning they can be prepared days in advance, freeing up the host for other tasks. Furthermore, their popularity is driven by their visual spectacle—the dramatic contrast of the dark chocolate filling against white cream and red candy makes them irresistibly photogenic and perfect for holiday tables and social media. Finally, they offer a sophisticated yet approachable baking project. The use of a muffin tin and simple ingredients makes them achievable for bakers of all levels, yet the final result is undeniably impressive and gourmet, satisfying the desire to create something truly beautiful and delicious for the season.
Why You’ll Love This Mini Chocolate Peppermint Cheesecakes:
- Individual Perfection: No slicing required! Each guest gets their own perfectly formed, beautiful dessert.
- The Ultimate Holiday Flavor: The classic combination of rich chocolate and cool peppermint is a guaranteed crowd-pleaser.
- Excellent Make-Ahead Dessert: Prepare and chill them up to 3 days before your event for stress-free entertaining.
- Customizable & Festive: Easily tailor the level of peppermint and decorate to match your holiday theme.
- Rich Yet Balanced: The decadent chocolate filling is perfectly balanced by the bright, refreshing peppermint, preventing it from being overly heavy.
Here’s what you’ll need:
For the Chocolate Cookie Crust:
- 24 whole chocolate sandwich cookies (like Oreos), about 2 cups of crumbs (creams included)
- 4 tablespoons (56g) unsalted butter, melted
- ⅛ teaspoon fine sea salt
For the Chocolate Peppermint Cheesecake Filling:
- 16 ounces (two 8-oz blocks) full-fat cream cheese, softened to room temperature
- ⅔ cup (135g) granulated sugar
- 2 tablespoons (15g) unsweetened cocoa powder, sifted (Dutch-process preferred)
- ¼ teaspoon fine sea salt
- 2 large eggs, at room temperature
- ⅓ cup (80ml) full-fat sour cream, at room temperature
- 1 teaspoon pure vanilla extract
- 1 ½ teaspoons pure peppermint extract (not mint extract—see note)
- 4 ounces (115g) semi-sweet or bittersweet chocolate, finely chopped and melted, cooled slightly
- 2-3 drops red gel food coloring (optional, for a pink swirl)
For the Peppermint Whipped Cream & Garnish:
- 1 cup (240ml) heavy whipping cream, very cold
- 3 tablespoons powdered sugar, sifted
- ½ teaspoon pure vanilla extract
- ¼ teaspoon pure peppermint extract
- 2-3 standard candy canes or peppermint candies, crushed
- Chocolate shavings or sprinkles (optional)
- Fresh mint sprigs (for garnish, optional)
Special Equipment:
- Two standard 12-cup muffin tins
- 24 standard-size parchment paper cupcake liners (Do not use foil or thin paper liners; parchment prevents sticking best.)
How to Make Mini Chocolate Peppermint Cheesecakes:
Now that you have your ingredients ready, let’s dive into the steps for making this delightful Mini Chocolate Peppermint Cheesecakes. It’s as easy as pie, and I promise you’ll feel like a culinary superstar!
Step 1: Prepare the Pans and Preheat Oven
Preheat your oven to 300°F (150°C). This lower temperature is crucial for gentle, crack-free baking. Line every single cup of two muffin tins with parchment paper liners. This is non-negotiable for easy removal. Do not grease the liners.
Step 2: Make the Chocolate Cookie Crust
Place the whole chocolate sandwich cookies (creams and all) in a food processor. Pulse until you have fine, even crumbs. Alternatively, place them in a sturdy zip-top bag and crush with a rolling pin. Transfer crumbs to a bowl. Pour the melted butter and salt over the crumbs. Mix with a fork until the mixture resembles wet sand and holds together when pinched. Spoon about 1 heaping tablespoon of crust mixture into the bottom of each prepared liner. Use a small glass, tamper, or the back of a spoon to press the crumbs firmly and evenly into a compact layer. Pre-bake the crusts for 5 minutes. Remove and let cool on a rack while you prepare the filling. Keep oven at 300°F.
Step 3: Create the Chocolate Peppermint Filling
In the bowl of a stand mixer fitted with the paddle attachment (or using a hand mixer), beat the softened cream cheese on medium-low speed for 2-3 minutes until completely smooth, creamy, and free of any lumps. Scrape down the bowl and beater thoroughly. Add the sugar, sifted cocoa powder, and salt. Beat on low to combine, then on medium for 1 minute until smooth, scraping again.
Step 4: Incorporate Eggs and Flavorings
With the mixer on low speed, add the eggs one at a time, mixing only until the yolk disappears before adding the next. Over-beating at this stage incorporates too much air. Scrape the bowl. Add the sour cream, vanilla extract, and peppermint extract. Mix on low until just combined. Finally, with the mixer on low, pour in the slightly cooled, melted chocolate and mix until the batter is uniform and a deep brown color. If desired, transfer about ½ cup of the batter to a small bowl and stir in 2-3 drops of red gel food coloring for a marbled effect.
Step 5: Fill and Bake with a Water Bath
Spoon the filling over the cooled crusts, dividing evenly among the 24 liners, filling each about ¾ full. If using the pink batter, you can add a small dollop on top of each and gently swirl with a toothpick. To prevent cracking and ensure creamy texture, create a simple water bath: place the muffin tins inside larger roasting pans. Carefully pour hot water into the roasting pan around the muffin tins until it comes about halfway up the sides. Bake at 300°F for 18-22 minutes. The cheesecakes are done when the edges are set but the centers still have a slight, gentle jiggle. They will firm up as they chill.
Step 6: Cool Slowly to Prevent Cracks
Turn off the oven. Crack the oven door open with a wooden spoon and let the cheesecakes cool in the oven for 30 minutes. This gradual cooling is the second key to a smooth, crack-free top. After 30 minutes, remove the pans from the water bath and let the cheesecakes cool completely at room temperature on a wire rack for another hour.
Step 7: Chill, Garnish, and Serve
Once completely cool, transfer the muffin tins to the refrigerator. Chill, uncovered, for at least 4 hours, but ideally overnight for the flavors to fully set and meld. Just before serving, make the peppermint whipped cream: In a chilled bowl, whip the heavy cream, powdered sugar, vanilla, and peppermint extract on medium-high speed until medium-stiff peaks form. Pipe or dollop onto each chilled cheesecake. Garnish generously with crushed candy canes, chocolate shavings, and a tiny mint sprig if desired. Serve chilled.
Tips for Success:
- Room Temperature is Critical: Cream cheese, eggs, and sour cream MUST be at room temperature to blend smoothly and avoid a lumpy batter.
- Use Pure Peppermint Extract: Imitation extracts can taste medicinal. Pure peppermint extract provides a clean, bright flavor. Do not use mint extract (which is often spearmint).
- Don’t Overmix After Adding Eggs: Mix only until incorporated to minimize air bubbles, which expand and cause cracks during baking.
- The Water Bath is Essential: This gentle, moist heat is what guarantees the signature creamy, dense texture of a baked cheesecake and prevents the tops from drying and cracking.
- Chill Thoroughly: These need a full, uninterrupted chill to set properly. Rushing this step will result in a filling that’s too soft.
- Parchment Liners are a Must: They release perfectly. Foil or paper liners can stick stubbornly to the cheesecake.
Equipment Needed:
- Two Standard 12-Cup Muffin Tins
- 24 Parchment Paper Cupcake Liners
- Stand Mixer or Hand Mixer
- Food Processor or Zip-Top Bag & Rolling Pin
- Large Roasting Pans (for water bath)
- Piping Bag & Star Tip (optional, for whipped cream)
- Fine Mesh Sieve (for sifting cocoa/sugar)
Variations of Mini Chocolate Peppermint Cheesecakes:
- White Chocolate Peppermint: Replace the semi-sweet chocolate with melted white chocolate and use a vanilla wafer or graham cracker crust.
- Dark Chocolate Orange: Omit peppermint. Add 1 tbsp orange zest to the filling and use a chocolate cookie crust. Garnish with candied orange peel.
- Gingerbread Spice: Add 1 tsp ginger, ½ tsp cinnamon, and ¼ tsp cloves to the crust and filling. Use a molasses-spiked whipped cream.
- Mocha Peppermint: Dissolve 1 tbsp instant espresso powder into the melted chocolate before adding to the batter.
- No-Bake Version: Use a stabilized filling with gelatin or melted white chocolate folded into sweetened whipped cream cheese, and set in the fridge.
- Gluten-Free: Use gluten-free chocolate sandwich cookies for the crust.
Serving Suggestions for Mini Chocolate Peppermint Cheesecakes:
- On a Tiered Stand: Arrange them on a festive cake stand for a stunning holiday dessert display.
- As Part of a Dessert Platter: Serve alongside other mini desserts like brownie bites, cookies, and fudge.
- With a Hot Drink: Pair with a cup of hot cocoa, peppermint mocha, or spiced coffee.
- Gift Them: Place in festive mini cupcake boxes lined with parchment for a beautiful homemade holiday gift.
- For a Formal Dinner: Plate individually with a drizzle of chocolate sauce and a dusting of powdered sugar “snow.”
Prep Time:
40 minutes (plus overnight chilling)
Cooking Time:
20 minutes
Total Time:
1 hour (plus 12+ hours chilling)
Nutritional Information:
(Estimated per mini cheesecake, with whipped cream garnish)
- Calories: ~220
- Protein: 3g
- Sodium: ~140mg
- Sugar: 18g
- Fat: 16g (Saturated Fat: 9g)
- Carbohydrates: 18g
- Fiber: 1g
FAQs about Mini Chocolate Peppermint Cheesecakes:
Q: Can I make these without a water bath?
A: It is strongly discouraged. The water bath provides gentle, even heat that is essential for the proper texture and to prevent cracks and sinking. If you must skip it, reduce the oven temperature to 275°F and watch carefully, but results may vary.
Q: How far in advance can I make these?
A: Perfectly! The baked and chilled cheesecakes (without whipped cream) can be stored in an airtight container in the fridge for up to 4 days. Add the whipped cream and garnish within 2-3 hours of serving.
Q: Can I freeze them?
A: Yes, exceptionally well. Freeze the unfrosted cheesecakes on a tray until solid, then transfer to an airtight container. Freeze for up to 2 months. Thaw overnight in the fridge before garnishing.
Q: My filling sunk in the middle. Why?
A: This is usually due to overmixing (incorporating too much air) or underbaking. Ensure you mix on low after adding eggs and bake until just set with a slight jiggle.
Q: Can I use a different crust?
A: Absolutely. Graham cracker crumbs (about 1.5 cups mixed with 4 tbsp butter and 1 tbsp sugar) or crushed peppermint Oreos work beautifully.
Q: The peppermint is too strong/too weak. How can I adjust?
A: Peppermint extract potency varies. Start with 1 tsp, then taste the batter (it’s safe, no raw eggs if you use pasteurized eggs or taste before adding). Add more in ¼ tsp increments until desired strength. Remember, the candy cane garnish adds more mint.
Final Thoughts:
Mini Chocolate Peppermint Cheesecakes are the epitome of holiday baking magic, a dessert that is as delightful to create as it is to give and receive. They encapsulate the festive spirit in a form that is elegant, delicious, and wonderfully practical. This recipe demystifies the art of cheesecake, guiding you through the crucial steps of temperature control, gentle baking, and patient chilling to yield flawless, professional-looking results every time. The process of assembling these miniature treats, from pressing the crust to swirling the final dollop of cream, is a joyful, festive activity in itself. The final product, with its striking appearance and sublime flavor balance, is guaranteed to become a highly anticipated holiday tradition. So, line your tins, soften your cream cheese, and prepare to create a batch of these irresistible miniature marvels, the crowning jewel of any holiday table.
Print
Mini Chocolate Peppermint Cheesecakes: A Holiday Dessert
- Total Time: 1 hour
Description
Creamy chocolate cheesecake with a hint of peppermint, topped with whipped cream and crushed candy canes. These easy, no-bake mini desserts are perfect for the holidays.
Ingredients
For the Chocolate Cookie Crust:
-
24 whole chocolate sandwich cookies (like Oreos), about 2 cups of crumbs (creams included)
-
4 tablespoons (56g) unsalted butter, melted
-
⅛ teaspoon fine sea salt
For the Chocolate Peppermint Cheesecake Filling:
-
16 ounces (two 8-oz blocks) full-fat cream cheese, softened to room temperature
-
⅔ cup (135g) granulated sugar
-
2 tablespoons (15g) unsweetened cocoa powder, sifted (Dutch-process preferred)
-
¼ teaspoon fine sea salt
-
2 large eggs, at room temperature
-
⅓ cup (80ml) full-fat sour cream, at room temperature
-
1 teaspoon pure vanilla extract
-
1 ½ teaspoons pure peppermint extract (not mint extract—see note)
-
4 ounces (115g) semi-sweet or bittersweet chocolate, finely chopped and melted, cooled slightly
-
2–3 drops red gel food coloring (optional, for a pink swirl)
For the Peppermint Whipped Cream & Garnish:
-
1 cup (240ml) heavy whipping cream, very cold
-
3 tablespoons powdered sugar, sifted
-
½ teaspoon pure vanilla extract
-
¼ teaspoon pure peppermint extract
-
2–3 standard candy canes or peppermint candies, crushed
-
Chocolate shavings or sprinkles (optional)
-
Fresh mint sprigs (for garnish, optional)
Special Equipment:
-
Two standard 12-cup muffin tins
-
24 standard-size parchment paper cupcake liners (Do not use foil or thin paper liners; parchment prevents sticking best.)
Instructions
Step 1: Prepare the Pans and Preheat Oven
Preheat your oven to 300°F (150°C). This lower temperature is crucial for gentle, crack-free baking. Line every single cup of two muffin tins with parchment paper liners. This is non-negotiable for easy removal. Do not grease the liners.
Step 2: Make the Chocolate Cookie Crust
Place the whole chocolate sandwich cookies (creams and all) in a food processor. Pulse until you have fine, even crumbs. Alternatively, place them in a sturdy zip-top bag and crush with a rolling pin. Transfer crumbs to a bowl. Pour the melted butter and salt over the crumbs. Mix with a fork until the mixture resembles wet sand and holds together when pinched. Spoon about 1 heaping tablespoon of crust mixture into the bottom of each prepared liner. Use a small glass, tamper, or the back of a spoon to press the crumbs firmly and evenly into a compact layer. Pre-bake the crusts for 5 minutes. Remove and let cool on a rack while you prepare the filling. Keep oven at 300°F.
Step 3: Create the Chocolate Peppermint Filling
In the bowl of a stand mixer fitted with the paddle attachment (or using a hand mixer), beat the softened cream cheese on medium-low speed for 2-3 minutes until completely smooth, creamy, and free of any lumps. Scrape down the bowl and beater thoroughly. Add the sugar, sifted cocoa powder, and salt. Beat on low to combine, then on medium for 1 minute until smooth, scraping again.
Step 4: Incorporate Eggs and Flavorings
With the mixer on low speed, add the eggs one at a time, mixing only until the yolk disappears before adding the next. Over-beating at this stage incorporates too much air. Scrape the bowl. Add the sour cream, vanilla extract, and peppermint extract. Mix on low until just combined. Finally, with the mixer on low, pour in the slightly cooled, melted chocolate and mix until the batter is uniform and a deep brown color. If desired, transfer about ½ cup of the batter to a small bowl and stir in 2-3 drops of red gel food coloring for a marbled effect.
Step 5: Fill and Bake with a Water Bath
Spoon the filling over the cooled crusts, dividing evenly among the 24 liners, filling each about ¾ full. If using the pink batter, you can add a small dollop on top of each and gently swirl with a toothpick. To prevent cracking and ensure creamy texture, create a simple water bath: place the muffin tins inside larger roasting pans. Carefully pour hot water into the roasting pan around the muffin tins until it comes about halfway up the sides. Bake at 300°F for 18-22 minutes. The cheesecakes are done when the edges are set but the centers still have a slight, gentle jiggle. They will firm up as they chill.
Step 6: Cool Slowly to Prevent Cracks
Turn off the oven. Crack the oven door open with a wooden spoon and let the cheesecakes cool in the oven for 30 minutes. This gradual cooling is the second key to a smooth, crack-free top. After 30 minutes, remove the pans from the water bath and let the cheesecakes cool completely at room temperature on a wire rack for another hour.
Step 7: Chill, Garnish, and Serve
Once completely cool, transfer the muffin tins to the refrigerator. Chill, uncovered, for at least 4 hours, but ideally overnight for the flavors to fully set and meld. Just before serving, make the peppermint whipped cream: In a chilled bowl, whip the heavy cream, powdered sugar, vanilla, and peppermint extract on medium-high speed until medium-stiff peaks form. Pipe or dollop onto each chilled cheesecake. Garnish generously with crushed candy canes, chocolate shavings, and a tiny mint sprig if desired. Serve chilled
Notes
-
Two Standard 12-Cup Muffin Tins
-
24 Parchment Paper Cupcake Liners
-
Stand Mixer or Hand Mixer
-
Food Processor or Zip-Top Bag & Rolling Pin
-
Large Roasting Pans (for water bath)
- Prep Time: 40 minutes
- Category: dessert
- Cuisine: American
Nutrition
- Calories: 220
- Sugar: 18g
- Sodium: 140mg
- Fat: 16g
- Saturated Fat: 9g
- Carbohydrates: 18g
- Fiber: 1g
- Protein: 3g


