
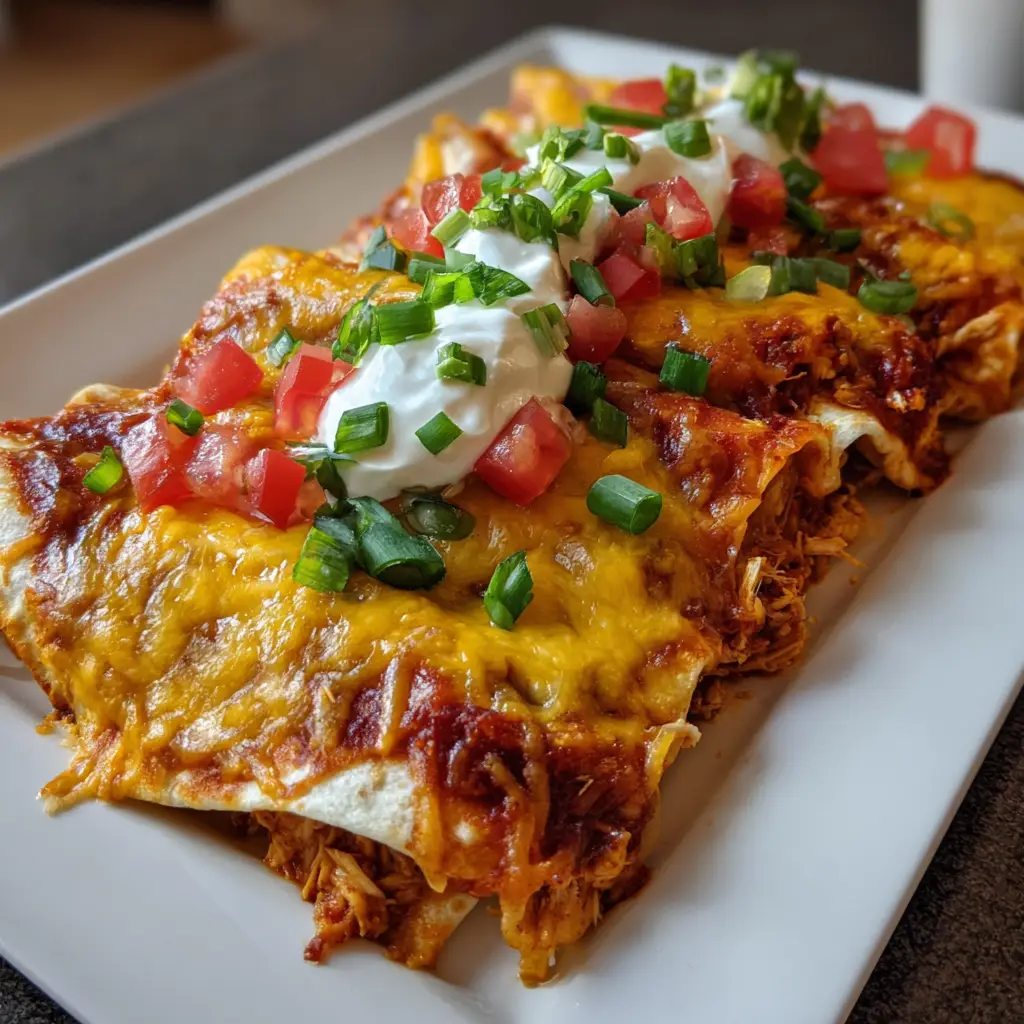
In the pantheon of beloved comfort food, few dishes hold a candle to the soul-warming, celebratory allure of a perfectly baked enchilada. The Cheesy Taco Chicken Enchilada takes this iconic Mexican-American classic and elevates it to new heights of flavor and family-friendly appeal. Imagine tender, shredded chicken, fiercely seasoned with the vibrant, familiar spices of a taco packet, then mixed with creamy, melty cheese. This delectable filling is lovingly rolled inside soft corn tortillas, which are then nestled side-by-side in a baking dish, smothered in a rich, tangy red enchilada sauce, and buried under a thick, molten blanket of more cheese. Baked until the sauce bubbles at the edges and the cheese on top turns a glorious, golden brown, each enchilada emerges as a self-contained parcel of joy.
Why Is This Cheesy Taco Chicken Enchiladas So Popular?
The enduring and widespread popularity of this specific enchilada variation is a testament to its masterful fusion of two iconic flavor profiles and its unparalleled reliability as a crowd-pleaser. Its acclaim is built on a foundation of familiar taste, comforting texture, and effortless adaptability.
First and foremost is its brilliant hybrid flavor concept. It seamlessly marries the universally loved, approachable seasoning of tacos with the rich, saucy, baked goodness of enchiladas. The taco seasoning provides an immediate hit of recognizable, savory-spicy flavor that appeals to all ages, while the enchilada sauce adds a deeper, more complex tang and moisture that prevents the dish from being dry. This combination ensures every bite is packed with a depth of flavor that feels both exciting and comfortingly familiar.
Secondly, it is the epitome of a make-ahead, freezer-friendly, and feed-a-crowd masterpiece. The entire dish can be assembled hours or even a day in advance, refrigerated, and baked just before serving—making it the ultimate choice for stress-free entertaining or easy weeknight planning. It also freezes exceptionally well, both before and after baking, acting as a homemade “frozen dinner” that is infinitely superior to any store-bought alternative. Its generous yield makes it perfect for potlucks, large family gatherings, or ensuring there are always fantastic leftovers.
Furthermore, its incredible customizability and forgiving nature make it a staple in home kitchens. You can easily adjust the heat level with mild or spicy taco seasoning and enchilada sauce. You can add different fillings like black beans, corn, or sautéed peppers. You can use different cheese blends or even swap the chicken for ground beef or shredded pork. This flexibility allows the recipe to become a personalized family heirloom that can adapt to any taste or ingredient availability.
Finally, its deeply satisfying, textural perfection is irresistible. The contrast between the slightly crisp edges of the tortilla, the tender chicken filling, the gooey interior cheese, and the bubbling top layer creates a multi-sensory eating experience that is profoundly comforting and endlessly enjoyable.
Why You’ll Love This Cheesy Taco Chicken Enchiladas:
- The Ultimate Flavor Fusion: You will love the perfect marriage of taco seasoning’s bold spice with the rich, savory depth of enchilada sauce.
- Family-Friendly Favorite: This dish is a guaranteed hit with both kids and adults, solving the dinner dilemma with a resounding, cheesy answer.
- Perfect for Making Ahead: You will appreciate the ability to do all the work in advance, making dinner time or entertaining completely stress-free.
- Amazing as Leftovers: The flavors meld and intensify beautifully overnight, making the next-day enchiladas even more delicious.
- Elegant Comfort Food: Despite its comforting roots, this dish has a beautiful, festive presentation that’s impressive enough for guests.
Here’s what you’ll need:
Creating authentic texture and deep flavor requires attention to a few key ingredients and techniques, particularly with the tortillas and cheese.
For the Taco Chicken Filling:
- 3 cups Cooked Chicken, shredded: A store-bought rotisserie chicken is the ultimate time-saver and flavor booster.
- 1 (1 oz) packet Taco Seasoning: Use your favorite brand, or make your own blend (2 tsp chili powder, 1 tsp cumin, 1 tsp paprika, ½ tsp garlic powder, ½ tsp onion powder, ¼ tsp oregano, ¼ tsp cayenne).
- ⅓ cup Water
- 1 (4 oz) can Diced Green Chiles, undrained
- 1 ½ cups Shredded Cheese for the filling: A blend of Monterey Jack (for melt) and Sharp Cheddar (for flavor) is perfect.
- 4 oz Cream Cheese, softened (optional, but adds incredible creaminess)
For the Enchilada Assembly:
- 10-12 (6-inch) Corn Tortillas: This is crucial: Corn tortillas are traditional and provide the best flavor and texture.
- 1 (28 oz) can Red Enchilada Sauce: Choose a good-quality sauce, as it is the backbone of the dish’s flavor. You’ll need about 3 cups.
- 1 tbsp Vegetable Oil
- 2 cups Shredded Cheese for topping: Use a Mexican blend or more Monterey Jack/Cheddar.
- Non-stick Cooking Spray
For the Garnish & Serving Fiesta:
- Fresh Cilantro, chopped
- Diced Red Onion or White Onion
- Diced Tomatoes
- Sliced Jalapeños (fresh or pickled)
- Sliced Black Olives
- Sour Cream or Mexican Crema
- Guacamole or Sliced Avocado
- Lime Wedges
How to Make Cheesy Taco Chicken Enchiladas:
Now that you have your ingredients ready, let’s dive into the steps for making this delightful Cheesy Taco Chicken Enchiladas. It’s as easy as pie, and I promise you’ll feel like a culinary superstar!
Step 1: Prepare the Flavorful Filling
Preheat your oven to 375°F (190°C). In a large skillet over medium heat, combine the shredded chicken, taco seasoning, water, and the undrained green chiles. Stir and cook for 3-4 minutes until the liquid is absorbed and the chicken is thoroughly coated in the seasoning. Remove from heat. If using, stir in the softened cream cheese until melted and combined. Then, stir in the 1 ½ cups of shredded cheese for the filling. Set aside.
Step 2: The Critical Tortilla Prep (Do Not Skip!)
This step prevents the corn tortillas from cracking when you roll them. Heat the 1 tbsp of vegetable oil in a small skillet over medium heat. Using tongs, quickly fry each tortilla for about 5-10 seconds per side, just until softened and pliable. They should not be crispy. Alternatively, you can wrap a stack of tortillas in damp paper towels and microwave for 30-45 seconds until warm and soft. Place the softened tortillas on a plate and cover with a towel to keep them warm and flexible.
Step 3: Assemble the Enchiladas
Spread ½ cup of the enchilada sauce evenly over the bottom of a 9×13 inch baking dish. Take one softened tortilla and place a generous ¼ cup of the chicken and cheese filling in a line down the center. Roll the tortilla tightly around the filling and place it seam-side down in the baking dish. Repeat with the remaining tortillas and filling, packing them snugly side-by-side in the dish.
Step 4: Sauce and Cheese the Enchiladas
Pour the remaining enchilada sauce evenly over the top of the rolled enchiladas, making sure to cover the ends to prevent drying out. Use a spoon to spread the sauce into any gaps. Sprinkle the 2 cups of shredded cheese evenly over the sauce, covering everything.
Step 5: Bake to Bubbly, Golden Perfection
Cover the baking dish with aluminum foil. Bake for 20 minutes. Then, remove the foil and bake for an additional 10-15 minutes, or until the cheese is completely melted, bubbly, and starting to brown in spots, and the sauce is bubbling around the edges.
Step 6: Rest, Garnish, and Serve
Remove the enchiladas from the oven and let them rest for 10 minutes. This is essential—it allows the filling to set, making them much easier to serve without falling apart. Garnish the entire dish with a sprinkle of fresh cilantro. Serve directly from the dish, providing a vibrant array of garnishes on the side so everyone can customize their plate with sour cream, diced onions, tomatoes, jalapeños, and a squeeze of fresh lime.
Tips for Success:
- Soften the Tortillas: This is the #1 rule for perfect enchiladas. Frying or steaming makes them pliable and prevents a cracked, messy final product.
- Don’t Overfill: About ¼ cup of filling per tortilla is perfect. Overfilling makes them difficult to roll and can cause them to burst open in the oven.
- Use a Good Sauce: Taste your enchilada sauce before using it. If it’s a bit bland, you can enhance it by sautéing a little minced garlic in oil, then stirring in the sauce to warm.
- Freshly Shred Your Cheese: Pre-shredded cheese contains anti-caking agents that can make your sauce grainy and prevent smooth melting. Always shred your own cheese from a block.
- Let Them Rest: The 10-minute rest after baking is non-negotiable for clean serving. It allows the starches to set and the cheese to firm up slightly.
Equipment Needed:
- 9×13 inch Baking Dish
- Large Skillet
- Small Skillet or Microwave (for tortillas)
- Tongs
- Mixing Bowls
- Measuring Cups and Spoons
- Spatula
Variations of Cheesy Taco Chicken Enchiladas:
- Sour Cream Chicken Enchiladas (Suizas): Use a green salsa verde sauce and top with a sour cream/cream cheese mixture before adding the cheese.
- Beef Enchiladas: Substitute the chicken with 1 lb of cooked, seasoned ground beef or turkey.
- Black Bean & Corn Enchiladas: Add 1 cup of rinsed black beans and 1 cup of corn to the chicken filling for extra fiber and texture.
- Stacked Enchilada Casserole: For ultimate ease, skip rolling. Layer softened tortillas, filling, sauce, and cheese like a lasagna.
- Creamy White Chicken Enchiladas: Use a homemade white cheese sauce instead of red enchilada sauce for a rich, Northern-style dish.
Serving Suggestions for Cheesy Taco Chicken Enchiladas:
This is a complete meal, but traditional Mexican sides elevate it into a feast.
- Perfect Pairings: Mexican Rice (Arroz Rojo) and Charro Beans or Refried Beans are the classic, perfect companions. A simple shredded lettuce salad with a lime vinaigrette adds freshness.
- The Garnish Bar: As emphasized, the fresh toppings are essential. They provide cool, crisp, and acidic contrasts that balance the rich, hot enchiladas.
- The Perfect Drink: Serve with ice-cold Mexican beer, margaritas, or horchata.
Prep Time:
25 minutes
Cooking Time:
35 minutes
Total Time:
1 hour (plus resting time)
Nutritional Information (Approximate per 2-enchilada serving):
- Calories: ~500-600 kcal
- Protein: 35 g
- Sodium: ~1300 mg
- Sugar: 8 g
- Fat: 25 g
- Carbohydrates: 35 g
- Fiber: 5 g
Please note: This is an estimate and can vary significantly based on the specific brands and proportions of ingredients you use.
FAQs about Cheesy Taco Chicken Enchiladas:
Q: Can I make these ahead of time?
A: Absolutely! Assemble the enchiladas completely (through step 4), cover tightly with plastic wrap and then foil, and refrigerate for up to 24 hours. Bake as directed, adding 5-10 minutes to the covered baking time since it will be cold.
Q: Can I use flour tortillas instead of corn?
A: You can, but the flavor and texture will be different. Flour tortillas become very soft and pasta-like. Corn tortillas are traditional and provide a more authentic taste and sturdier structure. If using flour, there’s no need to fry/soften them first.
Q: How do I store and reheat leftovers?
A: Store in an airtight container in the refrigerator for up to 4 days. Reheat individual portions in the microwave, or reheat the entire dish, covered with foil, in a 350°F (175°C) oven for 15-20 minutes until warmed through.
Q: Can I freeze these enchiladas?
A: Yes, they freeze beautifully. Assemble completely but do not bake. Wrap the entire dish tightly in both plastic wrap and heavy-duty foil. Freeze for up to 3 months. Thaw in the refrigerator for 24 hours before baking as directed.
Q: My enchiladas came out soggy. What happened?
A: Sogginess is usually caused by: 1) Not softening the corn tortillas first (they absorb too much sauce and disintegrate), 2) Using too much sauce inside the filling, or 3) Not baking them uncovered for the final 10-15 minutes to evaporate excess liquid.
Final Thoughts:
The Cheesy Taco Chicken Enchilada is a triumphant celebration of home cooking at its most satisfying and joyful. It is a dish that embodies the spirit of sharing, of gathering around the table, and of indulging in flavors that are both exciting and comforting. The process of softening the tortillas, rolling the filling, and unveiling the bubbling, cheesy final product is a deeply rewarding ritual. It’s a recipe that builds confidence in the kitchen and creates lasting memories with every cheesy, saucy, flavorful bite. So, soften those tortillas, shred that cheese, and get ready to create a fiesta on a plate that will have everyone asking for seconds and begging for the recipe. It’s more than dinner; it’s a delicious tradition in the making.
Print
Cheesy Taco Chicken Enchiladas: Flavorful Family Dinner
- Total Time: 1 hour
Description
These Cheesy Taco Chicken Enchiladas are bursting with flavor! A simple, comforting dinner with seasoned chicken, melty cheese & your favorite toppings.
Ingredients
For the Taco Chicken Filling:
-
3 cups Cooked Chicken, shredded: A store-bought rotisserie chicken is the ultimate time-saver and flavor booster.
-
1 (1 oz) packet Taco Seasoning: Use your favorite brand, or make your own blend (2 tsp chili powder, 1 tsp cumin, 1 tsp paprika, ½ tsp garlic powder, ½ tsp onion powder, ¼ tsp oregano, ¼ tsp cayenne).
-
⅓ cup Water
-
1 (4 oz) can Diced Green Chiles, undrained
-
1 ½ cups Shredded Cheese for the filling: A blend of Monterey Jack (for melt) and Sharp Cheddar (for flavor) is perfect.
-
4 oz Cream Cheese, softened (optional, but adds incredible creaminess)
For the Enchilada Assembly:
-
10-12 (6-inch) Corn Tortillas: This is crucial: Corn tortillas are traditional and provide the best flavor and texture.
-
1 (28 oz) can Red Enchilada Sauce: Choose a good-quality sauce, as it is the backbone of the dish’s flavor. You’ll need about 3 cups.
-
1 tbsp Vegetable Oil
-
2 cups Shredded Cheese for topping: Use a Mexican blend or more Monterey Jack/Cheddar.
-
Non-stick Cooking Spray
For the Garnish & Serving Fiesta:
-
Fresh Cilantro, chopped
-
Diced Red Onion or White Onion
-
Diced Tomatoes
-
Sliced Jalapeños (fresh or pickled)
-
Sliced Black Olives
-
Sour Cream or Mexican Crema
-
Guacamole or Sliced Avocado
-
Lime Wedges
Instructions
Step 1: Prepare the Flavorful Filling
Preheat your oven to 375°F (190°C). In a large skillet over medium heat, combine the shredded chicken, taco seasoning, water, and the undrained green chiles. Stir and cook for 3-4 minutes until the liquid is absorbed and the chicken is thoroughly coated in the seasoning. Remove from heat. If using, stir in the softened cream cheese until melted and combined. Then, stir in the 1 ½ cups of shredded cheese for the filling. Set aside.
Step 2: The Critical Tortilla Prep (Do Not Skip!)
This step prevents the corn tortillas from cracking when you roll them. Heat the 1 tbsp of vegetable oil in a small skillet over medium heat. Using tongs, quickly fry each tortilla for about 5-10 seconds per side, just until softened and pliable. They should not be crispy. Alternatively, you can wrap a stack of tortillas in damp paper towels and microwave for 30-45 seconds until warm and soft. Place the softened tortillas on a plate and cover with a towel to keep them warm and flexible.
Step 3: Assemble the Enchiladas
Spread ½ cup of the enchilada sauce evenly over the bottom of a 9×13 inch baking dish. Take one softened tortilla and place a generous ¼ cup of the chicken and cheese filling in a line down the center. Roll the tortilla tightly around the filling and place it seam-side down in the baking dish. Repeat with the remaining tortillas and filling, packing them snugly side-by-side in the dish.
Step 4: Sauce and Cheese the Enchiladas
Pour the remaining enchilada sauce evenly over the top of the rolled enchiladas, making sure to cover the ends to prevent drying out. Use a spoon to spread the sauce into any gaps. Sprinkle the 2 cups of shredded cheese evenly over the sauce, covering everything.
Step 5: Bake to Bubbly, Golden Perfection
Cover the baking dish with aluminum foil. Bake for 20 minutes. Then, remove the foil and bake for an additional 10-15 minutes, or until the cheese is completely melted, bubbly, and starting to brown in spots, and the sauce is bubbling around the edges.
Step 6: Rest, Garnish, and Serve
Remove the enchiladas from the oven and let them rest for 10 minutes. This is essential—it allows the filling to set, making them much easier to serve without falling apart. Garnish the entire dish with a sprinkle of fresh cilantro. Serve directly from the dish, providing a vibrant array of garnishes on the side so everyone can customize their plate with sour cream, diced onions, tomatoes, jalapeños, and a squeeze of fresh lime.
Notes
-
9×13 inch Baking Dish
-
Large Skillet
-
Small Skillet or Microwave (for tortillas)
-
Tongs
-
Mixing Bowls
-
Measuring Cups and Spoons
- Prep Time: 25 minutes
- Category: Dinner
- Cuisine: American
Nutrition
- Calories: 600 kcal
- Sugar: 8 g
- Sodium: 1300 mg
- Fat: 25 g
- Carbohydrates: 35 g
- Fiber: 5 g
- Protein: 35 g


