
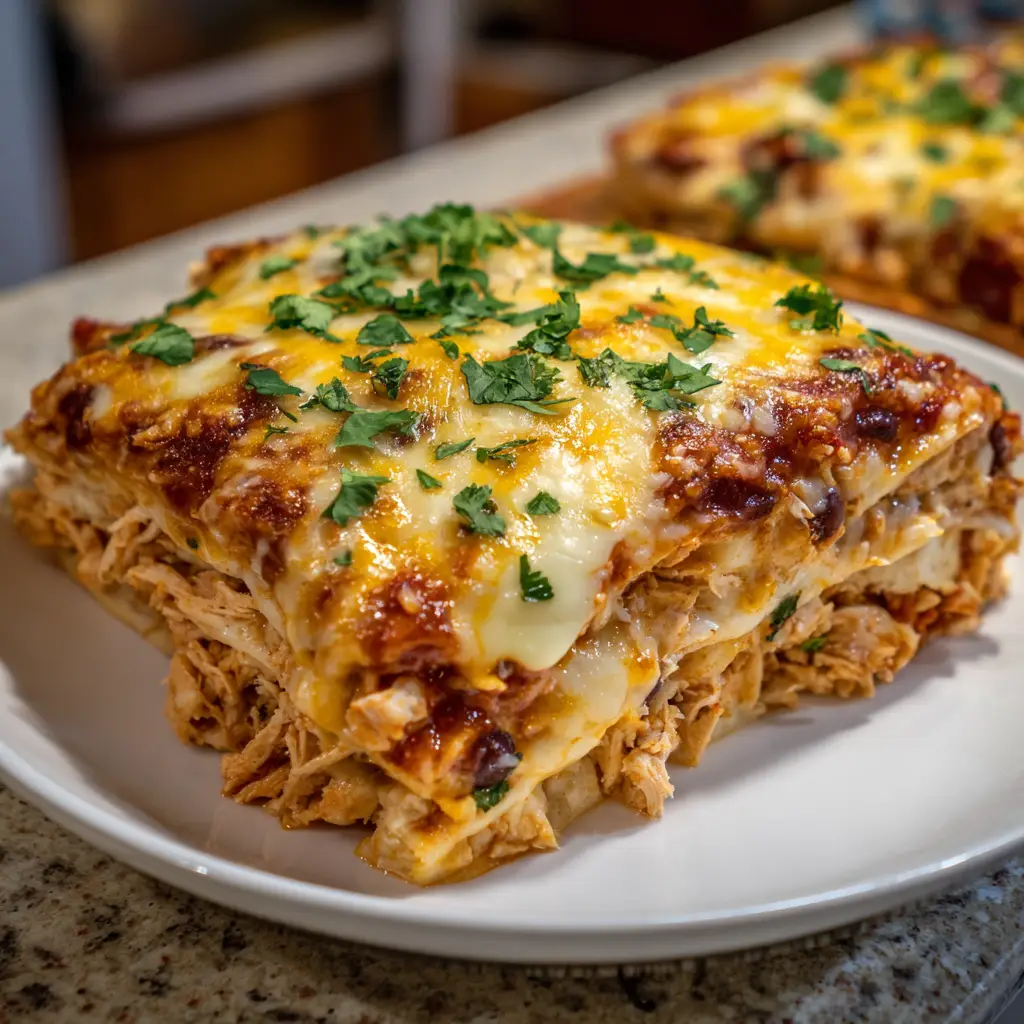
Imagine all the soul-warming, vibrant flavors of a classic chicken enchilada, the tender, spiced meat, the tangy, rich sauce, and the irresistible, molten cheese, but without the meticulous labor of rolling and filling individual tortillas. This is the glorious reality of the Cheesy Chicken Enchilada Casserole. It is the ultimate expression of comfort food ingenuity, a deconstructed, layered masterpiece that delivers maximum flavor with minimum effort. This casserole is a celebration of Tex-Mex tradition, transformed into a hearty, all-in-one dish that is perfect for feeding a hungry family, impressing guests at a potluck, or simply treating yourself to a weeknight meal that feels like a festive occasion.
Why Is This Cheesy Chicken Enchilada Casserole So Popular?
The Cheesy Chicken Enchilada Casserole has earned its place as a beloved staple in home kitchens for a multitude of compelling reasons, all of which center around ease, flavor, and crowd-pleasing appeal.
First and foremost is its revolutionary “no-roll” assembly. Traditional enchiladas can be time-consuming and messy, with torn tortillas and overflowing fillings. This casserole eliminates that hassle entirely. By simply layering torn or flat tortillas with the filling and sauce, you achieve the same iconic flavor and texture profile in a fraction of the time, with far less stress. It’s a game-changer for busy weeknights and novice cooks.
Secondly, it is a masterclass in make-ahead meal preparation. The entire casserole can be assembled hours or even a day in advance, covered, and refrigerated until it’s time to bake. This makes it the perfect dish for entertaining, as it allows the host to be with their guests rather than stuck in the kitchen. It also freezes exceptionally well, acting as a homemade frozen meal that is infinitely better than any store-bought alternative.
Furthermore, its incredible versatility and customizability ensure it never grows old. The recipe is a template for creativity. You can adjust the heat level with mild or spicy enchilada sauce, incorporate different beans or vegetables like corn or black olives, and swap the cheeses to suit your preference. This adaptability makes it a reliable go-to that can be different every time you make it.
Finally, its unapologetic celebration of cheesy, savory comfort is a universal draw. The combination of enchilada sauce, seasoned chicken, and multiple types of cheese creates a deeply satisfying, umami-rich experience that appeals to both children and adults. It’s a guaranteed hit that promises empty plates and happy diners every single time.
Why You’ll Love This Cheesy Chicken Enchilada Casserole:
- Ultimate Comfort Food: You will love the rich, cheesy, and savory layers that provide the same deep satisfaction as traditional enchiladas with even more delicious, homestyle texture.
- Effortless Entertaining: This casserole is a guaranteed crowd-pleaser for potlucks, game day, or family gatherings, and it can be prepared entirely in advance.
- Family-Friendly Favorite: It’s a meal that kids and adults adore equally, solving the “what’s for dinner?” dilemma with a resounding, flavorful answer.
- Perfect for Leftovers: The flavors meld and intensify overnight, making the leftovers just as delicious, if not better, than the first serving.
- Incredibly Forgiving: Unlike rolled enchiladas, there’s no technique to master. It’s a simple, layered assembly that turns out perfectly every time.
Here’s what you’ll need:
Building a deeply flavorful casserole requires a strategic selection of ingredients. Using a high-quality enchilada sauce is the most critical step for a superior result.
For the Chicken Filling:
- 3 cups Cooked Chicken, shredded: A store-bought rotisserie chicken is the ultimate time-saver. Alternatively, you can poach or bake 2 large chicken breasts seasoned with salt, pepper, and cumin.
- 1 (10 oz) can Red Enchilada Sauce: Choose a good-quality sauce, as it is the backbone of the dish’s flavor. For a green version, use salsa verde.
- 1 (4 oz) can Diced Green Chiles, undrained: These provide a mild, tangy heat and authentic flavor.
- 1 cup Sour Cream or Mexican Crema: This adds a crucial creaminess that tempers the acidity of the sauce and creates a richer, more cohesive filling.
- 1 (15 oz) can Black Beans, rinsed and drained: For fiber and protein.
- 1 cup Frozen Corn, thawed: Adds a sweet, juicy pop of color and texture.
- 1 tsp Ground Cumin
- 1 tsp Chili Powder
- ½ tsp Garlic Powder
For the Layering and Topping:
- 10-12 (6-inch) Corn Tortillas OR 6-8 (8-inch) Flour Tortillas: Corn tortillas offer a more traditional, authentic flavor and texture, while flour tortillas become softer and more pasta-like. Pro-Tip: For corn tortillas, quickly pan-fry them in a tiny amount of oil for 10-15 seconds per side to prevent them from becoming tough in the casserole.
- 3 cups Shredded Cheese: A blend is ideal for flavor and meltability.
- 2 cups Monterey Jack Cheese, for its superb melting quality and mild flavor.
- 1 cup Sharp Cheddar Cheese, for a tangy, robust kick.
- 1 (10 oz) can Red Enchilada Sauce, for layering and topping.
- Non-stick Cooking Spray
For Garnish and Serving:
- ½ cup Fresh Cilantro, chopped
- 1 Avocado, diced
- ½ cup Red Onion, finely diced
- ½ cup Roma Tomatoes, diced
- Sour Cream or Mexican Crema
- Sliced Jalapeños (fresh or pickled)
How to Make Cheesy Chicken Enchilada Casserole:
Now that you have your ingredients ready, let’s dive into the steps for making this delightful Cheesy Chicken Enchilada Casserole. It’s as easy as pie, and I promise you’ll feel like a culinary superstar!
Step 1: Prepare the Flavorful Filling
Preheat your oven to 375°F (190°C). In a large mixing bowl, combine the shredded chicken, 1 can of enchilada sauce, the diced green chiles (with their liquid), sour cream, rinsed black beans, thawed corn, cumin, and chili powder. Mix gently until everything is evenly coated and combined. This creamy, saucy mixture is the heart of your casserole.
Step 2: Prepare the Tortillas
If using corn tortillas, this is a critical step for the best texture. Heat a small skillet over medium-high heat with a teaspoon of oil. Briefly fry each tortilla for about 10-15 seconds per side, just until soft and pliable. This prevents them from cracking and becoming tough during baking. If using flour tortillas, you can use them directly, or tear them into large, rustic pieces for easier layering.
Step 3: Assemble the First Layer
Lightly grease a 9×13 inch baking dish with non-stick spray. Spread about ½ cup of the second can of enchilada sauce evenly over the bottom of the dish. Arrange a single layer of tortillas over the sauce, tearing them as needed to cover the bottom completely. This initial layer of sauce prevents the bottom from drying out.
Step 4: The Hearty Chicken Layer
Spoon half of the creamy chicken filling mixture over the tortilla layer. Spread it into an even, uniform layer, ensuring it reaches the edges of the dish.
Step 5: The Cheesy Glue
Sprinkle one-third of your shredded cheese blend (about 1 cup) evenly over the chicken layer. The cheese acts as a binding agent, melting into the layers below and above.
Step 6: Repeat the Layers
Repeat the process: another layer of tortillas, the remaining half of the chicken mixture, and another third of the cheese (another 1 cup).
Step 7: The Final Top Layer
Place one final layer of tortillas on top. Pour the remaining enchilada sauce from the second can over the top, spreading it to cover all the tortillas. This will ensure the top layer stays moist and flavorful. Finish by sprinkling the remaining 1 cup of cheese evenly over the entire surface.
Step 8: Bake to Bubbly, Golden Perfection
Cover the baking dish tightly with aluminum foil. Bake for 25 minutes. Then, remove the foil and bake for an additional 10-15 minutes, or until the cheese is completely melted, bubbly, and starting to develop golden-brown spots around the edges.
Step 9: Rest, Garnish, and Serve
Remove the casserole from the oven and let it rest for 10-15 minutes. This resting period is essential—it allows the layers to set, making it much easier to cut clean portions without everything spilling out. Garnish generously with fresh cilantro, diced red onion, tomatoes, avocado, and a dollop of sour cream. Slice into squares and serve immediately.
Tips for Success:
- The Tortilla Secret: Never skip softening corn tortillas. Frying them briefly is the single best way to avoid a tough, cardboard-like texture in the finished casserole.
- Don’t Over-Sauce: Using the exact amount specified ensures a moist but not soupy casserole. The sour cream in the filling adds significant moisture.
- Let it Rest: This is non-negotiable for a picture-perfect serving. The casserole will be molten lava straight from the oven; resting allows it to firm up.
- Taste Your Enchilada Sauce: Sauces vary widely in saltiness and spice. Taste it before assembling so you can adjust the seasoning in the chicken mixture accordingly.
- Customize the Heat: Use a hot enchilada sauce or add a diced jalapeño to the chicken mixture for more spice.
Equipment Needed:
- 9×13 inch Baking Dish
- Large Mixing Bowl
- Skillet (for softening corn tortillas)
- Measuring Cups and Spoons
- Spatula
- Can Opener
Variations of Cheesy Chicken Enchilada Casserole:
- Green Chile Chicken Enchilada Casserole: Substitute the red enchilada sauce with salsa verde and use Pepper Jack cheese for extra heat.
- Beef Enchilada Casserole: Replace the chicken with 1 lb of cooked, seasoned ground beef or turkey.
- Vegetarian Fiesta Casserole: Omit the chicken and add an extra can of black beans or pinto beans, and 1 cup of diced zucchini.
- “Sour Cream Chicken” Casserole: Double the amount of sour cream in the filling and use a white sauce for an ultra-creamy, Northern-style enchilada bake.
- Taco Casserole: Replace the enchilada sauce with 1.5 cups of taco sauce and add a packet of taco seasoning to the meat.
Serving Suggestions for Cheesy Chicken Enchilada Casserole:
This casserole is a complete meal, but traditional Mexican sides elevate it into a feast.
- Perfect Pairings: A crisp Mexican-style street corn salad (Esquites) or a simple cilantro-lime rice are perfect companions. A refreshing chopped salad with a lime vinaigrette balances the richness.
- The Toppings Bar: Set up a toppings bar with small bowls of diced avocado, sour cream, pico de gallo, sliced jalapeños, and hot sauce so everyone can customize their plate.
- The Perfect Drink: A classic margarita, an ice-cold Mexican beer, or a refreshing agua fresca completes the experience.
Prep Time:
20 minutes
Cooking Time:
35-40 minutes
Total Time:
55-60 minutes (plus resting time)
Nutritional Information (Approximate per serving, based on 8 servings):
- Calories: ~520 kcal
- Protein: 32 g
- Sodium: ~1100 mg
- Sugar: 8 g
- Fat: 25 g
- Carbohydrates: 40 g
- Fiber: 8 g
Please note: This is an estimate and can vary significantly based on the specific brands and proportions of ingredients you use.
FAQs about Cheesy Chicken Enchilada Casserole:
Q: Can I make this casserole ahead of time?
A: Absolutely! Assemble the entire casserole (through step 7), cover tightly with plastic wrap and then foil, and refrigerate for up to 24 hours. Bake as directed, adding 5-10 minutes to the covered baking time since it will be cold.
Q: How do I store and reheat leftovers?
A: Store in an airtight container in the refrigerator for up to 4 days. Reheat individual portions in the microwave, or reheat the entire casserole, covered with foil, in a 350°F (175°C) oven for 15-20 minutes until warmed through.
Q: Can I freeze this casserole?
A: Yes, it freezes beautifully. Assemble completely but do not bake. Wrap the entire dish tightly in both plastic wrap and heavy-duty foil. Freeze for up to 3 months. Thaw in the refrigerator for 24 hours before baking as directed.
Q: My casserole is too watery. What happened?
A: This is usually caused by the natural liquid in the sour cream and the undrained green chiles separating during baking. Letting it rest for the full 15 minutes allows the starches from the tortillas to absorb the excess liquid. Also, ensure your beans are thoroughly rinsed and drained.
Q: Is it better to use corn or flour tortillas?
A: This is a matter of personal preference. Corn offers a more authentic flavor and firmer texture. Flour tortillas create a softer, more uniform casserole that some people, especially children, prefer. The pan-frying step for corn tortillas is highly recommended.
Final Thoughts:
The Cheesy Chicken Enchilada Casserole is more than a recipe; it is a testament to the power of smart, comforting, and delicious home cooking. It takes the beloved essence of a classic Mexican dish and reimagines it in the most convenient, crowd-pleasing way possible. From the moment you mix the creamy, spiced filling to the moment you pull the golden, bubbly masterpiece from the oven, the process is straightforward and rewarding. It’s a dish that brings people together, satisfies deep cravings, and leaves everyone feeling nourished and happy. So, grab your baking dish, embrace the layers, and get ready to create a new family favorite that promises to be a regular on your dinner table for years to come. It’s the ultimate comfort food, deconstructed and perfected
Print
Cheesy Chicken Enchilada Casserole: Easy 40-Minute Comfort Food
- Total Time: 60 minutes
Description
This cheesy chicken enchilada casserole is layered with flavor! An easy, family-friendly meal that’s ready in 40 minutes. Always a hit!
Ingredients
For the Chicken Filling:
-
3 cups Cooked Chicken, shredded: A store-bought rotisserie chicken is the ultimate time-saver. Alternatively, you can poach or bake 2 large chicken breasts seasoned with salt, pepper, and cumin.
-
1 (10 oz) can Red Enchilada Sauce: Choose a good-quality sauce, as it is the backbone of the dish’s flavor. For a green version, use salsa verde.
-
1 (4 oz) can Diced Green Chiles, undrained: These provide a mild, tangy heat and authentic flavor.
-
1 cup Sour Cream or Mexican Crema: This adds a crucial creaminess that tempers the acidity of the sauce and creates a richer, more cohesive filling.
-
1 (15 oz) can Black Beans, rinsed and drained: For fiber and protein.
-
1 cup Frozen Corn, thawed: Adds a sweet, juicy pop of color and texture.
-
1 tsp Ground Cumin
-
1 tsp Chili Powder
-
½ tsp Garlic Powder
For the Layering and Topping:
-
10-12 (6-inch) Corn Tortillas OR 6-8 (8-inch) Flour Tortillas: Corn tortillas offer a more traditional, authentic flavor and texture, while flour tortillas become softer and more pasta-like. Pro-Tip: For corn tortillas, quickly pan-fry them in a tiny amount of oil for 10-15 seconds per side to prevent them from becoming tough in the casserole.
-
3 cups Shredded Cheese: A blend is ideal for flavor and meltability.
-
2 cups Monterey Jack Cheese, for its superb melting quality and mild flavor.
-
1 cup Sharp Cheddar Cheese, for a tangy, robust kick.
-
-
1 (10 oz) can Red Enchilada Sauce, for layering and topping.
-
Non-stick Cooking Spray
For Garnish and Serving:
-
½ cup Fresh Cilantro, chopped
-
1 Avocado, diced
-
½ cup Red Onion, finely diced
-
½ cup Roma Tomatoes, diced
-
Sour Cream or Mexican Crema
-
Sliced Jalapeños (fresh or pickled)
Instructions
Step 1: Prepare the Flavorful Filling
Preheat your oven to 375°F (190°C). In a large mixing bowl, combine the shredded chicken, 1 can of enchilada sauce, the diced green chiles (with their liquid), sour cream, rinsed black beans, thawed corn, cumin, and chili powder. Mix gently until everything is evenly coated and combined. This creamy, saucy mixture is the heart of your casserole.
Step 2: Prepare the Tortillas
If using corn tortillas, this is a critical step for the best texture. Heat a small skillet over medium-high heat with a teaspoon of oil. Briefly fry each tortilla for about 10-15 seconds per side, just until soft and pliable. This prevents them from cracking and becoming tough during baking. If using flour tortillas, you can use them directly, or tear them into large, rustic pieces for easier layering.
Step 3: Assemble the First Layer
Lightly grease a 9×13 inch baking dish with non-stick spray. Spread about ½ cup of the second can of enchilada sauce evenly over the bottom of the dish. Arrange a single layer of tortillas over the sauce, tearing them as needed to cover the bottom completely. This initial layer of sauce prevents the bottom from drying out.
Step 4: The Hearty Chicken Layer
Spoon half of the creamy chicken filling mixture over the tortilla layer. Spread it into an even, uniform layer, ensuring it reaches the edges of the dish.
Step 5: The Cheesy Glue
Sprinkle one-third of your shredded cheese blend (about 1 cup) evenly over the chicken layer. The cheese acts as a binding agent, melting into the layers below and above.
Step 6: Repeat the Layers
Repeat the process: another layer of tortillas, the remaining half of the chicken mixture, and another third of the cheese (another 1 cup).
Step 7: The Final Top Layer
Place one final layer of tortillas on top. Pour the remaining enchilada sauce from the second can over the top, spreading it to cover all the tortillas. This will ensure the top layer stays moist and flavorful. Finish by sprinkling the remaining 1 cup of cheese evenly over the entire surface.
Step 8: Bake to Bubbly, Golden Perfection
Cover the baking dish tightly with aluminum foil. Bake for 25 minutes. Then, remove the foil and bake for an additional 10-15 minutes, or until the cheese is completely melted, bubbly, and starting to develop golden-brown spots around the edges.
Step 9: Rest, Garnish, and Serve
Remove the casserole from the oven and let it rest for 10-15 minutes. This resting period is essential—it allows the layers to set, making it much easier to cut clean portions without everything spilling out. Garnish generously with fresh cilantro, diced red onion, tomatoes, avocado, and a dollop of sour cream. Slice into squares and serve immediately
Notes
-
9×13 inch Baking Dish
-
Large Mixing Bowl
-
Skillet (for softening corn tortillas)
-
Measuring Cups and Spoons
-
Spatula
-
Can Opener
- Prep Time: 20 minutes
Nutrition
- Calories: 520 kcal
- Sugar: 8 g
- Sodium: 1100 mg
- Fat: 25 g
- Carbohydrates: 40 g
- Fiber: 8 g
- Protein: 32 g


