
Introduction to Butter and Brown Sugar Glaze
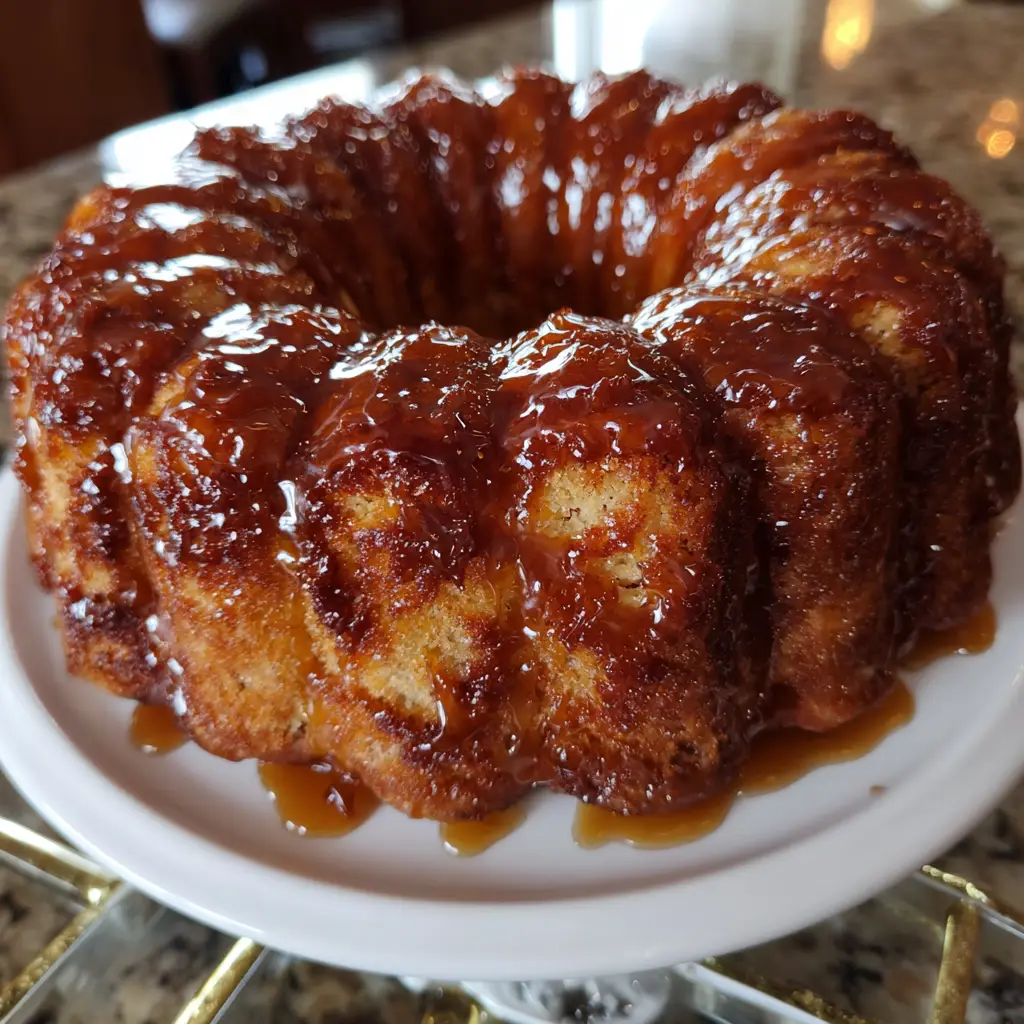
In the world of culinary finishes, few things are as universally beloved, effortlessly elegant, and profoundly transformative as a warm Butter and Brown Sugar Glaze. This is not merely a sauce; it is liquid gold, a shimmering, velvety cascade that possesses the magical ability to elevate the simplest of baked goods into gourmet masterpieces. Imagine the deep, caramel-like sweetness of brown sugar melding with the rich, nutty undertones of melted butter, all brought together into a smooth, pourable consistency that slowly drips and sets into a delicate, crackly shell. This glaze is the secret weapon behind the irresistible allure of cinnamon rolls, the crowning glory of a humble Bundt cake, and the simple perfection that can turn a bowl of oatmeal into a decadent treat.
Why Is This Butter and Brown Sugar Glaze So Popular?
The enduring and widespread adoration for this simple glaze is a testament to its powerful combination of nostalgic flavor, practical simplicity, and stunning visual appeal. Its popularity is rooted in several key factors.
First and foremost is its deep, complex, and comforting flavor profile. The combination of butter and brown sugar is a classic for a reason. It taps directly into our sense of comfort and nostalgia, reminiscent of the toppings on holiday hams, the centers of well-loved candies, and the warm, gooey filling of a perfect chocolate chip cookie. The molasses in the brown sugar introduces notes of caramel, toffee, and a slight bitterness that prevents the glaze from being cloyingly sweet, creating a sophisticated taste that feels both familiar and special.
Secondly, it is unbelievably quick and easy to make. In a world of complex recipes, this glaze is a welcome reprieve. It typically comes together in under 5 minutes with minimal effort and uses pantry-staple ingredients. This accessibility means that anyone can create a beautiful, homemade finishing touch without the stress or time commitment of a more elaborate frosting or sauce, making it the perfect solution for last-minute desserts or impromptu baking projects.
Thirdly, its textural versatility is unmatched. Depending on the ratio of ingredients and the application method, this glaze can be a thin, drippy icing for a Bundt cake, a thick, spreadable frosting for cookies and bars, or a warm, pourable sauce for ice cream and pancakes. It can set firm, remain soft and chewy, or stay liquid, allowing you to customize it perfectly for your desired outcome.
Finally, its visual appeal is immediate and professional. The warm, amber hue of the glaze, with its glossy, shiny finish, makes any dessert look more appealing, finished, and professionally made. It provides a beautiful sheen and a textural contrast that is as pleasing to the eye as it is to the palate.
Why You’ll Love This Butter and Brown Sugar Glaze:
- 5-Minute Miracle: You will love how quickly this glaze comes together with minimal effort and cleanup.
- Pantry-Staple Ingredients: You will appreciate that you can create something spectacular with ingredients you likely already have on hand.
- Incredibly Versatile: You will be amazed at the number of desserts, breakfasts, and snacks this one glaze can transform.
- Perfect Sweetness: You will enjoy the deep, caramel-like flavor that is rich and sweet without being overpowering.
- Professional Finish: You will love the beautiful, glossy sheen it adds to all your baked goods.
Here’s what you’ll need:
The simplicity of this recipe demands attention to the quality of its few ingredients.
Core Ingredients:
- ½ cup (1 stick / 113g) Unsalted Butter: Using unsalted butter allows you to control the salt level. For a richer, more caramel-like flavor, you can brown the butter first.
- 1 cup (packed) Light Brown Sugar (200g): Light brown sugar provides a classic, balanced caramel flavor. Dark brown sugar can be used for a deeper, more molasses-forward taste.
- ¼ teaspoon Salt: This is crucial for balancing the sweetness and enhancing the buttery and caramel flavors. If using salted butter, you may omit this.
Liquid for Consistency:
- 3-4 tablespoons Heavy Cream, Half-and-Half, or Whole Milk: Heavy cream will yield the richest, creamiest glaze. Milk will create a lighter version. The amount can be adjusted for your desired thickness.
Flavor Enhancers (Optional but Recommended):
- 1 teaspoon Pure Vanilla Extract: Adds a warm, aromatic depth. Always add after removing from heat.
- 1 cup (120g) Powdered Sugar, sifted: For a thicker, more opaque, “frosting-like” glaze that sets firmly.
- 1-2 tablespoons Bourbon or Dark Rum: For an adult, complex flavor note.
How to Make Butter and Brown Sugar Glaze:
Now that you have your ingredients ready, let’s dive into the steps for making this delightful Butter and Brown Sugar Glaze. It’s as easy as pie, and I promise you’ll feel like a culinary superstar!
Step 1: Melt the Butter and Sugar
In a medium-sized, heavy-bottomed saucepan, melt the butter over medium heat. Once melted, add the packed brown sugar and salt. Whisk continuously until the brown sugar has completely dissolved into the butter. This should take about 2-3 minutes. The mixture will be granular at first but will become smooth and bubble slightly.
Step 2: Create the Base Simmer
Bring the mixture to a gentle simmer. Allow it to bubble gently for 1 minute, whisking constantly. This cooking time allows the raw taste of the sugar to cook out and helps thicken the base slightly. Do not boil vigorously, as this can cause the sugar to crystallize or burn.
Step 3: Incorporate the Cream
Remove the saucepan from the heat. Carefully whisk in the heavy cream, one tablespoon at a time. The mixture will bubble up vigorously when you first add the cream, so be cautious. Start with 3 tablespoons and whisk until the glaze is smooth and shiny.
Step 4: Add Flavor Enhancers
Whisk in the pure vanilla extract, bourbon, or any other liquid flavorings at this point. If you are making a thicker glaze with powdered sugar, let the mixture cool for about 5 minutes before gradually whisking in the sifted powdered sugar until no lumps remain.
Step 5: Adjust Consistency
Evaluate the consistency of your glaze. For a thin, drippy glaze (ideal for cakes and cinnamon rolls), you may need to add the remaining tablespoon of cream. For a thicker, spreadable glaze (ideal for cookies and bars), you can use less cream or more powdered sugar.
Step 6: Cool Slightly and Apply
Let the glaze cool for 2-3 minutes to thicken slightly. This prevents it from just running off your baked good. It should still be very warm and pourable.
Step 7: Glaze and Serve
Pour or drizzle the warm glaze over your completely cooled cake, rolls, or pastry. If you are glazing something warm (like pancakes), use the glaze immediately after step 4. The glaze will set as it cools, creating a delicious, slightly crisp top layer.
Tips for Success:
- Use a Heavy-Bottomed Pan: This distributes heat evenly and prevents the sugar from scorching.
- Don’t Rush the Melting: Whisk constantly while the sugar dissolves to prevent burning and ensure a smooth glaze.
- Cool Your Baked Goods: For the best results, always glaze completely cooled cakes and pastries. A warm surface will cause the glaze to melt and become absorbed, creating a soggy texture.
- Sift Your Powdered Sugar: If using powdered sugar, always sift it first to prevent lumps in your finished glaze.
- Customize the Thickness: The glaze thickens as it cools. If it becomes too thick while you’re working, gently reheat it over low heat or add a few drops of warm cream to thin it out.
- Brown Your Butter: For a next-level flavor, cook the butter over medium heat until it turns a golden amber color and smells nutty before adding the brown sugar.
Equipment Needed:
- Medium Heavy-Bottomed Saucepan
- Whisk
- Measuring Cups and Spoons
- Heat-Proof Spatula
- Fine-Mesh Sieve (if using powdered sugar)
Variations of Butter and Brown Sugar Glaze:
- Maple-Brown Sugar Glaze: Substitute 2 tablespoons of the cream with pure maple syrup.
- Spiced Brown Sugar Glaze: Add ½ teaspoon of cinnamon, a pinch of nutmeg, and a pinch of cardamom along with the brown sugar.
- Citrus Brown Sugar Glaze: Add 1 teaspoon of finely grated orange or lemon zest along with the vanilla extract.
- Coffee Brown Sugar Glaze: Substitute the cream with strongly brewed coffee or add 1 teaspoon of instant espresso powder dissolved in the vanilla extract.
- Penuche-Style Frosting: For a thick, fudge-like frosting, use 1/2 cup butter, 1 cup brown sugar, and 1/4 cup milk. Cook as directed, then cool completely before beating in 2 cups of sifted powdered sugar until spreadable.
Serving Suggestions for Butter and Brown Sugar Glaze:
- On Cinnamon Rolls & Sweet Rolls: The classic and perfect application.
- Drizzled over a Pound Cake or Bundt Cake: Adds moisture and a beautiful finish.
- On Breakfast Items: Glaze over waffles, pancakes, French toast, or scones.
- As a Dessert Topping: Drizzle warm over ice cream, bread pudding, or baked apples.
- On Cookies and Bars: Spread a thin layer on blondies, sugar cookies, or apple bars.
- As a Dip: Serve slightly warmed as a dip for apple slices, pretzels, or churros.
Prep Time:
2 minutes
Cooking Time:
5 minutes
Total Time:
7 minutes
Nutritional Information (Approximate per tablespoon):
- Calories: ~80 kcal
- Protein: 0 g
- Sodium: 20 mg
- Sugar: 10 g
- Fat: 4 g (Saturated Fat: 2.5 g)
- Carbohydrates: 12 g
- Fiber: 0 g
Please note: This is an estimate and can vary significantly based on the specific ingredients and variations you use.
FAQs about Butter and Brown Sugar Glaze:
Q: My glaze is grainy. What went wrong?
A: Graininess occurs when the brown sugar doesn’t fully dissolve. Ensure you are whisking constantly over medium heat until the sugar granules are completely melted into the butter before adding the cream.
Q: Can I make this glaze ahead of time?
A: Yes, you can. Store it in an airtight container in the refrigerator for up to 1 week. It will solidify. Gently reheat it in the microwave in 15-second intervals or in a saucepan over low heat, adding a teaspoon of cream if needed to thin it out.
Q: Why did my glaze become hard and crack?
A: This is normal for a glaze with a higher ratio of sugar! As it cools, it sets. If you want a softer set, increase the amount of butter or cream slightly. Using powdered sugar will also lead to a firmer set.
Q: Can I use this glaze on a warm cake?
A: It’s not recommended for layer cakes, as it will soak in and make the cake soggy. However, for dense cakes like pound cake or for cinnamon rolls that are meant to be served warm, applying the glaze warm is traditional and delicious.
Q: Is there a dairy-free version?
A: Absolutely. Use a high-quality vegan butter stick and canned coconut milk (full-fat for richness) in place of the butter and cream.
Final Thoughts:
The Butter and Brown Sugar Glaze is more than a recipe; it is a fundamental building block of joyful baking. It is a testament to the idea that the simplest combinations, when executed with care, can yield the most spectacular results. This glaze is your secret weapon for adding a touch of homemade magic, a burst of comforting flavor, and a professional finish to countless dishes. Its warm, caramel-kissed sweetness is a universal language of delight, capable of turning the ordinary into the extraordinary. So, keep your butter and brown sugar at the ready, and never again wonder how to finish that cake or elevate that breakfast. In just five minutes, you can create a glossy, glorious glaze that promises and delivers pure, unadulterated deliciousness.
Print
Butter and Brown Sugar Glaze: Sweet & Caramelized Topping
- Total Time: 7 minutes
Description
Make this irresistible Butter and Brown Sugar Glaze! Perfect for cakes, cookies, pancakes, or ice cream, rich, buttery & easy to make
Ingredients
Core Ingredients:
-
½ cup (1 stick / 113g) Unsalted Butter: Using unsalted butter allows you to control the salt level. For a richer, more caramel-like flavor, you can brown the butter first.
-
1 cup (packed) Light Brown Sugar (200g): Light brown sugar provides a classic, balanced caramel flavor. Dark brown sugar can be used for a deeper, more molasses-forward taste.
-
¼ teaspoon Salt: This is crucial for balancing the sweetness and enhancing the buttery and caramel flavors. If using salted butter, you may omit this.
Liquid for Consistency:
-
3-4 tablespoons Heavy Cream, Half-and-Half, or Whole Milk: Heavy cream will yield the richest, creamiest glaze. Milk will create a lighter version. The amount can be adjusted for your desired thickness.
Flavor Enhancers (Optional but Recommended):
-
1 teaspoon Pure Vanilla Extract: Adds a warm, aromatic depth. Always add after removing from heat.
-
1 cup (120g) Powdered Sugar, sifted: For a thicker, more opaque, “frosting-like” glaze that sets firmly.
-
1-2 tablespoons Bourbon or Dark Rum: For an adult, complex flavor note
Instructions
Step 1: Melt the Butter and Sugar
In a medium-sized, heavy-bottomed saucepan, melt the butter over medium heat. Once melted, add the packed brown sugar and salt. Whisk continuously until the brown sugar has completely dissolved into the butter. This should take about 2-3 minutes. The mixture will be granular at first but will become smooth and bubble slightly.
Step 2: Create the Base Simmer
Bring the mixture to a gentle simmer. Allow it to bubble gently for 1 minute, whisking constantly. This cooking time allows the raw taste of the sugar to cook out and helps thicken the base slightly. Do not boil vigorously, as this can cause the sugar to crystallize or burn.
Step 3: Incorporate the Cream
Remove the saucepan from the heat. Carefully whisk in the heavy cream, one tablespoon at a time. The mixture will bubble up vigorously when you first add the cream, so be cautious. Start with 3 tablespoons and whisk until the glaze is smooth and shiny.
Step 4: Add Flavor Enhancers
Whisk in the pure vanilla extract, bourbon, or any other liquid flavorings at this point. If you are making a thicker glaze with powdered sugar, let the mixture cool for about 5 minutes before gradually whisking in the sifted powdered sugar until no lumps remain.
Step 5: Adjust Consistency
Evaluate the consistency of your glaze. For a thin, drippy glaze (ideal for cakes and cinnamon rolls), you may need to add the remaining tablespoon of cream. For a thicker, spreadable glaze (ideal for cookies and bars), you can use less cream or more powdered sugar.
Step 6: Cool Slightly and Apply
Let the glaze cool for 2-3 minutes to thicken slightly. This prevents it from just running off your baked good. It should still be very warm and pourable.
Step 7: Glaze and Serve
Pour or drizzle the warm glaze over your completely cooled cake, rolls, or pastry. If you are glazing something warm (like pancakes), use the glaze immediately after step 4. The glaze will set as it cools, creating a delicious, slightly crisp top layer
Notes
-
Medium Heavy-Bottomed Saucepan
-
Whisk
-
Measuring Cups and Spoons
-
Heat-Proof Spatula
-
Fine-Mesh Sieve
- Prep Time: 2 minutes
- Category: dessert
- Cuisine: American
Nutrition
- Calories: 80 kcal
- Sugar: 10 g
- Sodium: 20 mg
- Fat: 4g
- Carbohydrates: 12 g


