
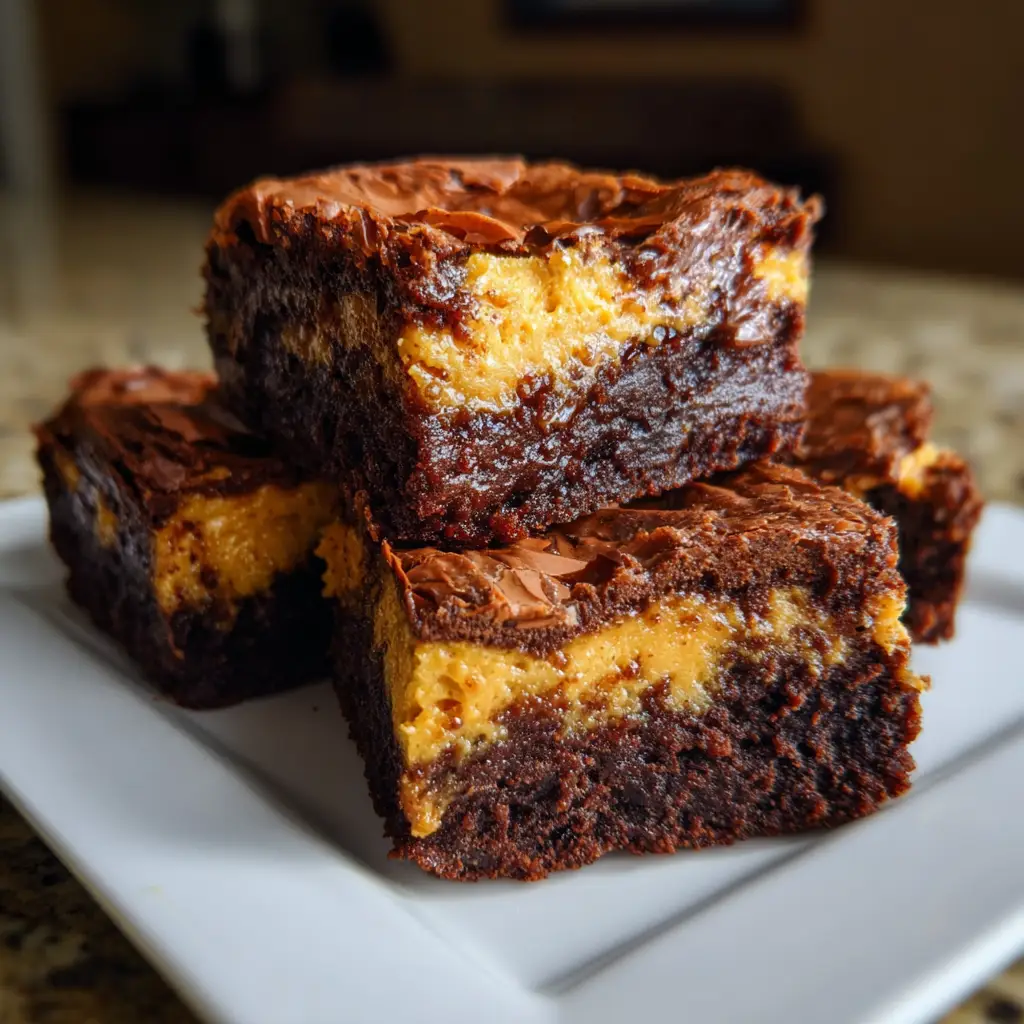
Pumpkin Cheesecake Brownies are a magnificent culinary fusion, a decadent dessert that masterfully marries two beloved worlds: the deep, dark, intensely chocolatey realm of the brownie and the creamy, spiced, autumnal warmth of pumpkin cheesecake. This recipe is not merely a brownie with a hint of pumpkin, nor is it a cheesecake with a chocolate crust; it is a sophisticated, layered bar where both components are stars in their own right, creating a harmonious and breathtaking contrast in every single bite. Imagine a dense, fudgy, and rich chocolate base, so decadent it borders on a truffle-like experience, perfectly supporting a luxuriously smooth, lightly spiced pumpkin cheesecake layer that is both tangy and sweet.
Why Is This Pumpkin Cheesecake Brownie So Popular?
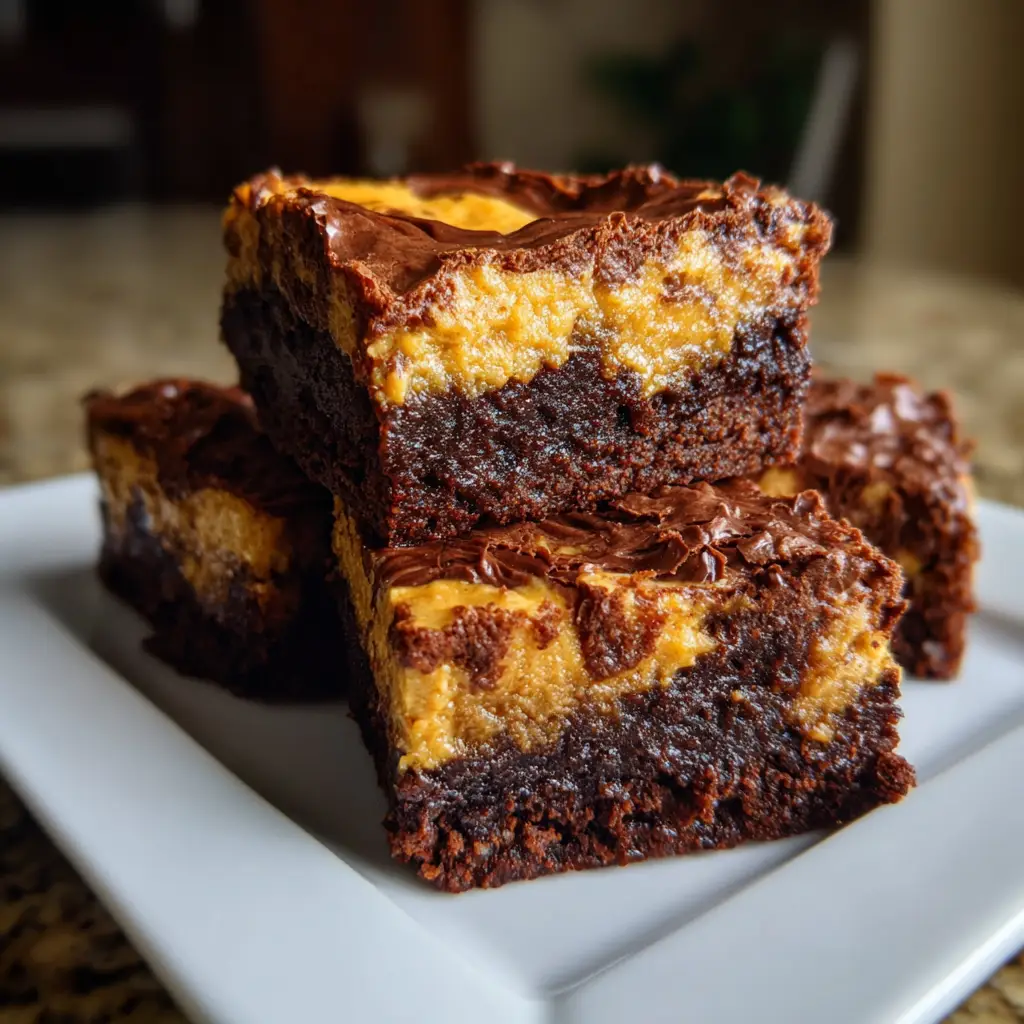
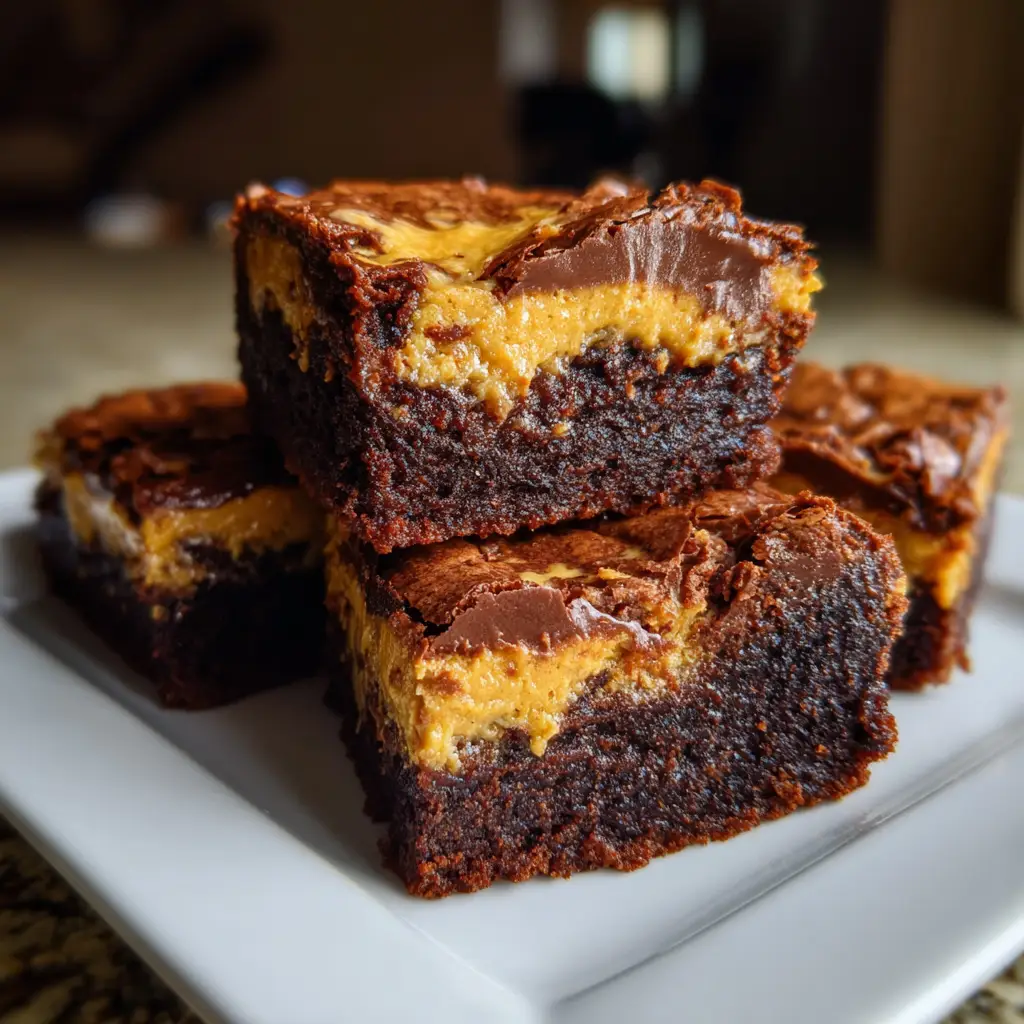
The soaring popularity of the Pumpkin Cheesecake Brownie is a phenomenon rooted in its perfect balance of contrast, flavor, and seasonal appeal. Firstly, it satisfies multiple dessert cravings simultaneously. For those who can’t decide between a rich chocolate treat and a creamy cheesecake, this bar offers the best of both, resolving the eternal internal debate with spectacular results. Secondly, it is a visually stunning dessert. The dramatic marbling, with swirls of deep brown and vibrant cream, makes it look like it came from a professional patisserie, guaranteeing a “wow” factor that few other bar cookies can match. Furthermore, its popularity is inextricably linked to the cultural love affair with pumpkin spice each autumn. It taps into the seasonal zeitgeist in a more sophisticated and substantial way than a latte, offering a tangible, homemade treat that celebrates the flavors of the harvest. It is also a versatile crowd-pleaser; it is rich enough for adults to appreciate its complexity, yet approachable and delicious enough to become an instant favorite with children. Finally, it is a recipe that feels indulgent and gourmet, yet its assembly is straightforward and accessible, making any baker feel accomplished. It is the perfect dessert for those who want to impress without succumbing to the stress of intricate, multi-step pastries.
Why You’ll Love This Pumpkin Cheesecake Brownie:
You will fall head over heels for this Pumpkin Cheesecake Brownie recipe because it is meticulously engineered for a flawless outcome and an unforgettable sensory experience. You will love the detailed, step-by-step process for creating the perfect fudgy brownie base—a from-scratch batter that relies on melted chocolate and cocoa powder for a deep, complex chocolate flavor, avoiding the cakey texture that plagues lesser brownies. You will appreciate the guidance for achieving the ideal cheesecake layer: using room-temperature ingredients for a silky-smooth filling, and the precise blending technique that prevents over-aerating, ensuring a dense, creamy contrast to the brownie beneath. You will adore the creative freedom of the marbling process; it’s a fun, artistic step that allows you to create a beautiful, unique pattern on every batch. This recipe is also a practical dream; it yields a generous number of bars, it freezes exceptionally well, and it can be made a day or two in advance, making it the ultimate strategic dessert for entertaining. Most importantly, you will love the profound sense of satisfaction that comes from slicing into the chilled pan to reveal the stunning layers and the chorus of compliments you will receive. It is a dessert that tastes even more incredible than it looks, a true masterpiece that will solidify your reputation as a baking virtuoso.
Here’s what you’ll need:
For the Fudgy Brownie Layer:
-
1/2 cup (1 stick / 113g) Unsalted Butter: Melted, for a rich, fudgy texture.
-
4 oz (113g) High-Quality Bittersweet or Semi-Sweet Chocolate, finely chopped: The primary source of deep chocolate flavor.
-
1 cup (200g) Granulated Sugar: For sweetness that balances the bitterness of the chocolate.
-
2 large Eggs, at room temperature: Essential for structure and richness.
-
1 teaspoon Pure Vanilla Extract: Enhances the chocolate flavor.
-
1/4 cup (25g) Unsweetened Cocoa Powder, Dutch-processed preferred: For an extra layer of intense chocolate depth.
-
3/4 cup (95g) All-Purpose Flour: The structural foundation, measured by weight for accuracy.
-
1/4 teaspoon Salt: To heighten all the other flavors.
For the Pumpkin Cheesecake Layer:
-
12 oz (340g) Full-Fat Cream Cheese, softened to room temperature: This is non-negotiable for a smooth, lump-free filling.
-
1/2 cup (100g) Granulated Sugar: Sweetens the cheesecake layer.
-
3/4 cup (185g) Pure Pumpkin Puree (not pumpkin pie filling): The star of the show, providing flavor, color, and moisture.
-
1 large Egg, at room temperature: Binds the cheesecake and gives it structure.
-
1 teaspoon Pure Vanilla Extract: Complements the pumpkin and spices.
-
1 teaspoon Ground Cinnamon: The quintessential pumpkin spice.
-
1/4 teaspoon Ground Ginger: For a warm, slightly sharp note.
-
1/8 teaspoon Ground Nutmeg: For a nutty, aromatic depth.
-
1/8 teaspoon Ground Cloves: For a pungent, warm backbone (use sparingly).
-
A pinch of Salt: To balance the sweetness.
How to Make Pumpkin Cheesecake Brownies:
Now that you have your ingredients ready, let’s dive into the steps for making this delightful Pumpkin Cheesecake Brownie. It’s as easy as pie, and I promise you’ll feel like a culinary superstar!
Step 1: Prepare the Pan and Preheat the Oven
Preheat your oven to 350°F (175°C). Line an 8×8-inch or 9×9-inch square baking pan with parchment paper, leaving an overhang on two opposite sides. This “sling” will allow you to lift the entire batch of brownies out of the pan for clean, easy slicing. Grease the parchment paper lightly.
Step 2: Create the Chocolate Brownie Base
In a heatproof bowl set over a saucepan of gently simmering water (a double boiler), melt the chopped bittersweet chocolate and butter together. Stir continuously until the mixture is completely smooth and glossy. Remove the bowl from the heat and let it cool for 5 minutes. Alternatively, you can melt them in the microwave in 25-second bursts, stirring between each interval.
Step 3: Complete the Brownie Batter
Whisk the 1 cup of granulated sugar into the slightly cooled chocolate-butter mixture until combined. Add the two room-temperature eggs, one at a time, whisking vigorously after each addition until the batter becomes thicker and shiny. Whisk in the vanilla extract. Sift the cocoa powder, all-purpose flour, and salt directly into the wet ingredients. Using a spatula, fold the dry ingredients into the wet until just combined and no streaks of flour remain. Do not overmix.
Step 4: Prepare the Pumpkin Cheesecake Swirl
In a separate, clean bowl, using a hand mixer or a stand mixer fitted with the paddle attachment, beat the softened cream cheese on medium speed until it is completely smooth and free of lumps, about 1-2 minutes. Add the 1/2 cup of granulated sugar and beat until creamy and well-combined.
Step 5: Incorporate the Pumpkin and Spices
Add the pumpkin puree, the single egg, vanilla extract, cinnamon, ginger, nutmeg, cloves, and a pinch of salt to the cream cheese mixture. Beat on medium-low speed until everything is perfectly blended and the mixture is uniform in color and smooth. Scrape down the sides and bottom of the bowl to ensure homogeneity.
Step 6: Assemble the Layers and Create the Swirl
Pour all of the prepared brownie batter into the bottom of your prepared baking pan, spreading it into an even layer. Dollop large spoonfuls of the pumpkin cheesecake mixture evenly over the top of the brownie batter. Using the tip of a knife, a skewer, or a thin spatula, gently swirl the two batters together. Drag the tool through the batters in a zig-zag, figure-8, or circular pattern to create a beautiful marbled effect. Be careful not to over-swirl, or the two layers will blend into one.
Step 7: Bake to Perfection
Place the pan in the preheated oven and bake for 35-45 minutes (the time will vary based on your pan size and oven). The brownies are done when the edges are set, the center has a slight jiggle (but does not look liquid), and a toothpick inserted into a brownie-dominant area comes out with a few moist crumbs attached. The cheesecake part should not look wet.
Step 8: The Crucial Cooling Process
Remove the pan from the oven and place it on a wire cooling rack. Allow the brownies to cool completely in the pan for at least 2 hours. For the cleanest, most perfect slices, you must then refrigerate the pan for a minimum of 4 hours, or preferably overnight. This step sets the cheesecake layer firmly and makes the fudgy brownie even denser and more decadent.
Tips for Success:
-
Room Temperature is King: Ensuring your cream cheese, eggs, and pumpkin puree are at room temperature is the single most important step for a smooth, lump-free cheesecake layer that bakes evenly.
-
Do Not Overmix the Brownie Batter: Once you add the flour, mix only until the ingredients are combined. Overmixing develops gluten, leading to a tough, cakey brownie instead of a fudgy one.
-
The Swirling Technique: Use a light hand. 5-7 passes through the batter with a knife are usually sufficient to create a beautiful pattern without muddying the layers.
-
The Toothpick Test is Tricky: Remember that the toothpick will come out clean from the cheesecake swirl but should have moist crumbs from the brownie part. Testing in a brownie-only spot is key.
-
Chilling is Non-Negotiable: Resisting the urge to cut into these brownies warm is a test of willpower, but it is essential for achieving clean layers and the perfect, firm-yet-creamy texture.
-
Use Pure Pumpkin: Double-check your can label to ensure you are using 100% pure pumpkin puree and not “pumpkin pie filling,” which contains added sugars and spices that will throw off the recipe’s balance.
Equipment Needed:
-
8×8 or 9×9-inch Square Metal Baking Pan
-
Parchment Paper
-
Two Medium/Large Mixing Bowls
-
Hand Mixer or Stand Mixer
-
Whisk and Spatula
-
Double Boiler or Microwave-Safe Bowl
-
Cooling Rack
Variations of Pumpkin Cheesecake Brownies:
-
Chocolate Chip Studded: Fold 1/2 cup of semi-sweet chocolate chips into the brownie batter or sprinkle them on top before baking for extra chocolate pockets.
-
Graham Cracker Crust Layer: For an extra layer of texture, press 1 cup of graham cracker crumbs mixed with 3 tablespoons of melted butter and 1 tablespoon of sugar into the bottom of the pan before adding the brownie batter.
-
Spiced Up Version: Add a pinch of black pepper or a dash of cayenne pepper to the brownie batter for a subtle, sophisticated “Mexican hot chocolate” kick.
-
Nutty Delight: Fold 1/2 cup of chopped toasted pecans or walnuts into the brownie batter for a crunchy contrast.
-
Gluten-Free Adaptation: Substitute the all-purpose flour with a 1:1 gluten-free flour blend. The result is nearly identical.
Serving Suggestions for Pumpkin Cheesecake Brownies:
These brownies are sublime on their own, but a few garnishes can elevate them to a restaurant-quality dessert.
-
The Classic Garnish: A dollop of freshly whipped cream and a light dusting of cinnamon or cocoa powder.
-
Caramel Drizzle: A generous drizzle of salted caramel sauce over the top complements both the chocolate and pumpkin flavors exquisitely.
-
A La Mode: Serve a slightly warmed brownie square with a scoop of vanilla bean ice cream or cinnamon ice cream for the ultimate warm-cold contrast.
-
For a Gourmet Touch: A sprinkle of flaky sea salt on top just before serving enhances every flavor and adds a delightful textural crunch.
-
Beverage Pairing: Pair with a glass of cold milk, a bold cup of coffee, a glass of dessert wine like a Riesling, or even a stout beer.
Prep Time:
25 minutes
Cooking Time:
40 minutes
Total Time:
1 hour 5 minutes (plus minimum 4 hours chilling time)
Nutritional Information (Estimated per brownie, serves 16):
-
Calories: ~280
-
Protein: ~4g
-
Sodium: ~120mg
-
Sugar: ~25g
-
Fat: ~16g (Saturated Fat: ~9g)
-
Carbohydrates: ~32g
-
Fiber: ~2g
Please note: Nutritional information is an estimate and can vary significantly based on the specific brands of ingredients you use and the size of your brownies.
FAQs about Pumpkin Cheesecake Brownies:
Q: Why did my cheesecake layer crack?
A: Cracking usually occurs from overmixing (incorporating too much air), a sudden temperature change, or overbaking. Ensure all ingredients are at room temperature, don’t over-beat the cheesecake after adding the egg, and avoid opening the oven door frequently during baking.
Q: Can I make these brownies ahead of time?
A: Absolutely! In fact, they are better made a day ahead. They need the long chilling time to set properly. They will keep, covered tightly in the refrigerator, for up to 5 days.
Q: Can I freeze Pumpkin Cheesecake Brownies?
A: Yes, they freeze exceptionally well. Once completely cooled and chilled, slice them and place them in a single layer on a parchment-lined baking sheet to freeze solid (about 2 hours). Then, transfer the frozen squares to an airtight container or freezer bag. They will keep for up to 3 months. Thaw in the refrigerator overnight.
Q: My brownies are too cakey. What went wrong?
A: A cakey texture is typically the result of overmixing the batter after adding the flour, using too much flour (always spoon and level your flour, don’t scoop!), or overbaking.
Q: Can I use a boxed brownie mix?
A: You can, for a shortcut. Prepare the boxed mix according to “fudgy” brownie directions, typically omitting any extra egg. Use it as your base layer and proceed with the recipe from Step 4 onward.
Final Thoughts:
Pumpkin Cheesecake Brownies are more than just a dessert; they are an experience, a celebration of flavor and texture that captures the very essence of autumnal indulgence. This recipe provides a detailed, foolproof roadmap to creating a dessert that is simultaneously sophisticated and comforting, impressive and approachable. The marriage of fudgy chocolate and spiced pumpkin cream cheese is a culinary revelation, a combination that is far greater than the sum of its parts. By following the crucial steps, using room temperature ingredients, avoiding overmixing, mastering the swirl, and, most importantly, exercising patience during the chilling process, you are guaranteed a flawless result.


