Imagine capturing the quintessential, soul-warming flavor of a rich, spiced pumpkin cheesecake and transforming it into a delightful, pop-able, and elegantly portable treat. Welcome to the world of No-Bake Pumpkin Cheesecake Balls, a recipe that is as fun to make as it is divine to eat. These irresistible morsels are the perfect solution for anyone craving the iconic taste of autumn but short on time, oven space, or baking confidence. Each ball is a perfect sphere of creamy, spiced pumpkin cheesecake filling, enrobed in a crisp, melt-in-your-mouth coating, offering a spectacular contrast of textures and a burst of seasonal flavor.
Why Is This No-Bake Pumpkin Cheesecake Balls So Popular?
The soaring popularity of No-Bake Pumpkin Cheesecake Balls is a testament to their perfect alignment with modern culinary desires. Firstly, they offer unparalleled convenience and ease. In a world where time is precious, a dessert that requires zero baking and can be made ahead of time is a true gift. They are a foolproof entry into the world of cheesecake, eliminating common pitfalls like sinking or over-baking. Secondly, their adorable, bite-sized presentation is a huge draw. Individual portions are inherently fun and festive, making them perfect for parties, platters, and gift-giving. Their uniform, round shape and decorative coatings make them visually stunning and highly “shareable” on social media. Furthermore, their textural symphony is utterly captivating. The initial crunch of the coating gives way to a cool, creamy, and intensely flavored interior that melts on the tongue, creating a multi-sensory eating experience. They are the ultimate portable, make-ahead, and universally loved dessert that feels both gourmet and approachable.
Why You’ll Love This No-Bake Pumpkin Cheesecake Balls:
- The Ultimate No-Fuss Dessert: No oven, no baking skills, and no fancy equipment required. It’s a simple process of mixing, rolling, and coating.
- Perfect Make-Ahead Treat: These balls actually benefit from chilling overnight, making them the ideal stress-free dessert for entertaining.
- Endlessly Customizable: From the spices in the filling to the type of coating on the outside, you can create a unique variation every single time.
- Family-Friendly Fun: The process of rolling and dipping is a wonderful activity to do with children or friends in the kitchen.
- Elegant and Impressive: Despite their simplicity, these balls look like they came from a professional confectionery, making you look like a dessert wizard.
Here’s what you’ll need:
For the Cheesecake Filling:
- 1 (8 oz) block full-fat cream cheese, softened to room temperature. This is non-negotiable for a smooth, lump-free texture.
- ½ cup (120g) pure pumpkin puree: Ensure it is 100% pure pumpkin, not pumpkin pie filling.
- ¼ cup (50g) light brown sugar, packed: For its molasses notes that pair perfectly with pumpkin.
- ¼ cup (30g) powdered sugar (confectioners’ sugar): This sweetens and also helps to thicken the filling.
- 1 teaspoon pure vanilla extract
- 1 teaspoon ground cinnamon
- ½ teaspoon ground ginger
- ¼ teaspoon ground nutmeg
- ⅛ teaspoon ground cloves
- A pinch of salt: To enhance all the flavors.
- ¾ cup (90g) graham cracker crumbs: This is the crucial structural element that soaks up moisture and gives the filling a classic cheesecake crust texture.
For the Coating & Garnish:
- 12 oz (about 2 cups) vanilla candy melts or white chocolate chips: Candy melts are preferred for their easy melting and firm set.
- 1 teaspoon coconut oil or vegetable shortening: This thins the melted coating for a smoother, more delicate shell.
- Optional Coatings: Crushed graham crackers, crushed pecans or walnuts, cinnamon sugar, crushed Biscoff cookies, or orange sanding sugar.
- Optional Drizzle: Melted dark chocolate or butterscotch chips.
How to Make No-Bake Pumpkin Cheesecake Balls
Now that you have your ingredients ready, let’s dive into the steps for making this delightful No-Bake Pumpkin Cheesecake Balls. It’s as easy as pie, and I promise you’ll feel like a culinary superstar!
Step 1: Prepare the Cream Cheese Base
In a large mixing bowl, using a hand mixer or a stand mixer fitted with the paddle attachment, beat the softened cream cheese on medium speed until it is completely smooth, creamy, and free of any lumps. This should take about 1-2 minutes. Scrape down the sides of the bowl.
Step 2: Incorporate Wet Ingredients and Spices
Add the pumpkin puree, brown sugar, powdered sugar, vanilla extract, cinnamon, ginger, nutmeg, cloves, and salt to the cream cheese. Beat on medium speed until all ingredients are perfectly combined and the mixture is uniform in color and texture. Scrape down the bowl again to ensure everything is incorporated.
Step 3: Add the Graham Cracker Crumbs
Switch to a spatula or wooden spoon. Add the graham cracker crumbs to the wet mixture. Fold gently until the crumbs are fully absorbed. The mixture will be soft and somewhat sticky—this is normal.
Step 4: The Crucial Chill
Cover the bowl tightly with plastic wrap and refrigerate for at least 2 hours, or until the mixture is very firm. Do not skip or shorten this step. A firm mixture is absolutely essential for being able to roll neat, round balls that won’t melt in your hands during the coating process.
Step 5: Portion and Roll the Balls
Line a large baking sheet with parchment paper. Using a small cookie scoop (about 1 tablespoon in size), portion out the chilled mixture. Roll each portion between your palms into a smooth, compact ball. If the mixture becomes too soft and sticky to handle, simply return it to the refrigerator for 15-20 minutes. Place the rolled balls on the prepared baking sheet.
Step 6: The Second Chill
Once all the balls are rolled, place the entire baking sheet in the freezer for at least 30 minutes. This “flash freeze” ensures the balls are rock-solid and will not soften or lose their shape when dipped into the warm coating.
Step 7: Melt the Coating
While the balls are freezing, melt the coating. In a deep, microwave-safe bowl, combine the vanilla candy melts and the teaspoon of coconut oil. Microwave in 30-second intervals, stirring thoroughly after each interval, until the mixture is completely smooth and fluid. Do not overheat.
Step 8: Coat the Cheesecake Balls
Remove a few balls from the freezer at a time (keeping the rest cold). Using a fork, a dipping tool, or two spoons, carefully dip each frozen ball into the melted coating, ensuring it is completely submerged. Lift it out, gently tap off the excess coating, and return it to the parchment-lined sheet.
Step 9: Add Garnish and Set
If you are using a garnish like crushed graham crackers or nuts, sprinkle it on top immediately after dipping, before the coating sets. For a decorative drizzle, wait until the first coat is fully set, then use a fork or a piping bag to zigzag melted dark chocolate over the top. Allow the balls to set completely at room temperature, which will take about 15-20 minutes.
Tips for Success:
- Room Temperature Cream Cheese is Key: Cold cream cheese will create lumps that are impossible to beat out, resulting in a grainy texture.
- The Double Chill is Non-Negotiable: The initial chill firms the mixture for rolling. The second freeze ensures a clean, easy dip. Skipping either will lead to a messy process.
- Squeeze Out Pumpkin Moisture (Pro Tip): For an even firmer filling, place the pumpkin puree on a paper towel and gently press to absorb some excess water before measuring.
- Work in Small Batches: Only take 4-5 balls out of the freezer at a time for dipping. If they warm up, they can soften and fall apart in the coating.
- If Coating is Too Thick: Add another ½ teaspoon of coconut oil and stir until it reaches a smooth, dippable consistency.
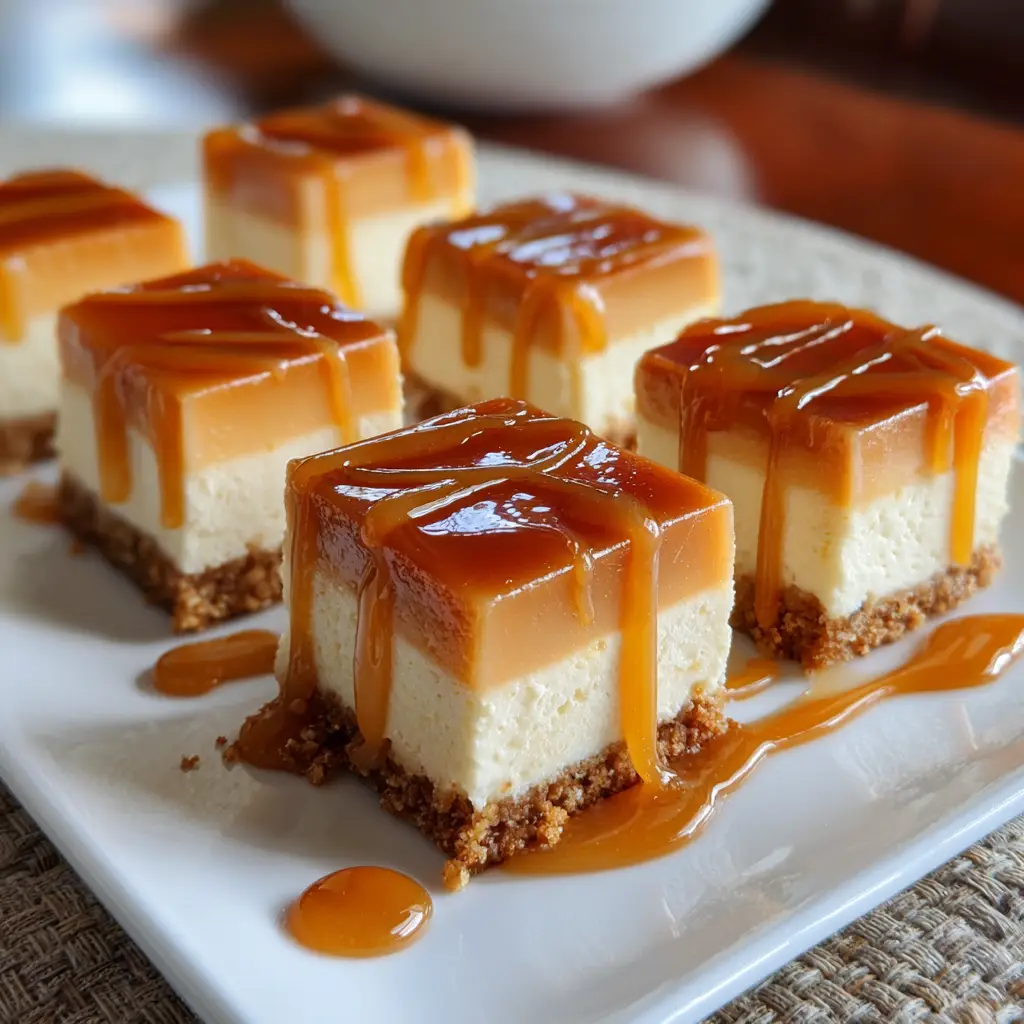
Equipment Needed:
- Electric Hand Mixer or Stand Mixer
- Large Mixing Bowl
- Measuring Cups and Spoons
- Spatula
- Baking Sheet
- Parchment Paper
- Small Cookie Scoop (highly recommended)
- Microwave-Safe Bowl
- Fork or Dipping Tools
Variations of No-Bake Pumpkin Cheesecake Balls:
- Gingersnap Cheesecake Balls: Replace the graham cracker crumbs with finely crushed gingersnap cookies for a spicy, snappy twist.
- Pecan Praline Balls: Roll the finished, chilled balls in finely chopped, toasted pecans instead of dipping in chocolate.
- White Chocolate Chip Version: Fold ¼ cup of mini white chocolate chips into the filling mixture before chilling for added texture.
- Bourbon-Spiked Balls: Add 1-2 tablespoons of bourbon or spiced rum to the filling for a sophisticated adult-only treat.
- Vegan/Dairy-Free Version: Use vegan cream cheese, vegan graham crackers, and dairy-free chocolate for coating.
Serving Suggestions for No-Bake Pumpkin Cheesecake Balls:
- The Holiday Platter: Arrange the finished balls in festive paper liners on a beautiful platter as part of a larger dessert spread for Thanksgiving or Christmas.
- With Coffee or Tea: Serve a few balls alongside a hot cup of coffee, chai tea, or even a pumpkin spice latte for the ultimate autumnal pairing.
- As a Gift: Package them in a decorative box or cellophane bag tied with a ribbon for a thoughtful and delicious homemade gift.
- Fancy Dessert Shot: For a playful presentation, place a single ball on a small pedestal or in a mini shot glass with a dollop of whipped cream.
Prep Time:
30 minutes (plus 3 hours chilling/freezing time)
Total Time:
3 hours 30 minutes (mostly hands-off)
Nutritional Information
(Please note: This is an estimated calculation per ball, based on the recipe yielding 24 balls.)
- Calories: ~120 kcal
- Protein: 1g
- Sodium: 65mg
- Sugar: 12g
- Fat: 7g (Saturated Fat: 4g)
- Carbohydrates: 14g
- Fiber: 0g
FAQs about No-Bake Pumpkin Cheesecake Balls:
Q: How far in advance can I make these?
A: They are an excellent make-ahead dessert! Store them in a single layer in an airtight container in the refrigerator for up to 1 week.
Q: Can I freeze these cheesecake balls?
A: Absolutely! They freeze beautifully for up to 2 months. Place them in a single layer on a baking sheet to freeze solid, then transfer to a freezer bag or container. Thaw in the refrigerator overnight before serving.
Q: My mixture is too soft to roll, even after chilling. What can I do?
A: This usually means the pumpkin had a high water content or it needs more chilling. Add another 2-3 tablespoons of graham cracker crumbs and chill for another hour.
Q: Can I use a different coating?
A: Yes! You can use dark chocolate, semisweet chocolate, or even cinnamon-spiced melting wafers. The process is exactly the same.
Q: Why did my coating crack?
A: Cracking can happen if the frozen filling is too cold, causing the shell to contract too quickly as it sets. Let the balls sit at room temperature for just 2-3 minutes after removing from the freezer before dipping.
Final Thoughts:
No-Bake Pumpkin Cheesecake Balls are more than just a recipe; they are a celebration of flavor, convenience, and creative joy. They demystify the process of making cheesecake and package its beloved essence into a perfectly portable, irresistibly delicious form. The act of creating them, mixing the spiced filling, rolling the neat little spheres, and watching them transform under a glossy coat, is a deeply satisfying culinary ritual. So, embrace the ease and elegance of this no-bake wonder, and get ready to deliver a taste of autumn bliss that will enchant everyone who is lucky enough to try one.
Print
No-Bake Pumpkin Cheesecake Bites: Easy 15-Minute Fall Dessert
- Total Time: 3 hours
Description
Creamy, spiced no-bake pumpkin cheesecake balls! An easy 15-minute dessert with a graham cracker crust.
Ingredients
For the Cheesecake Filling:
-
1 (8 oz) block full-fat cream cheese, softened to room temperature. This is non-negotiable for a smooth, lump-free texture.
-
½ cup (120g) pure pumpkin puree: Ensure it is 100% pure pumpkin, not pumpkin pie filling.
-
¼ cup (50g) light brown sugar, packed: For its molasses notes that pair perfectly with pumpkin.
-
¼ cup (30g) powdered sugar (confectioners’ sugar): This sweetens and also helps to thicken the filling.
-
1 teaspoon pure vanilla extract
-
1 teaspoon ground cinnamon
-
½ teaspoon ground ginger
-
¼ teaspoon ground nutmeg
-
⅛ teaspoon ground cloves
-
A pinch of salt: To enhance all the flavors.
-
¾ cup (90g) graham cracker crumbs: This is the crucial structural element that soaks up moisture and gives the filling a classic cheesecake crust texture.
For the Coating & Garnish:
-
12 oz (about 2 cups) vanilla candy melts or white chocolate chips: Candy melts are preferred for their easy melting and firm set.
-
1 teaspoon coconut oil or vegetable shortening: This thins the melted coating for a smoother, more delicate shell.
-
Optional Coatings: Crushed graham crackers, crushed pecans or walnuts, cinnamon sugar, crushed Biscoff cookies, or orange sanding sugar.
-
Optional Drizzle: Melted dark chocolate or butterscotch chips.
Instructions
Step 1: Prepare the Cream Cheese Base
In a large mixing bowl, using a hand mixer or a stand mixer fitted with the paddle attachment, beat the softened cream cheese on medium speed until it is completely smooth, creamy, and free of any lumps. This should take about 1-2 minutes. Scrape down the sides of the bowl.
Step 2: Incorporate Wet Ingredients and Spices
Add the pumpkin puree, brown sugar, powdered sugar, vanilla extract, cinnamon, ginger, nutmeg, cloves, and salt to the cream cheese. Beat on medium speed until all ingredients are perfectly combined and the mixture is uniform in color and texture. Scrape down the bowl again to ensure everything is incorporated.
Step 3: Add the Graham Cracker Crumbs
Switch to a spatula or wooden spoon. Add the graham cracker crumbs to the wet mixture. Fold gently until the crumbs are fully absorbed. The mixture will be soft and somewhat sticky—this is normal.
Step 4: The Crucial Chill
Cover the bowl tightly with plastic wrap and refrigerate for at least 2 hours, or until the mixture is very firm. Do not skip or shorten this step. A firm mixture is absolutely essential for being able to roll neat, round balls that won’t melt in your hands during the coating process.
Step 5: Portion and Roll the Balls
Line a large baking sheet with parchment paper. Using a small cookie scoop (about 1 tablespoon in size), portion out the chilled mixture. Roll each portion between your palms into a smooth, compact ball. If the mixture becomes too soft and sticky to handle, simply return it to the refrigerator for 15-20 minutes. Place the rolled balls on the prepared baking sheet.
Step 6: The Second Chill
Once all the balls are rolled, place the entire baking sheet in the freezer for at least 30 minutes. This “flash freeze” ensures the balls are rock-solid and will not soften or lose their shape when dipped into the warm coating.
Step 7: Melt the Coating
While the balls are freezing, melt the coating. In a deep, microwave-safe bowl, combine the vanilla candy melts and the teaspoon of coconut oil. Microwave in 30-second intervals, stirring thoroughly after each interval, until the mixture is completely smooth and fluid. Do not overheat.
Step 8: Coat the Cheesecake Balls
Remove a few balls from the freezer at a time (keeping the rest cold). Using a fork, a dipping tool, or two spoons, carefully dip each frozen ball into the melted coating, ensuring it is completely submerged. Lift it out, gently tap off the excess coating, and return it to the parchment-lined sheet.
Step 9: Add Garnish and Set
If you are using a garnish like crushed graham crackers or nuts, sprinkle it on top immediately after dipping, before the coating sets. For a decorative drizzle, wait until the first coat is fully set, then use a fork or a piping bag to zigzag melted dark chocolate over the top. Allow the balls to set completely at room temperature, which will take about 15-20 minutes.
Notes
-
Electric Hand Mixer or Stand Mixer
-
Large Mixing Bowl
-
Measuring Cups and Spoons
-
Spatula
-
Baking Sheet
-
Parchment Paper
-
Small Cookie Scoop
- Prep Time: 30 minutes
- Category: dessert
- Cuisine: American
Nutrition
- Calories: 120 kcal
- Sugar: 12g
- Sodium: 65mg
- Fat: 7g
- Carbohydrates: 14g
- Protein: 1g

