

Introduction To Creamy Stovetop White Chicken Chili
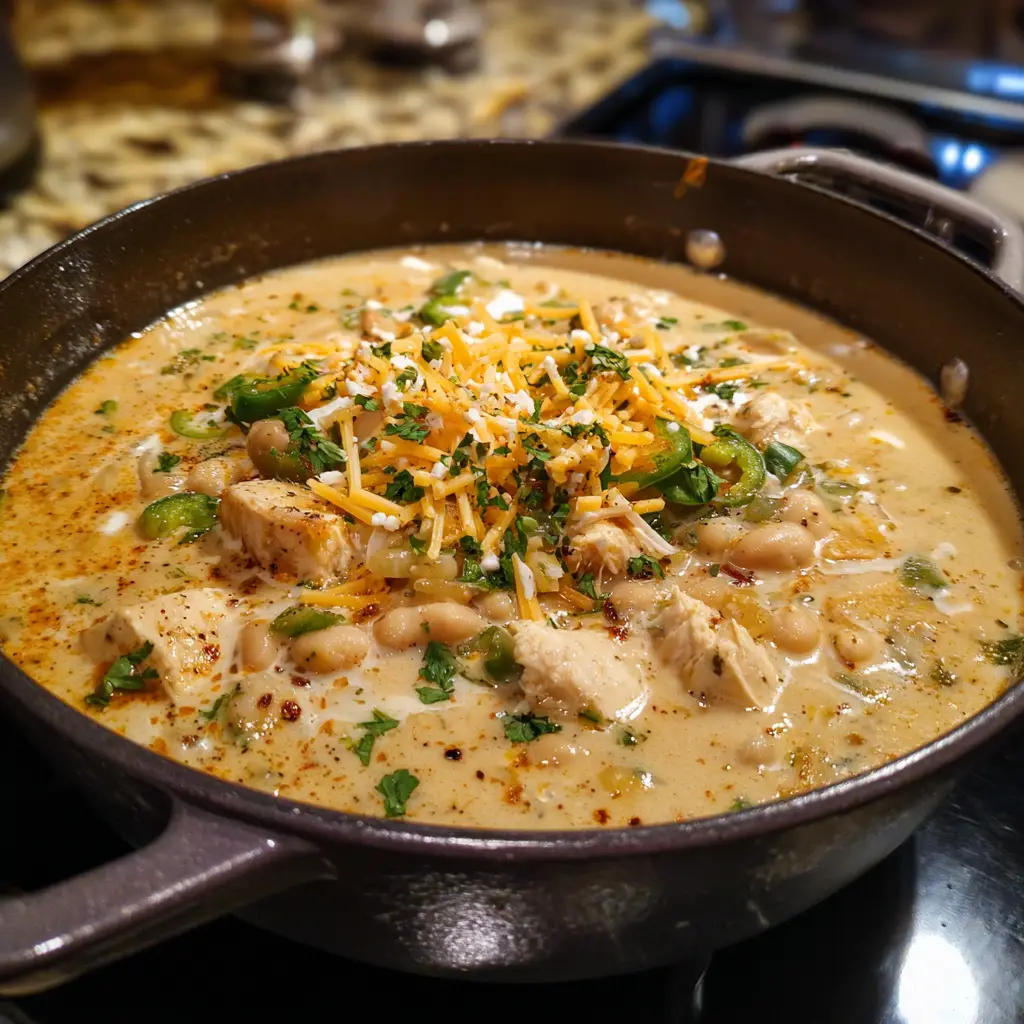
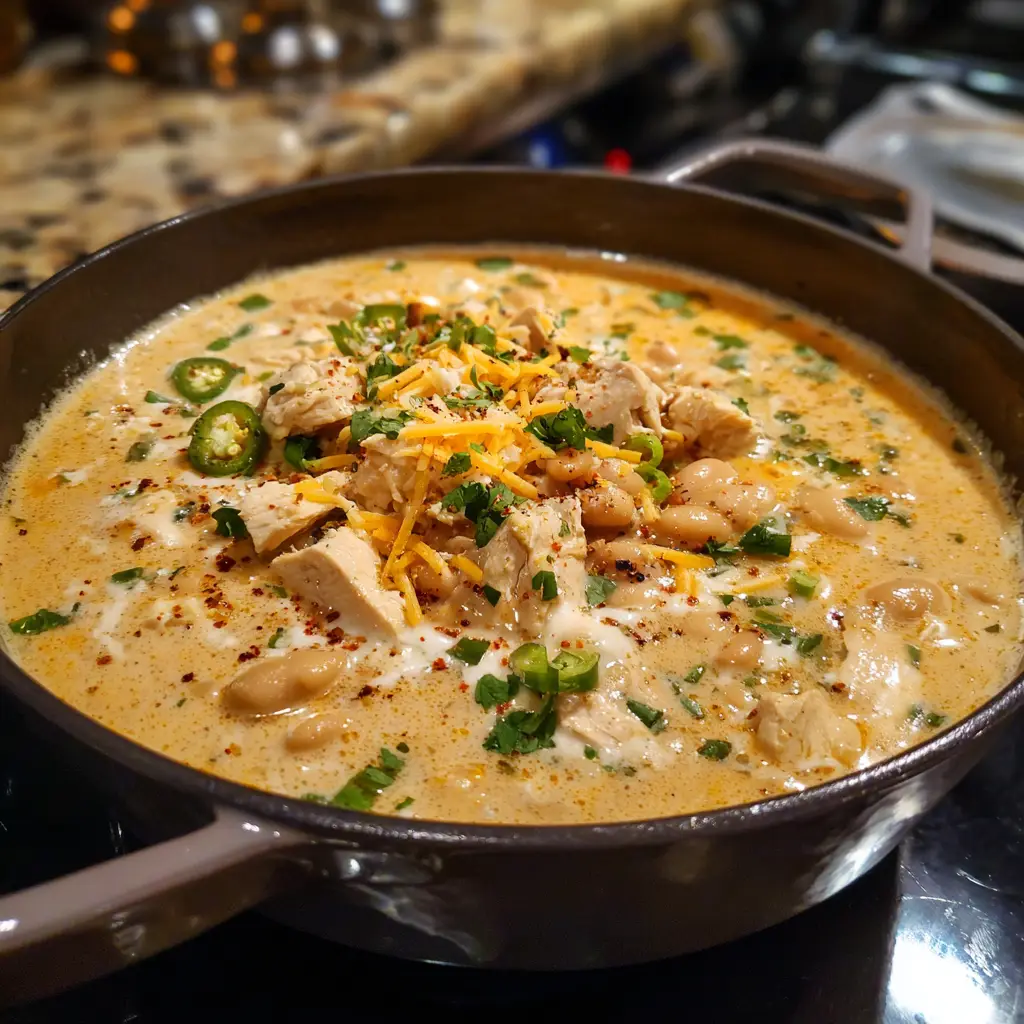
In the realm of comfort food, few dishes can claim the throne as deftly as a robust, simmering pot of chili. But step beyond the familiar territory of tomato-based, beef-filled red chili and enter a world of luminous, creamy, and equally profound flavor: the world of Creamy Stovetop White Chicken Chili. This is not merely a “white” version of its cousin; it is a dish with its own distinct personality, a symphony of textures and tastes that is both elegant and deeply comforting. Imagine tender, succulent chunks of chicken, simmered to perfection in a broth that has been transformed into a velvety, luxurious sauce.
Why Is This Creamy Stovetop White Chicken Chili So Popular?
The widespread adoration for Creamy Stovetop White Chicken Chili is built upon a foundation of practical brilliance and sensory appeal. Firstly, it is the champion of efficient, deep flavor development. Unlike its slow-cooker sibling, the stovetop method utilizes techniques like sautéing and simmering to build layers of flavor rapidly. The Maillard reaction on the chicken and the toasting of spices in the pot create a complexity that tastes like it simmered for hours, all in under 45 minutes. Secondly, it represents a lighter, yet still indulgent, alternative. For those who love the comfort of a creamy soup but seek a protein-packed, vegetable-filled meal, this chili is the perfect answer. It feels gourmet and decadent without being overly heavy.
Furthermore, its visual appeal and textural delight are undeniable. The creamy white and yellow hue, punctuated by green herbs and flecks of chicken, is a beautiful sight in a bowl. The contrast between the tender chicken, soft beans, and the creamy yet brothy sauce provides a satisfying eating experience with every spoonful. Its versatility is its superpower. It is a flawless canvas for customization, welcoming various beans, proteins, heat levels, and toppings, ensuring it never becomes boring. Finally, it is the ultimate one-pot meal, minimizing cleanup while maximizing satisfaction. It’s a complete, balanced dinner that comes together in a single vessel, making it the holy grail for home cooks who value both flavor and efficiency.
Why You’ll Love This Creamy Stovetop White Chicken Chili:
You will fall in love with this recipe because it is a masterclass in weeknight cooking that delivers restaurant-quality results. You will appreciate the active, engaging cooking process that builds flavor from the ground up, offering a sense of culinary accomplishment. You will cherish the incredible speed; from raw ingredients to a steaming bowl of comfort in less than an hour, it is a reliable solution for even the most hectic of evenings. The recipe is incredibly forgiving, allowing you to adjust the consistency, spice level, and ingredients to your exact preference without fear of failure. You will love how it makes fantastic leftovers, as the flavors continue to meld and intensify overnight, making your next-day lunch something to genuinely anticipate. It is naturally gluten-free and can easily be adapted to be dairy-free, catering to a wide range of dietary needs without sacrificing an ounce of flavor. Ultimately, you will love the consistent praise it elicits from family and friends and the simple, profound joy of savoring a bowl of something you created that is both nourishing and spectacularly delicious.
Here’s what you’ll need:
For the Chicken and Aromatics:
- 2 tbsp Olive Oil or Avocado Oil: For sautéing and building the foundational flavor base.
- 1.5 lbs Boneless, Skinless Chicken Thighs (or Breasts): Thighs are highly recommended for their superior flavor and juiciness, which holds up beautifully to simmering. Breasts can be used for a leaner option.
- 1 large Yellow Onion, diced: The sweet, aromatic backbone of the chili.
- 2-3 Jalapeño Peppers, seeded and finely diced: For a controllable level of heat. Leave the seeds in for a spicier chili.
- 4-5 cloves Garlic, minced: Fresh garlic is essential for that pungent, aromatic depth.
- 2 (4 oz) cans Diced Green Chiles, undrained: The soul of the dish, providing a tangy, authentic mild green chile flavor.
For the Spices & Seasoning:
- 2 tsp Ground Cumin: The quintessential warm, earthy spice that defines the chili’s character.
- 1 ½ tsp Dried Oregano: Preferably Mexican oregano for its more citrusy, floral notes.
- 1 tsp Chili Powder: Adds a subtle red chili flavor and complexity.
- ½ tsp Smoked Paprika: Imparts a crucial, gentle smokiness that elevates the entire dish.
- ¼ tsp Cayenne Pepper (optional): For those who appreciate a background warmth. Adjust to your taste.
- 1 tsp Kosher Salt, plus more to taste: Season in layers.
- ½ tsp Freshly Ground Black Pepper:
For the Creamy Base and Beans:
- 4 cups Low-Sodium Chicken Broth: The liquid foundation. Using low-sodium allows you to control the final salt level.
- 3 (15.5 oz) cans Cannellini Beans or Great Northern Beans, rinsed and drained: Cannellini beans are creamier, while Great Northern are slightly firmer. Rinsing them prevents the chili from being too starchy.
- 1 cup Frozen Corn: Adds a sweet pop of color and flavor.
- 1 cup Full-Fat Sour Cream: The primary agent for the signature tangy creaminess.
- ½ cup Heavy Cream or Half-and-Half: Enriches the broth and adds a velvety, luxurious texture.
- 2 cups shredded Monterey Jack Cheese, or a Pepper Jack blend for heat: For melty, cheesy goodness.
The Essential Toppings (The “Garnish Bar”):
- Fresh Cilantro, chopped
- Sliced Avocado or Chunky Guacamole
- Additional Sour Cream or Mexican Crema
- Thinly Sliced Radishes for a crisp, peppery contrast.
- A Squeeze of Fresh Lime Juice (non-negotiable for brightness).
- Tortilla Chips or Strips for crunch.
- Diced Red Onion for a sharp bite.
How to Make Creamy Stovetop White Chicken Chili:
Now that you have your ingredients ready, let’s dive into the steps for making this delightful Creamy Stovetop White Chicken Chili. It’s as easy as pie, and I promise you’ll feel like a culinary superstar!
Step 1: Sear and Sauté the Flavor Foundation
In a large Dutch oven or heavy-bottomed pot, heat the olive oil over medium-high heat. Pat the chicken thighs dry and season generously with salt and pepper. Sear the chicken for 5-6 minutes per side, until a golden-brown crust forms. The chicken does not need to be cooked through. Remove the chicken and set it aside on a plate.
Step 2: Toast the Aromatics and Spices
Reduce the heat to medium. In the same pot, add the diced onion and jalapeño. Sauté for 5-6 minutes until softened. Add the minced garlic and cook for another 60 seconds until fragrant. Then, add all the spices—cumin, oregano, chili powder, smoked paprika, and cayenne. Stir constantly for 30 seconds to 1 minute until very fragrant. This “blooms” the spices, unlocking their essential oils and toasting them to deep, complex perfection.
Step 3: Deglaze and Build the Broth
Pour in one cup of the chicken broth to deglaze the pot, using a wooden spoon to scrape up all the delicious browned bits from the chicken from the bottom. This is pure flavor. Then, add the remaining 3 cups of broth and the two undrained cans of diced green chiles. Stir to combine.
Step 4: Simmer and Shred the Chicken
Return the seared chicken thighs to the pot. Bring the liquid to a boil, then reduce the heat to low, cover, and let it simmer gently for 15-20 minutes, until the chicken is cooked through and tender. Remove the chicken to a clean plate and use two forks to shred it into bite-sized pieces.
Step 5: Creamify the Chili
While the chicken is simmering, in a separate bowl, whisk the sour cream and heavy cream together until smooth. This is a crucial step to prevent curdling. To temper the dairy, slowly whisk in about one cup of the hot broth from the pot until the mixture is smooth and warm. This gradually raises its temperature.
Step 6: Combine and Thicken
Back in the pot, add the rinsed beans and frozen corn. Stir in the tempered cream mixture. Add the shredded chicken back in. Finally, stir in the shredded cheese one handful at a time, allowing each addition to melt smoothly into the chili before adding the next.
Step 7: Final Simmer and Serve
Let the chili simmer over low heat, uncovered, for 5-10 more minutes, stirring occasionally, until heated through and slightly thickened. Do not let it boil. Taste and adjust seasoning with salt and pepper. The chili will continue to thicken as it stands.
Tips for Success:
- The Power of Blooming Spices: Never skip toasting your spices in the oil. This simple 60-second step is the difference between a flat flavor and a deep, complex one.
- Temper, Don’t Curdle: Always temper cold dairy with hot liquid before adding it to the main pot. Adding sour cream directly to a boiling pot will cause it to separate and become grainy.
- Control the Heat: The base recipe is mild-to-medium. For more heat, use Pepper Jack cheese, add an extra jalapeño (with seeds), or stir in a diced serrano pepper with the onions.
- For a Dairy-Free Version: Omit the sour cream, heavy cream, and cheese. At the end, stir in ¾ cup of full-fat, canned coconut milk and 2-3 tablespoons of nutritional yeast for a cheesy flavor. The result is still incredibly creamy.
- Thickening Options: If you prefer a thicker chili, create a slurry by mixing 2 tablespoons of cornstarch with 3 tablespoons of cold water. Stir this into the simmering chili during the last 5 minutes of cooking.
- Don’t Overcook After Adding Dairy: Once the creamy elements are in, keep the chili on a gentle simmer and avoid boiling to maintain its smooth texture.
Equipment Needed:
- Large Dutch Oven or Heavy-Bottomed Pot (6-quart or larger)
- Cutting Board and Sharp Knife
- Measuring Cups and Spoons
- Whisk
- Two Forks (for shredding chicken)
- Mixing Bowls (various sizes)
Variations of Creamy Stovetop White Chicken Chili:
- Green Chile & Lime Chicken Chili: Add ½ cup of tomatillo salsa (salsa verde) with the broth and finish with the zest of one lime.
- White Turkey Chili: A brilliant use for leftover Thanksgiving turkey! Substitute shredded cooked turkey for the chicken, adding it at the very end just to heat through.
- “Crack Chicken” Chili: Add 1 packet of dry ranch seasoning with the spices and ½ cup of cooked, crumbled bacon at the end.
- Poblano & Corn Chili: Roast 2 poblano peppers over a flame until charred, steam, peel, and dice. Use them in place of one can of green chiles for a smoky, robust flavor.
- Bean-Lover’s Chili: Use a mix of Cannellini, Navy, and Butter beans for a more complex texture and flavor profile.
Serving Suggestions for Creamy Stovetop White Chicken Chili:
Serve this chili in deep bowls to accommodate all the glorious toppings, which are essential for the full experience. A side of warm, fluffy cornbread or buttery skillet biscuits is the classic and perfect partner for dipping. For a lighter contrast, serve with a crunchy cabbage slaw dressed with a lime-cilantro vinaigrette. A cold, crisp Mexican lager or a pale ale complements the creamy spices beautifully, while a non-alcoholic sparkling lime water with a mint sprig is a refreshing palate cleanser.
Prep Time: 15 minutes
Cooking Time: 35 minutes
Total Time: 50 minutes
Servings: 6-8
Nutritional Information (Estimated per serving, based on 6 servings):
- Calories: ~620
- Protein: 42g
- Sodium: ~1100mg
- Sugar: 9g
- Fat: 32g
- Carbohydrates: 42g
- Fiber: 10g
(Please note: Nutritional information is an estimate and can vary based on specific ingredients, portion sizes, and toppings.)
FAQs about Creamy Stovetop White Chicken Chili:
Q: Can I use chicken breasts instead of thighs?
A: Absolutely. Chicken breasts will yield a leaner chili. Be very careful not to overcook them, as they can become dry. Simmer for only 10-15 minutes before shredding.
Q: My chili is too thin. How can I thicken it?
A: The easiest method is to use a potato masher to mash some of the beans directly in the pot. Alternatively, let it simmer uncovered for 10-15 minutes to reduce, or use a cornstarch slurry as described in the tips.
Q: Can I make this in a slow cooker?
A: Yes. Follow steps 1 and 2 on the stovetop (searing chicken and sautéing aromatics), then transfer everything (except dairy and cheese) to a slow cooker. Cook on LOW for 6-7 hours or HIGH for 3-4. Shred chicken, then stir in the tempered cream and cheese as the final step.
Q: How long does leftover white chicken chili last?
A: Stored in an airtight container in the refrigerator, it will keep for 3-4 days. Reheat gently on the stovetop over low heat, stirring frequently, to prevent the dairy from separating.
Q: Can I freeze this chili?
A: Yes, but with caution. Cream-based soups can sometimes separate or become grainy upon thawing. For best results, freeze the chili base before adding the sour cream, heavy cream, and cheese. Thaw, reheat, and then add the dairy components fresh.
Final Thoughts:
Creamy Stovetop White Chicken Chili is more than a recipe; it is a strategic and deeply satisfying approach to modern home cooking. It proves unequivocally that a meal can be both quick and complex, both comforting and sophisticated, both a weeknight workhorse and a company-worthy centerpiece. The process of building flavor from the sear of the chicken to the bloom of the spices is a rewarding culinary journey that engages the senses and culminates in a pot of pure, unadulterated comfort. From its customizable garnish bar to its velvety, herb-infused broth, every element is designed for maximum enjoyment and personalization. So, grab your Dutch oven and embrace the simple, profound magic of this one-pot wonder. A bowl of creamy, dreamy, soul-warming delight awaits, ready to become a new cornerstone in your culinary repertoire.


