

Introduction to Crispy Cheesy Corn Sticks
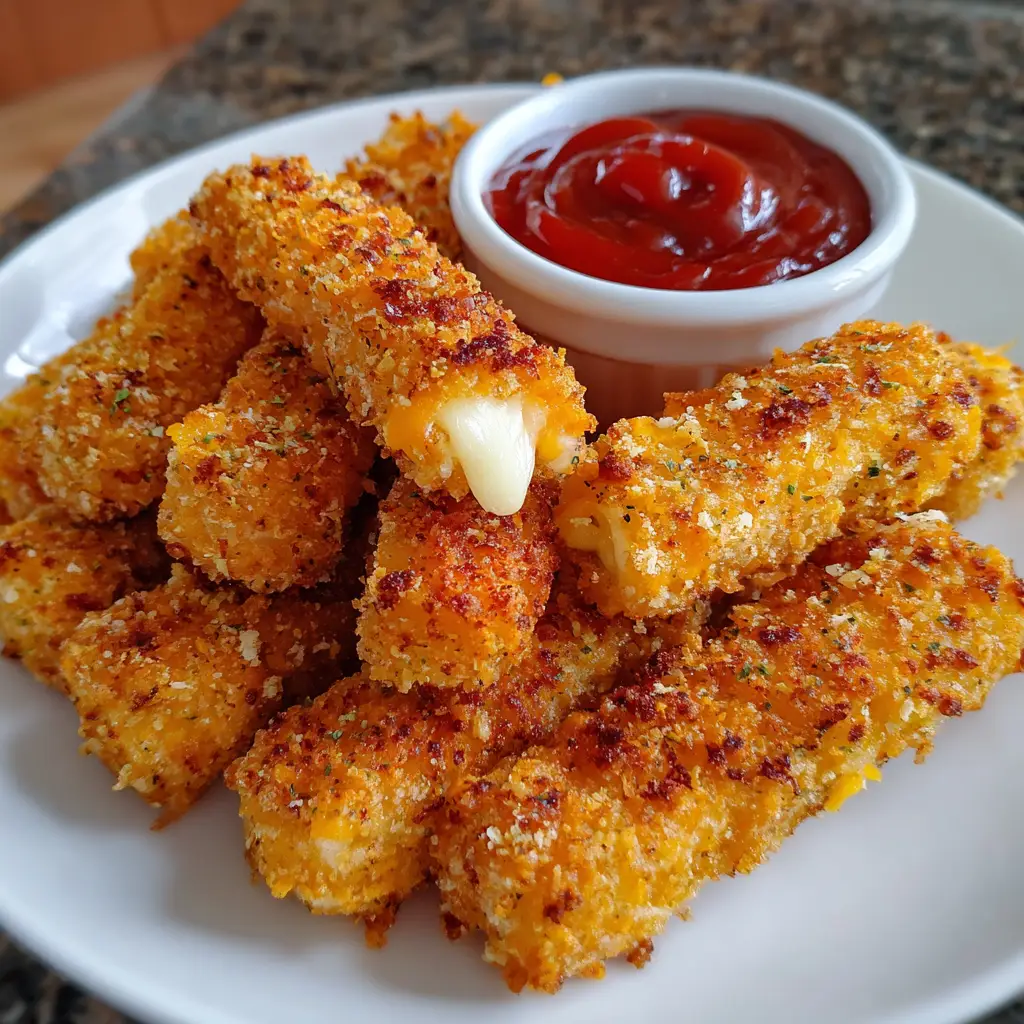
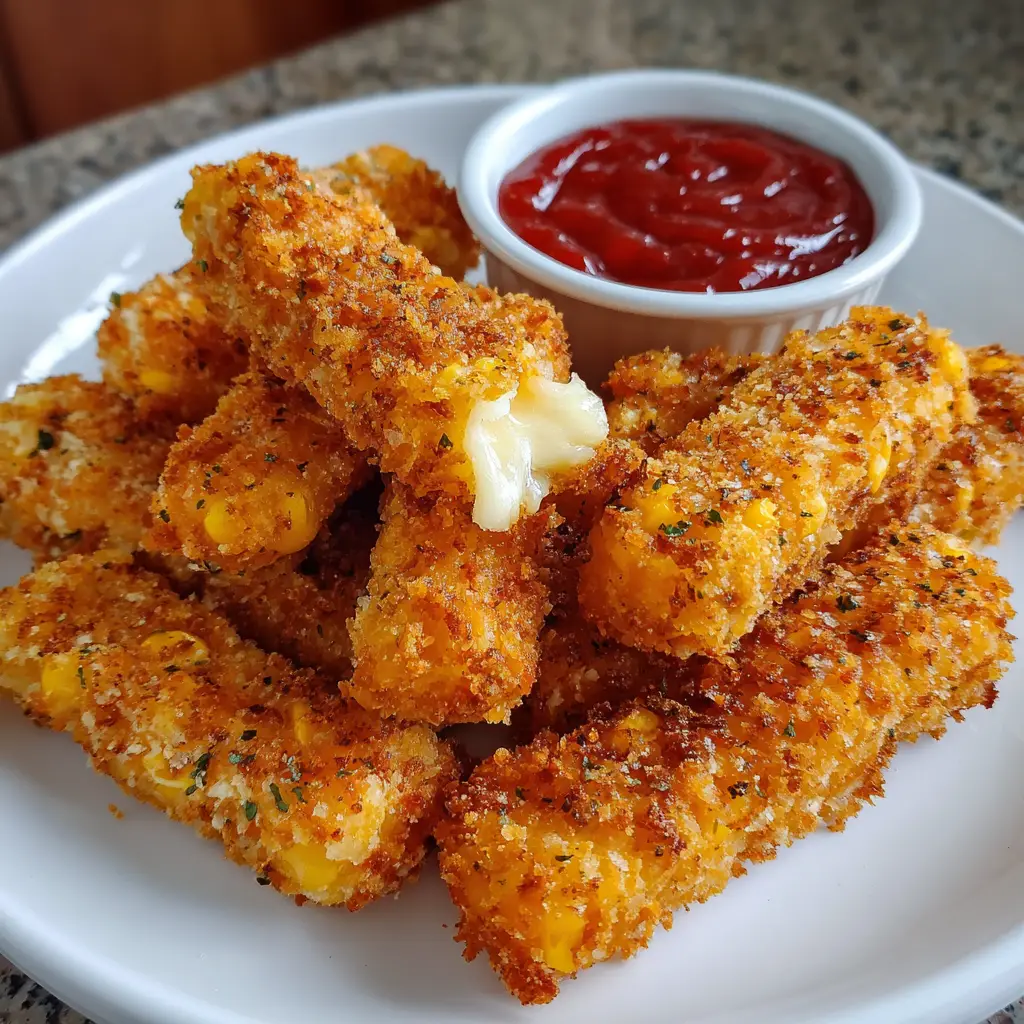
In the vast and wonderful world of baked goods and savory snacks, there exists a category of food that is universally irresistible: the handheld, dippable, cheesy, and carbohydrate-rich delight. Standing proudly in this hall of fame is the Crispy Cheesy Corn Stick. This is not just a bread roll in a new shape; it is a sensory experience that begins with a satisfyingly crisp, golden-brown exterior and gives way to a miraculously soft, moist, and tender crumb, bursting with the sweet, sunny flavor of corn and the rich, savory punch of melted cheese. Imagine the best cornbread you’ve ever had, sweet, slightly crumbly, and comforting, now re-engineered into a fun, portable stick form with an unparalleled textural contrast and an even more intense cheesy flavor in every single bite.
Why Is This Crispy Cheesy Corn Stick So Popular?
The widespread adoration for Crispy Cheesy Corn Sticks is a phenomenon built on a foundation of powerful nostalgia, irresistible texture, and fun, interactive eating. Their popularity is a direct result of how perfectly they satisfy multiple cravings at once.
First and foremost is the unbeatable textural symphony. The human palate craves contrast, and these sticks deliver it in spades. The initial bite requires a gentle crunch, a sound that signals perfectly baked goods. This gives way immediately to a soft, almost creamy interior that is simultaneously light and substantial. This interplay between the shatteringly crisp shell and the pillowy-soft insides is a key driver of their addictive quality, making it nearly impossible to eat just one.
Secondly, they are a powerful nostalgia trigger. The flavor profile of sweet corn and sharp cheddar is deeply embedded in comfort food culture, reminiscent of family barbecues, summer picnics, and grandmother’s kitchen. The unique stick form itself often evokes memories of classic cast-iron corn stick pans, linking them to a tradition of heirloom cooking and cherished family recipes. They feel both familiar and excitingly novel at the same time.
Finally, their fun factor and versatility cannot be overstated. The stick shape is inherently playful and dippable, making them a hit with children and adults alike. They are perfectly designed for dragging through a pool of melted butter, a drizzle of honey, or a bowl of spicy chili. Furthermore, their role is fluid; they can be a side dish, an appetizer, a snack, or even a base for creative canapés. This ability to seamlessly fit into any part of a meal makes them an indispensable recipe for any home cook.
Why You’ll Love This Crispy Cheesy Corn Stick:
- Textural Heaven: You will be captivated by the magnificent contrast between the crispy, golden-brown crust and the incredibly soft, moist, and tender interior.
- Explosive Flavor: You will love the harmonious balance of the sweet, earthy cornmeal and the rich, savory, gooey cheese in every single bite.
- Surprisingly Simple: You will appreciate how a handful of basic pantry ingredients can be transformed into such an impressive and professional-looking baked good.
- The Ultimate Crowd-Pleaser: From kids to gourmands, these sticks are a universal favorite, guaranteed to disappear quickly from any plate you put them on.
- Perfect for Dipping and Topping: Their unique shape makes them the ideal vehicle for your favorite dips, spreads, sauces, and compound butters.
Here’s what you’ll need:
The magic of this recipe lies in the quality and balance of its ingredients. Using fine cornmeal and high-quality cheese will make a significant difference in the final product.
For the Corn Stick Batter:
- 1 cup (120g) Fine-Ground Yellow Cornmeal: The star of the show. A fine grind ensures a tender, not gritty, crumb. Do not use coarse polenta.
- 1 cup (125g) All-Purpose Flour: Provides the structure that holds the sticks together and contributes to a soft interior.
- ¼ cup (50g) Granulated Sugar: This amount provides a subtle sweetness that perfectly complements the corn and cheese. Adjust to your taste.
- 1 tablespoon Baking Powder: The primary leavening agent responsible for the rise and airy texture. Ensure it is fresh.
- 1 teaspoon Salt: Diamond Crystal kosher salt is ideal. Essential for balancing all the flavors and enhancing the cheesiness.
- ½ teaspoon Baking Soda: Works with the buttermilk to create a light, tender crumb.
- ½ teaspoon Garlic Powder (Optional): Highly recommended to add a savory depth that pairs beautifully with the cheese.
- ½ teaspoon Smoked Paprika (Optional): Adds a subtle, smoky complexity that elevates the entire flavor profile.
For the Wet Ingredients and Add-Ins:
- 1 cup (240ml) Full-Fat Buttermilk, at room temperature: The acidity in buttermilk tenderizes the gluten and reacts with the baking soda for a superb rise. For a substitute, add 1 tablespoon of white vinegar or lemon juice to a measuring cup and fill with whole milk to the 1-cup line. Let it sit for 5-10 minutes until curdled.
- ½ cup (115g) Unsalted Butter, melted and slightly cooled: Butter provides richness and flavor. Using oil is possible, but butter is superior here.
- 1 large Egg, at room temperature: Provides structure and richness. Room temperature ingredients incorporate more evenly.
- 1 ½ cups (170g) Sharp Cheddar Cheese, shredded: Crucially, shred your own cheese from a block. Pre-shredded cheese is coated with anti-caking agents that can prevent it from melting smoothly and may make the batter gummy.
- ½ cup (75g) Canned Corn Kernels, drained well (or frozen and thawed): Adds little bursts of sweet corn flavor and texture.
- 1-2 tablespoons Fresh Chives or Parsley, finely chopped (Optional): Adds a fresh, herbal note and a pop of color.
How to Make Crispy Cheesy Corn Sticks:
Now that you have your ingredients ready, let’s dive into the steps for making this delightful Crispy Cheesy Corn Stick. It’s as easy as pie, and I promise you’ll feel like a culinary superstar!
Step 1: Prepare the Pan and Preheat the Oven
Place your corn stick pan (cast iron is highly recommended) in the cold oven. Preheat the oven to 425°F (220°C). This is a critical step. Heating the pan in the oven ensures it is screaming hot when the batter hits it, which is the secret to achieving the signature crispy crust.
Step 2: Combine the Dry Ingredients
In a large mixing bowl, whisk together the 1 cup of cornmeal, 1 cup of all-purpose flour, ¼ cup of sugar, 1 tablespoon of baking powder, 1 teaspoon of salt, ½ teaspoon of baking soda, and the optional garlic powder and smoked paprika. Whisk for at least 30 seconds to ensure the leavening agents and spices are perfectly and evenly distributed throughout the flour. This guarantees a consistent rise and flavor in every stick.
Step 3: Whisk the Wet Ingredients
In a separate medium bowl, whisk the room-temperature buttermilk, the slightly cooled melted butter, and the room-temperature egg together until the mixture is completely smooth and homogenous. There should be no streaks of egg visible.
Step 4: Combine Wet and Dry, Then Add Mix-Ins
Pour the wet buttermilk mixture into the bowl with the dry ingredients. Using a spatula, fold the ingredients together until they are just combined. It is okay if there are a few small lumps; do not overmix. As soon as the flour is mostly incorporated, gently fold in the shredded cheddar cheese, drained corn kernels, and fresh herbs (if using).
Step 5: Carefully Portion the Batter
VERY CAREFULLY remove the screaming hot corn stick pan from the oven using oven mitts. Place it on a heat-proof surface. Immediately and generously brush the wells of the hot pan with melted butter or oil. This creates a non-stick barrier and adds to the crispiness. Quickly spoon or pipe the thick batter into the hot pan wells, filling each one to the top or even slightly mounded.
Step 6: Bake to Golden Perfection
Immediately place the filled pan back into the hot oven. Bake for 12-16 minutes, or until the edges are deep golden brown and crisp, and the tops are springy to the touch. A toothpick inserted into the center of a stick should come out clean.
Step 7: Cool and Release
Remove the pan from the oven. Let the corn sticks cool in the pan for exactly 2-3 minutes. This allows them to set and firm up. Then, using a small offset spatula or a fork, gently loosen the edges and carefully lift each stick out onto a wire cooling rack. Allowing them to rest directly on the rack prevents the bottoms from getting steamy and soft.
Tips for Success:
- The Hot Pan is Non-Negotiable: This is the single most important step for achieving a crispy crust. Do not skip preheating the pan.
- Do Not Overmix the Batter: Overmixing develops gluten, leading to tough, dense corn sticks. Mix until the ingredients are just combined.
- Shred Your Own Cheese: The difference in meltability and flavor between pre-shredded and freshly shredded cheese is monumental.
- Room Temperature Wet Ingredients: This allows for easier mixing and a more uniform batter, which promotes a better rise.
- Grease the Hot Pan: Greasing the pan after it’s hot creates an instant sear and ensures easy release.
- Serve Warm: These are at their absolute peak of texture and flavor when served warm from the oven.
Equipment Needed:
- Corn Stick Pan (Cast Iron preferred): This is the essential piece of equipment. A standard pan has 7-8 wells.
- Large Mixing Bowl
- Medium Mixing Bowl
- Whisk
- Spatula
- Box Grater (for shredding cheese)
- Oven Mitts
- Pastry Brush (for greasing the pan)
- Small Offset Spatula or Fork (for releasing sticks)
- Wire Cooling Rack
Variations of Crispy Cheesy Corn Stick:
- Jalapeño Popper: Add ¼ cup of finely diced pickled or fresh jalapeños and use a blend of cheddar and cream cheese.
- Herb & Garlic: Omit the corn and add 2 tablespoons of mixed fresh herbs (rosemary, thyme, chives) and 1 extra teaspoon of garlic powder.
- Bacon & Scallion: Fold in ½ cup of cooked, crumbled bacon and ¼ cup of sliced scallions.
- Spicy Pepper Jack: Replace the cheddar cheese with pepper jack cheese for a spicy kick.
- Sun-Dried Tomato & Feta: Use ½ cup of crumbled feta and ¼ cup of chopped sun-dried tomatoes for a Mediterranean twist.
Serving Suggestions for Crispy Cheesy Corn Stick:
- The Ultimate Chili Companion: Serve a basket of warm corn sticks alongside a big bowl of beef, turkey, or vegetarian chili. They are perfect for dipping.
- Soup’s Best Friend: Pair with tomato soup, potato soup, or a hearty stew for the ultimate comfort food meal.
- Brunch Brilliance: Serve alongside scrambled eggs, bacon, and fresh fruit for a memorable and satisfying brunch.
- Appetizer Star: Arrange them on a platter with small bowls of honey butter, spicy ranch dip, or pimento cheese for dipping.
- On Their Own: They are so flavorful and satisfying that they can be enjoyed completely on their own, warm from the oven with just a pat of butter.
Prep Time:
15 minutes
Cooking Time:
15 minutes
Total Time:
30 minutes
Nutritional Information (Approximate per stick, recipe makes 14):
- Calories: ~185 kcal
- Protein: 5 g
- Sodium: 280 mg
- Sugar: 4 g
- Fat: 9 g (Saturated: 5 g)
- Carbohydrates: 21 g
- Fiber: 1 g
Please note: This is an estimate and can vary significantly based on the specific brands of ingredients you use.
FAQs about Crispy Cheesy Corn Stick:
Q: I don’t have a corn stick pan. Can I make these in a muffin tin?
A: Yes, you can! Preheat the muffin tin as you would the corn stick pan. The result will be delicious, but they will be “Crispy Cheesy Corn Muffins” and will have a different crust-to-crumb ratio, with less overall crispy surface area. The baking time may need to be increased by 2-4 minutes.
Q: My corn sticks stuck to the pan! How can I prevent this?
A: Ensure you are properly preheating the pan and greasing it while it is hot with plenty of butter or oil. Using a well-seasoned cast-iron pan is also a major advantage.
Q: Can I make the batter ahead of time?
A: It is not recommended. The baking powder begins to activate as soon as the wet and dry ingredients meet. For the best rise, bake the batter immediately after mixing.
Q: How should I store and reheat leftovers?
A: Store completely cooled sticks in an airtight container at room temperature for up to 2 days. To re-crisp, place them on a baking sheet in a 350°F (175°C) oven for 5-8 minutes. They can also be frozen for up to 3 months.
Q: Can I make these gluten-free?
A: Yes. Substitute the all-purpose flour with a 1:1 gluten-free baking blend. The texture may be slightly more delicate.
Final Thoughts:
The Crispy Cheesy Corn Stick is a testament to the idea that the simplest of foods, when executed with care and a clever technique, can become the most memorable part of a meal. It is a recipe that celebrates texture, flavor, and fun in equal measure. The process of preheating the pan, the sizzle of the batter as it hits the hot iron, and the triumphant moment you release a perfect, golden-brown stick are all part of a rewarding culinary ritual. So, invest in a corn stick pan, embrace the technique, and get ready to create a new, irresistible favorite that will have everyone at your table reaching for more. This isn’t just a side dish; it’s an experience.


