
Introduction To Homemade Easy Cheesy Pizza Pockets
When it comes to crowd-pleasing comfort food, nothing beats the magic of gooey cheese, rich tomato sauce, and warm, golden dough. That’s exactly what you get with these Homemade Easy Cheesy Pizza Pockets—a delicious, portable twist on classic pizza that combines the best parts of calzones, hand pies, and hot pockets into one mouthwatering package. Whether you’re cooking for kids, feeding hungry teens, or prepping a fun family dinner, pizza pockets are the ultimate hands-on recipe that brings everyone to the table.
With endless customization options and simple ingredients you probably already have on hand, these pockets are the ideal solution for busy weeknights, lunchbox surprises, or game-day snacks. They can be baked or air-fried, stuffed with your favorite toppings, and frozen for later—truly a recipe that works for everyone, every time.
Why Is This Recipe So Popular?
Pizza pockets have exploded in popularity because they combine nostalgia, ease, and deliciousness in every bite. They’re a homemade upgrade to the store-bought frozen kind (we’re looking at you, Hot Pockets) but with more flavor, better texture, and complete control over the ingredients. Here’s why people can’t get enough:
- Kid-Approved Classic – Cheesy, saucy, handheld—kids love them, and parents love how easy they are to make.
- Better Than Takeout – Fresh dough, real cheese, and custom fillings make these far tastier than anything prepackaged.
- Budget-Friendly – Make a dozen pizza pockets for the price of one delivery pizza.
- Meal-Prep Magic – Make now, freeze for later. Perfect for quick meals all week long.
- Customizable for Everyone – From veggie to meat lover to extra spicy, you can personalize each pocket for the eater.
Why You’ll Love This Recipe:
✅ Cheesy, Gooey, and Golden – Like pizza rolls grew up and got gourmet
✅ Easy to Make – No fancy tools or complicated dough—just simple folding and baking
✅ Great for Meal Prep – Freeze and reheat without losing texture or flavor
✅ Family Fun – Let the kids join in and fill their own pizza pockets
✅ Perfect for Parties – Bite-sized, handheld, and easy to serve
✅ Healthier Option – Baked instead of fried and filled with your own quality ingredients
Ingredients:
These ingredients come together to form a powerhouse of flavor and fun:
- 🍞 1 pound pizza dough (store-bought or homemade)
- 🍅 1/2 cup pizza sauce (or marinara sauce)
- 🧀 1 1/2 cups shredded mozzarella cheese
- 🧀 1/4 cup grated Parmesan cheese
- 🍖 1/2 cup chopped pepperoni or cooked sausage (optional)
- 🌿 1 tsp dried Italian seasoning
- 🧄 1/2 tsp garlic powder
- 🧈 1 tbsp olive oil or melted butter (for brushing)
- 🧁 All-purpose flour (for dusting surface)
- 🥚 1 egg (for egg wash, optional)
Optional Fillings:
- 🍄 Sautéed mushrooms
- 🌶️ Sliced bell peppers or jalapeños
- 🧅 Caramelized onions
- 🍗 Cooked shredded chicken
- 🥦 Steamed broccoli or spinach
- 🌽 Corn or black olives for a twist
Preparation:
Step 1: Preheat Oven and Prepare Dough 🍞
Preheat your oven to 425°F (220°C) and line a baking sheet with parchment paper. Lightly flour your work surface and roll out the pizza dough into a large rectangle, about 1/4 inch thick. Using a knife or pizza cutter, divide the dough into 6–8 equal rectangles, depending on how big you want your pockets.
Step 2: Add the Fillings 🧀🍅
Spoon 1–2 tablespoons of pizza sauce onto the center of each rectangle, leaving about 1/2 inch around the edges. Add a generous handful of mozzarella cheese, a sprinkle of Parmesan, and your chosen toppings (pepperoni, mushrooms, etc.). Sprinkle each pocket with a pinch of Italian seasoning and garlic powder for that signature pizza flavor.
Step 3: Fold and Seal the Pockets 🥟
Fold each rectangle in half to form a square or triangle, pressing the edges together gently. Use a fork to crimp the edges and seal them tightly to keep the filling from leaking. If you’re using an egg wash, whisk the egg with 1 tablespoon of water and brush the tops of each pocket for extra golden color. You can also brush them with olive oil or melted butter if you prefer.
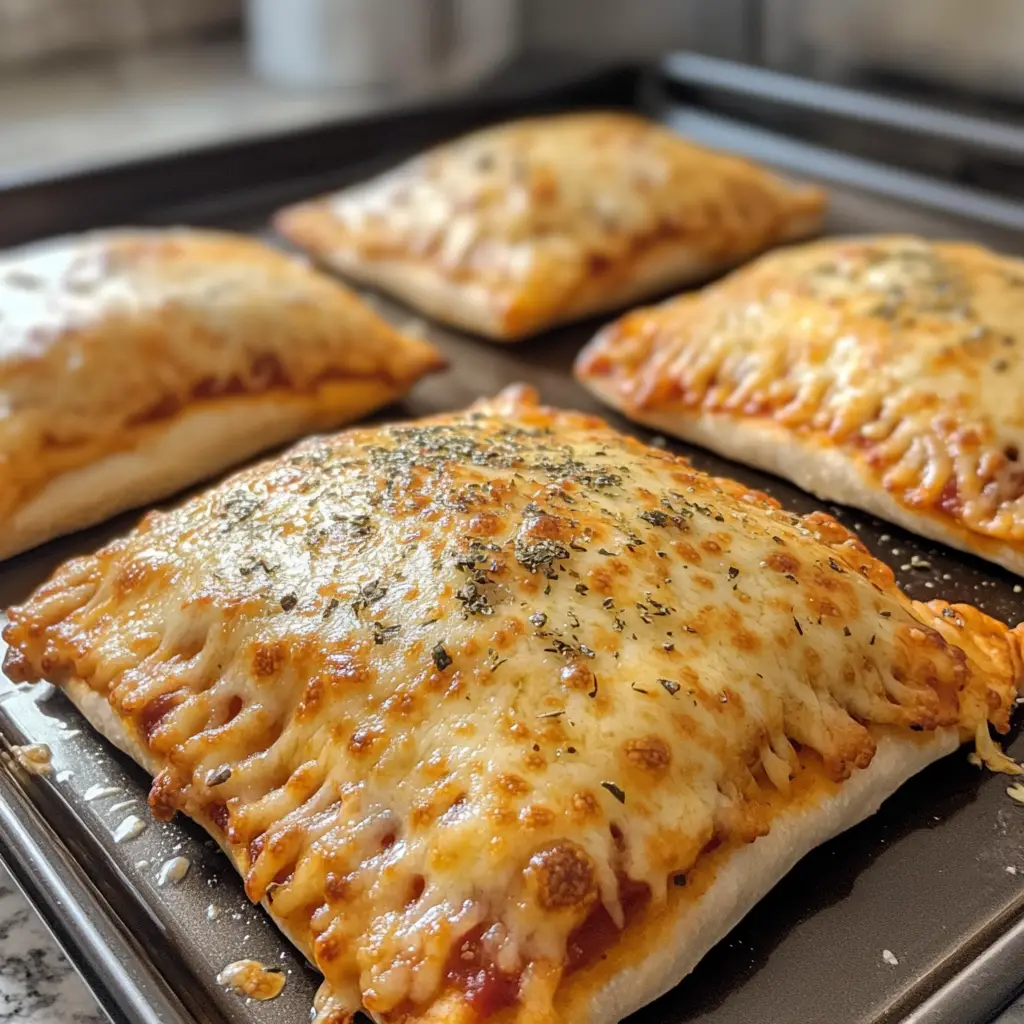
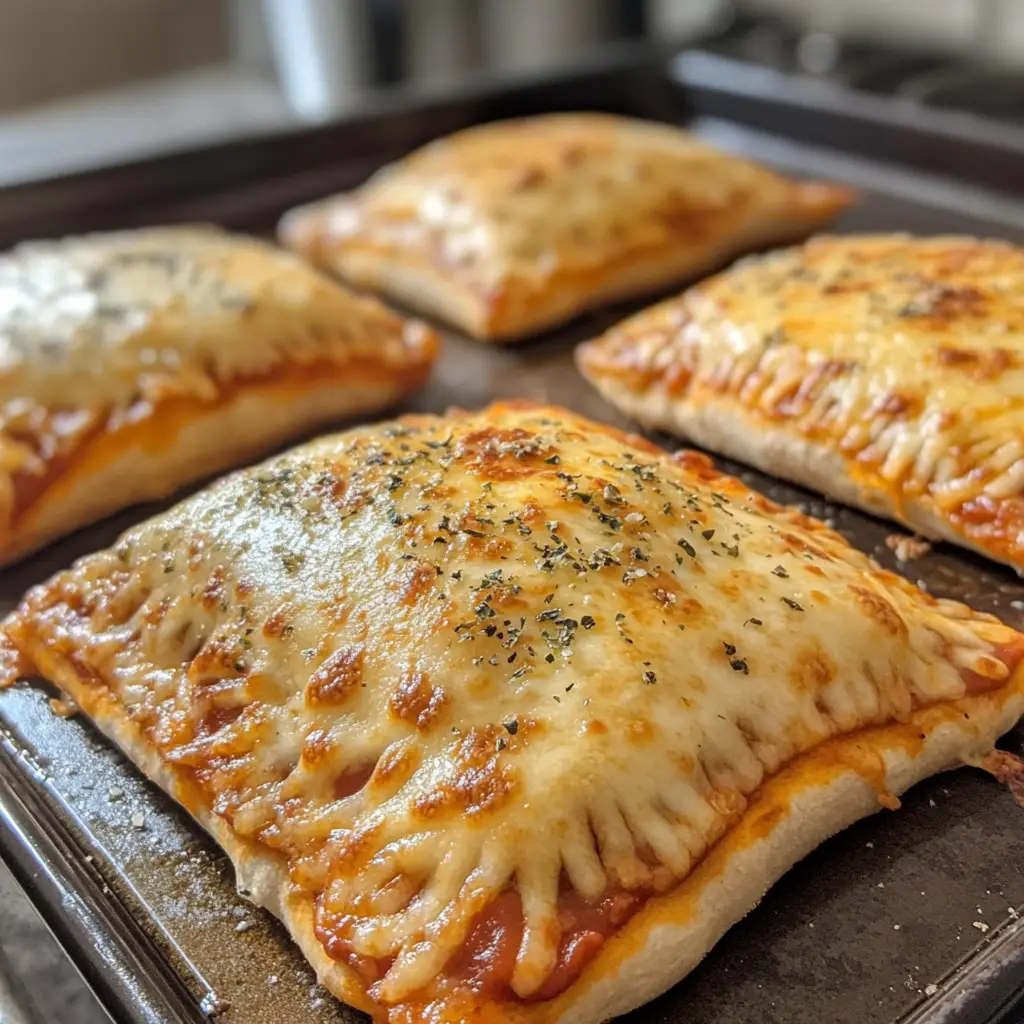
Step 4: Bake Until Golden and Bubbly 🔥
Transfer the pizza pockets to your prepared baking sheet. Bake in the preheated oven for 12–15 minutes, or until the crust is golden brown and crisp, and the cheese is visibly bubbling from the sides. Keep an eye on them to avoid overbaking.
Step 5: Cool and Serve 🍕
Let the pockets cool for 5 minutes before serving—they’ll be piping hot inside! Serve with extra marinara or ranch dressing for dipping and enjoy your homemade pizza perfection.
Variation:
The fun of pizza pockets is how easily they adapt to different tastes:
- Meat Lover’s Pocket: Fill with pepperoni, sausage, bacon, and ham for a hearty twist
- Veggie Supreme: Load with bell peppers, onions, olives, and mushrooms
- BBQ Chicken Pizza Pockets: Use BBQ sauce instead of pizza sauce and add chicken and red onions
- Breakfast Pocket: Fill with scrambled eggs, cheese, and sausage or bacon
- Spicy Jalapeño Popper Style: Use cream cheese, cheddar, jalapeños, and bacon for a spicy snack

COOKING Note:
These pockets bake up perfectly, but a few small tips will help you level them up:
- Roll dough evenly so the pockets cook at the same rate
- Don’t overfill—too much filling causes leaks or soggy dough
- Crimp tightly to prevent cheese or sauce from escaping
- Brushing with butter after baking adds great flavor and a shiny finish
- If using frozen dough, thaw completely before rolling
Serving Suggestions:
Serve these cheesy pizza pockets as:
- 🍽️ A kid-friendly lunch with carrot sticks and fruit
- 🎉 A party snack with dipping sauces like ranch, garlic butter, or spicy marinara
- 🥗 A casual dinner with a Caesar salad or veggie platter
- 🍻 A game day treat with cold drinks and chips
- 🍳 A brunch option with a breakfast-style filling
Dip them in:
- 🧄 Garlic parmesan sauce
- 🌶️ Spicy buffalo sauce
- 🍅 Classic marinara or tomato basil sauce
- 🥒 Creamy ranch dressing
- 🧀 Warm cheese dip
Tips:
- Make-Ahead: Assemble pockets and refrigerate for up to 24 hours before baking
- Freeze for Later: Let baked pockets cool completely, then freeze. Reheat in oven at 375°F for 10–12 minutes
- Use Biscuit Dough: For a shortcut, use canned biscuit or crescent roll dough instead of pizza dough
- Gluten-Free: Use gluten-free pizza dough or a cauliflower crust option
- Double the Batch: These disappear fast—make extras and freeze a second batch
Prep Time: 15 minutes
Cooking Time: 15 minutes
Total Time: 30 minutes
Nutritional Information (Per Pocket, approx.):
- Calories: 270
- Protein: 11g
- Carbohydrates: 26g
- Fat: 13g
- Saturated Fat: 5g
- Sodium: 560mg
- Sugar: 2g
- Fiber: 1g
FAQs:
Can I use pre-made dough?
Yes! Store-bought pizza dough, biscuit dough, or even puff pastry works perfectly.
How do I keep the cheese from leaking out?
Don’t overfill and make sure to crimp the edges well with a fork. A quick egg wash helps seal too.
Are these freezer-friendly?
Absolutely. Bake first, cool completely, freeze, and reheat when ready to eat.
Can I air fry pizza pockets?
Yes! Air fry at 375°F for 8–10 minutes, flipping halfway through for extra crispness.
Can I make a dessert version?
Yes! Fill with Nutella and banana, or cream cheese and berries. Dust with cinnamon sugar after baking.
Conclusion:
These Homemade Easy Cheesy Pizza Pockets are everything you love about pizza—melty cheese, savory sauce, soft dough—but made even better with their fun, handheld format and endless customization options. Whether you’re whipping them up for lunchboxes, making a big batch for the freezer, or putting together a game-day snack spread, these pockets never fail to satisfy. And the best part? You control the ingredients, flavor, and fun. So ditch the frozen aisle version and say hello to fresh, cheesy, homemade goodness. Fold, fill, and bake your way to pocket-sized pizza joy every time.


